Used Cameras, Great Bargains – Seoul CIty Parks 1, Gyeongbokgung The National Palace with the Canon 5d Mark III by BigJoe – How to Capture Panoramic Photographs with a DSLR by Charles – Portrait Professional Software Review by Tom – Silver Efex Pro 2 Review by Tom – Thailand Photo Stories, LensCap Stories by Dana
![]()
Quick Click Links
Used Cameras, Great Bargains Seoul City Parks Part 1, Gyeongbokgung The National Palace With the Canon 5d Mark III by Bigjoe

How To Capture Panoramic Photographs Using DSLR Cameras by Charles Portrait Professional Software Review by Tom
Silver Efex Pro 2 Review by Tom Photography News of Interest
Readers Submissions Readers Questions A Snapshot of Bangkok
Images Month in Review Infocus Blog, Thailand Photo Stories by Dana

Used Cameras, Great Bargains *menu
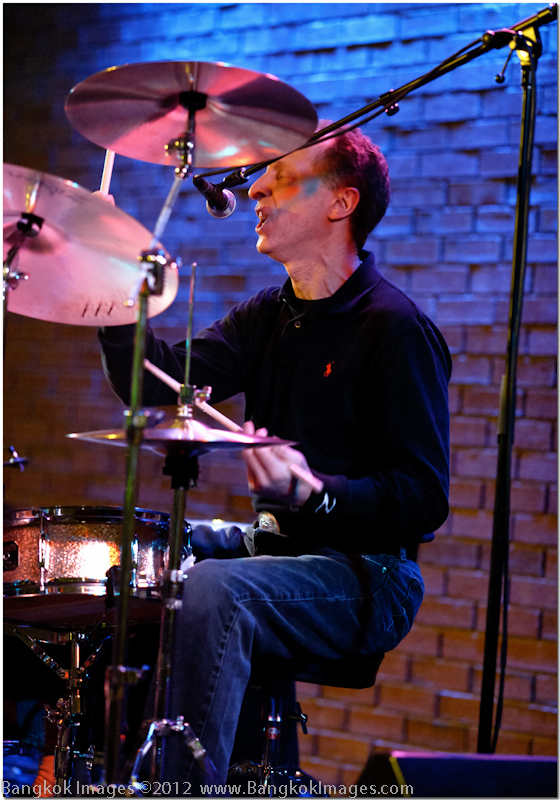
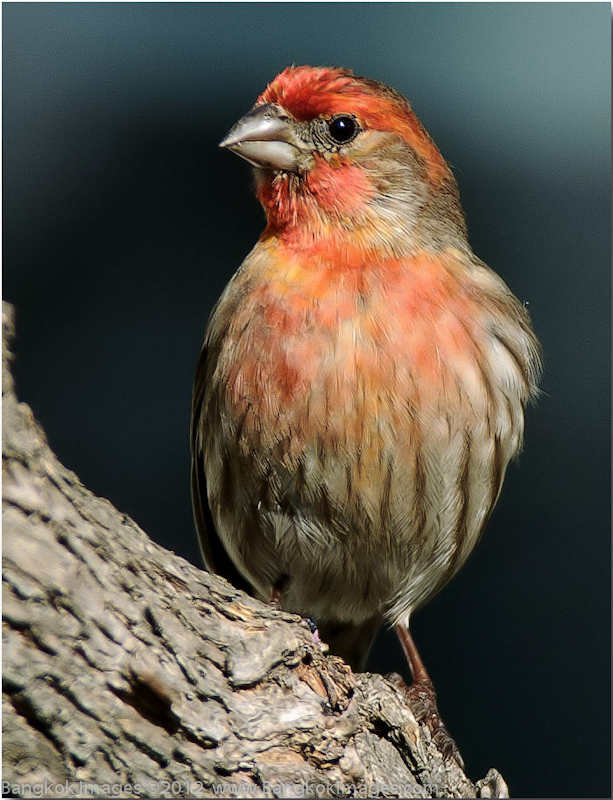
Canon 1ds Mark II, 135mm F2 USM @F2.5 1/80th ISO 3200
This month I’m going to cover two common questions with one Feature Photograph article. I was going to say kill two birds with one stone but I like birds. Don’t you? The questions are “how do I get good ISO images in dark venues”, and the second is “does it make sense to buy a used DSLR?” Let’s approach the answers using these two images from an 8-9 year old Canon 1ds Mark II DSLR which can currently be found on EBay for as little as $800 in
good condition or as much as $1400 in barely used like-new condition.
Not all used DSLRs are great value nor are they necessarily even desirable to use. Most are as you imagine them, old obsolete technology which produce the same marginal images today as they did years ago. But some models are still highly desirable and
in fact will serve you well if properly used which we’ll address as well. The most desirable DSLRs from the past are the models with full frame sensors and professional level systems and build quality. This almost exclusively limits you
to the Canon 1ds, 1ds Mark II and more recently it’s really hard to go wrong with the used but much newer Nikon D3.
Further down the list but still desirable would be the consumer grade full frame models like the Canon 5d, and the much newer but still used Canon 5d Mark II and Nikon D700. It would be hard to go wrong with either one provided the price is right and
the camera works as advertised. Keep in mind that even the consumer grade full frame DSLRs have shutters designed for as many as 150,000 actuations and most being sold have south of 50,000. If the previous owner has used this camera for 5-8 years
and only has 40,000 actuations you’ll certainly get years of use out of a copy in good condition.

No matter the condition, even if it’s brand new in the box, never lose track of its value. If a well used Canon 1ds Mark II is worth say $1200, then a brand new one IS NOT worth more than maybe another $300. Either one will serve you well for years
and they won’t have warranties, so don’t get too hung up on shutter actuations or pristine condition. Buy it with the intention of using it, and using it often and hard. What a great value that will turn out to be. Heck, virtually
100% of the images on this site were shot with one of the above cameras!
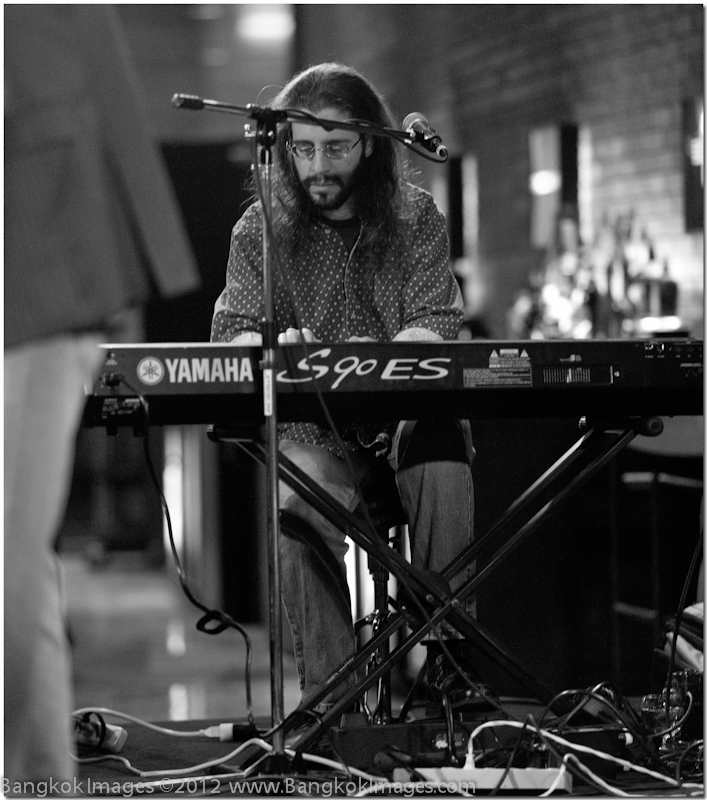
Canon 1ds Mark II, 135nn F2 USM @F2.2 1/60th ISO 3200
The second part of the question is high ISO performance in low light venues. There is no real secret to low noise images at higher ISOs – NAIL THE EXPOSURE, and this holds true for brand
new models as well. If you learn how to get the exposure right the first time so you can keep noise inducing post-processing to a minimum then you’ll be rewarded with great looking high ISO images at the cameras highest ISO settings.
Such a camera coupled with a fast lens and a quality noise reduction software utility will give you great looking low noise images such as these two examples shot after shot. With such images try not to get too hung up over sharpness, color fidelity,
or a deep depth of field. Such images look their best slightly soft with a more shallow DOF, so feel free to open up that lens and shoot wide open.
I’ve been using digital DSLRs since they were first available and I’ve owned most every significant new model made, especially the professional level full frame models. I remain convinced by paying attention to exposure, aperture, and post
processing, that I can consistently match or exceed the results of someone using the latest most expensive DSLR who isn’t attending to these variables as well or as often as I.
These two images are not flukes or one off lucky shots. These are painfully average, exactly what you should expect from an 8-9 year old full frame DSLR properly deployed. If you’d like a full frame low ISO performance virtually no different from
the newest DSLRs and comparable high ISO performance, with professional level autofocus and exposure systems, and a “brick house” build quality.. for as little as $800.. then head to your local camera reseller, EBay, or other such
venues and I’m sure you’ll turn up such a camera which will last you for another 8-9 years. And these sellers, they’ll often have consumer grade lenses they’ll want to get rid of as well, ask and you might get an entire
system for under $1000!
Seoul City Parks Part I, Gyeongbokgung the National Palace with the Canon 5d Mark III *menu

BigJoe is a name you’re going to hear more of. BigJoe is career Army currently serving his twilight tour in Korea and we’ve been corresponding regularly for some time concerning photography. He displays a strong natural eye for composition and lately he’s been turning out some really nice work and it just keeps getting better. I enjoy his narratives as well and I think you will too. You can send Feedback to BigJoe here. Bigjoe.jh64@gmail.com
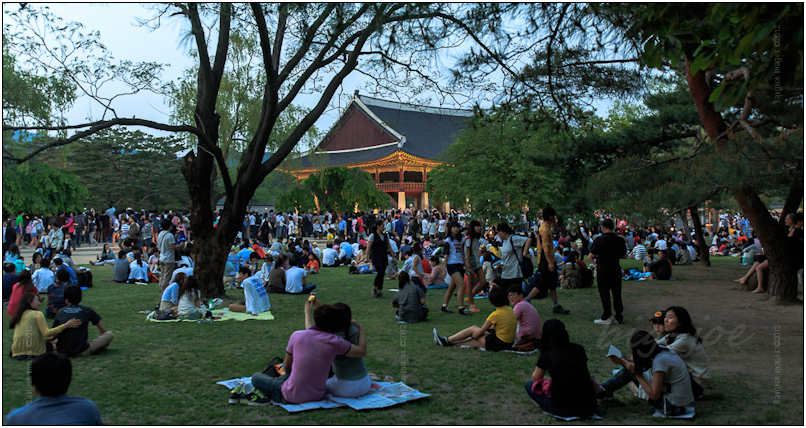
Canon 5DIII with EF 16-35mm F/2.8L USM lens handheld @ 34mm f/2.8 ISO 1600 1/60th sec
With the sun below the horizon the masses pressed tightly to gain a vantage from the lakes edge. I slowly strolled through the crowd behind them feeling at home among the many photographers. Searching for an angle, I looked where all of the cameras were aimed and then turned facing the opposite direction. There, lay a courtyard adjacent a stages seating area that had long been filled and overflowing into the green lawn. Moving to the far side of the courtyard I turned back in the direction the cameras were aimed and composed a shot.
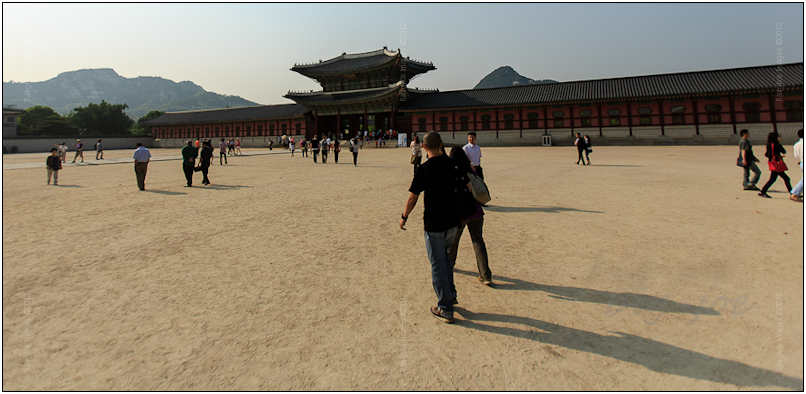
Canon 5DIII with EF 16-35mm F/2.8L USM lens handheld @ 16mm f/2.8 ISO 100 1/3200th sec
Earlier that afternoon exit five of the Gyeongbokgung subway station led me under the National Palace Museum of Korea out into the large walled off courtyard separating the palace grounds from the city. I walked to the east between the two southern gates
to the ticket kiosk and purchased a 3000 won (less than $3 US) entry ticket. With the shadows lengthening I stopped briefly to capture the courtyard and entrance to the reconstructed history of Seoul.
Canon 5DIII with EF 24-105mm F/4.0L USM lens handheld @ 24mm f/4.0 ISO 100 1/400th sec
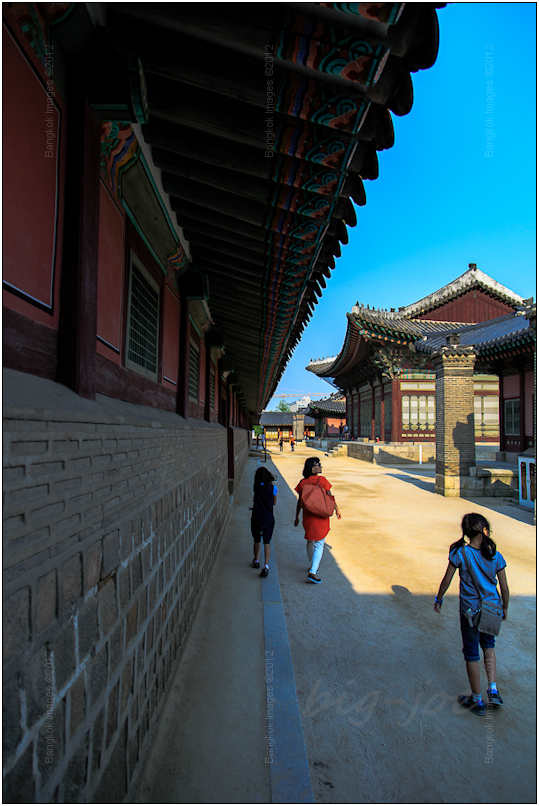
Following the crowd of tourists through the main gate I found myself in a labyrinth of restored buildings replicating the 1394-95 architecture of the Korean Joseon Dynasty. Here, visitors may wander throughout the complexes many alcoves, rooms and passages
within the palace walls. Many families were out enjoying the weather with children in tow exploring the buildings and courtyards.
Canon 5DIII with EF 16-35mm F/2.8L USM lens handheld @ 16mm f/3.2 ISO 100 1/640th sec
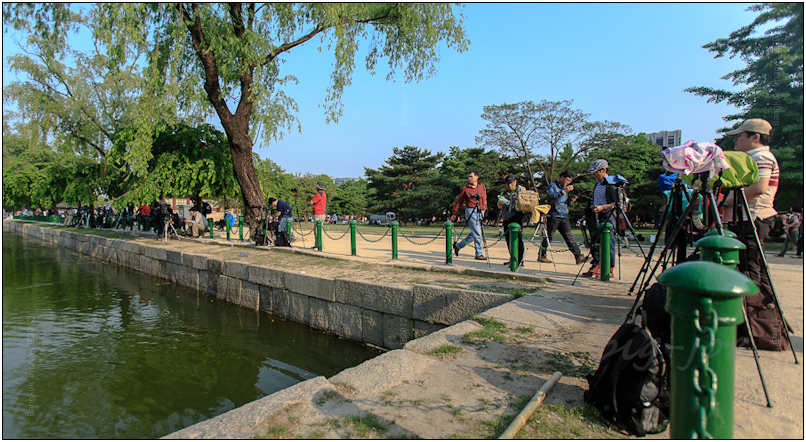
Engulfed in spring, green trees and budding flowers can be found on the outskirts of the central buildings. It was here in the western courtyard, walled away from the city, that I found a large manmade lake with a pavilion in its center. On the lakes
edge a gathering of around 30 photographers had set up tripods and were milling about. Thinking it was some sort of photography club or workshop I took a few pictures and continued to explore. South of the lake stands a building with a south
facing stage where Korean artists were performing traditional folk music and dances. I watched briefly, then taking note of the next performance time continued on my way.
Canon 5DIII with EF 16-35mm F/2.8L USM lens handheld @ 16mm f/3.2 ISO 100 1/1000th sec
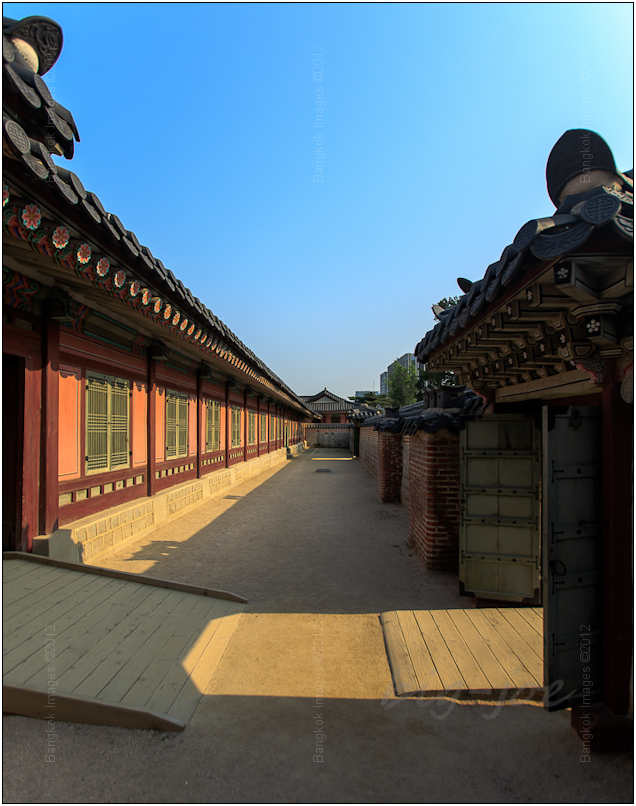
Days can easily be filled exploring the network of passages and courtyard encircled inner buildings throughout the palace grounds. From an amateur photographers perspective the palace provides user-friendly compositions with adequate lighting throughout
the day.
Canon 5DIII with EF 16-35mm F/2.8L USM lens handheld @ 16mm f/3.2 ISO 100 1/1600th sec
The majority of the standing buildings are replicas of a former chapter in Korean history. The original palace, destroyed by Japanese invasion during the 1500s, was rebuilt in the late 1860s only to be destroyed again by Japanese occupation during the
20th century. The outcome of WWII ended the Japanese threat to the Korean peninsula and prompted disagreements among Korean leaders dividing the nation in two. The resulting conflict between the North and South remains in a stalemate to this
day. In 1989 with the US military firmly securing its northern border the South Korean government began a forty-year initiative to rebuild the palace to its pre Japanese occupation state. Currently the palace structures are over forty percent
restored.
Canon 5DIII with EF 24-105mm F/4.0L USM lens handheld @ 35mm f/4.0 ISO 100 1/125th sec
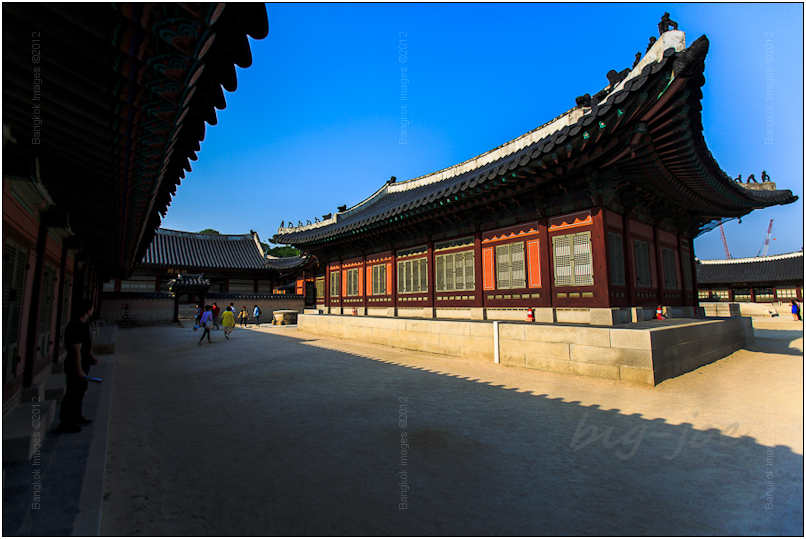
I spent a couple of hours winding my way through the maze of passages continually working my way towards the northern wall. At times I would have to wait for small crowds to clear in order to avoid having other sightseers and photographers in my compositions.
I shot the above image several times before getting one without an unintended head or body popping into the picture.
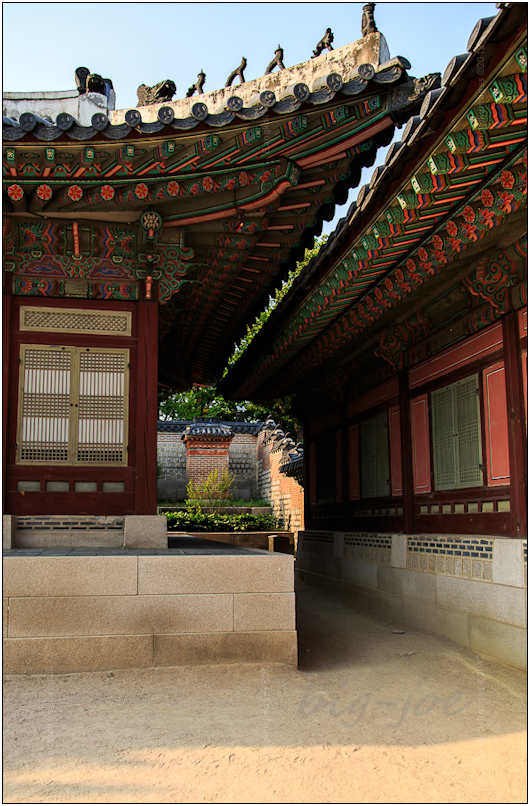
Canon 5DIII with EF 24-105mm F/4.0L USM lens handheld @ 28mm f/4.0 ISO 100 1/500th sec
Bright colored sweeping overhangs of Chinese architectural design under pinnacles lined with gargoyle like statues is the norm throughout the palace. The near symmetrical patterned buildings arrayed in symmetry with neighboring buildings draw the eye
introducing artistic patterns into the composition.
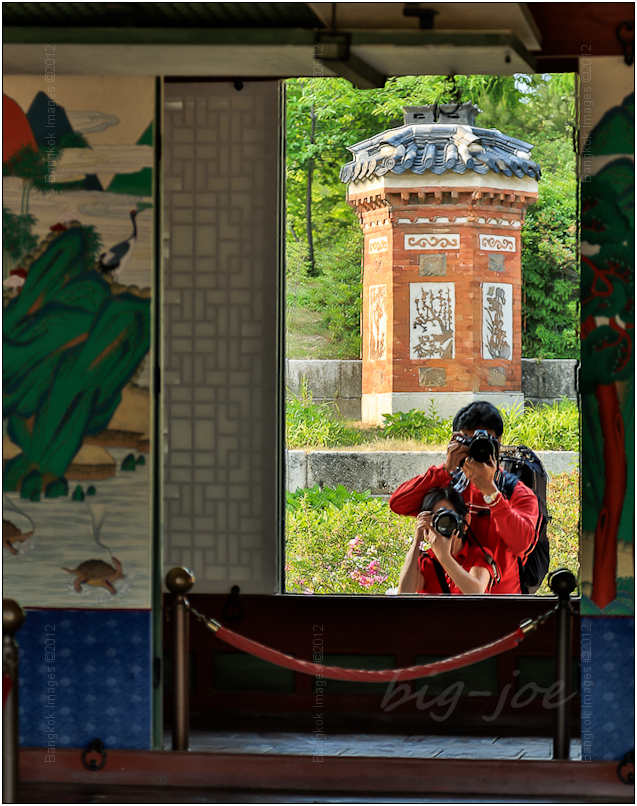
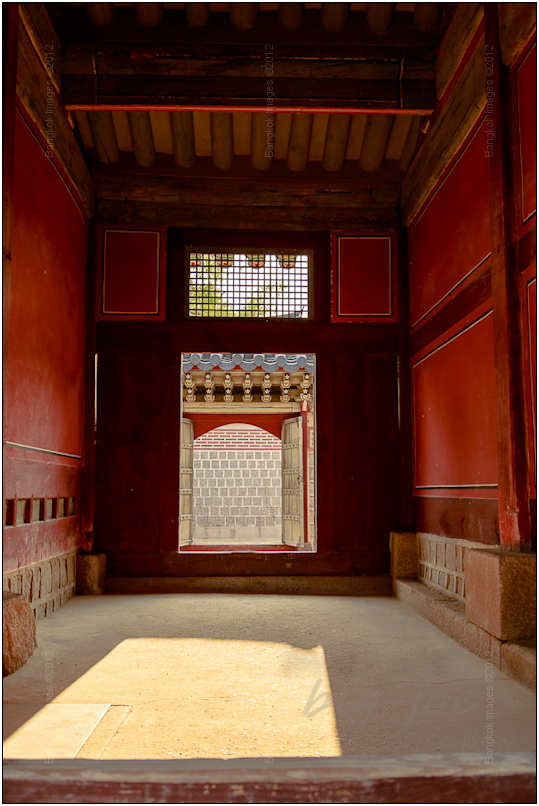
Canon 5DIII with EF 24-105mm F/4.0L USM lens handheld @ 98mm f/4.0 ISO 100 (1/15th-1/60th-1/125th)sec
A new goal of mine is to test the application of the internal High Dynamic Range (HDR) capability of my new Canon 5DIII. Processed completely in camera three consecutive shots are taken at increasing exposures, saved and then combined into a fourth JPEG
image. I’ve been experimenting with this since the camera arrived with varying levels of success. The above image was shot from outside a palace window through the building and out an opposite window during normal daylight with no inner
lighting. While I think it’s an interesting composition, the process of increasing the dynamic range sacrificed the time it takes for multiple exposures at extending shutter speeds. Due to this, movement by the subject and/or photographer
resulted in a blurred image. Many thanks to this couple who was rewarded for their modeling efforts with a similar image of handsome white ape pointing a camera through the opposite window at them. I wonder if they were shooting HDR as well.
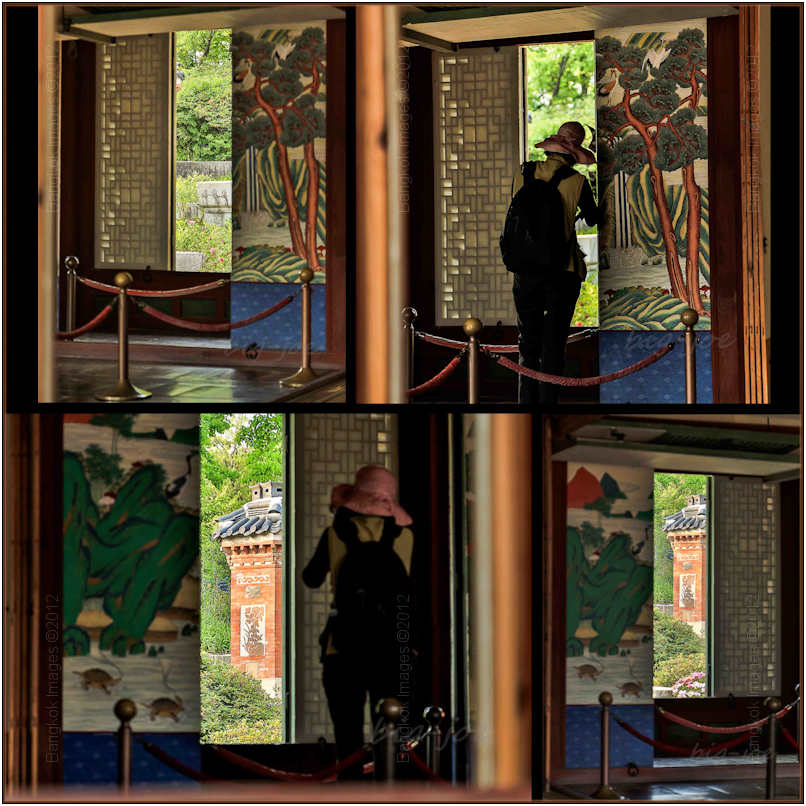
Continuing to look for successful ways to utilize HDR I shot the above four images. They are combined to show varying levels of success or failure. All were hand held shots braced on a window ledge, each contains varying degrees if blur. The top left
without a moving subject was the most successful and, as well as the other three, would have benefitted from a tripod. The top right with the woman in the pink hat, who insisted on being in several on my compositions that day, contains motion
blur from her movements. The bottom left image, to me, seems to be mostly blurred from camera movement, as there is no noticeable halo around the woman. The bottom right again shows excessive blur from an unsteady camera. It seems apparent
that a tripod is a necessity in order to achieve solid results.
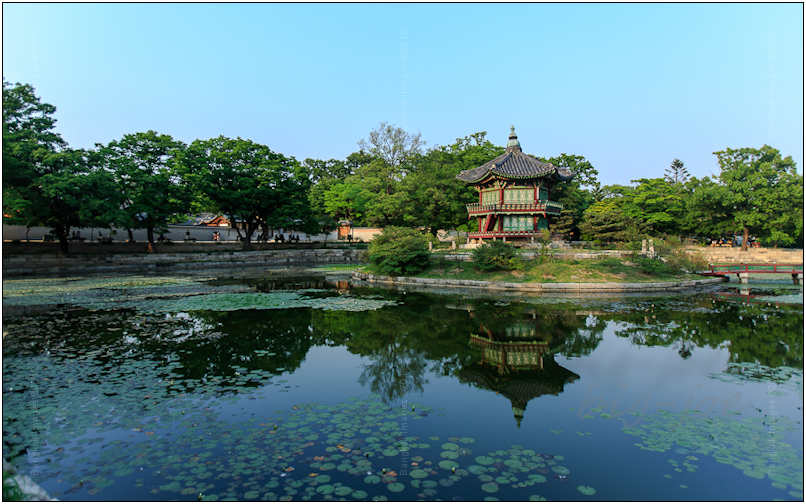
Canon 5DIII with EF 16-35mm F/2.8L USM lens handheld @ 21mm f/2.8 ISO 100 1/400th sec
Continuing to the northern edges of the palace grounds I found a second manmade lake with an island in the center. On the island is the Hyangwonjeong pavilion, which loosely translates to “building of far-reaching fragrance”. It makes me
wonder what the fragrance was that the builders felt the need to place it out in the middle of a lake. Nonetheless, the lakes glasslike surface dotted with lily pads makes picturesque scene.
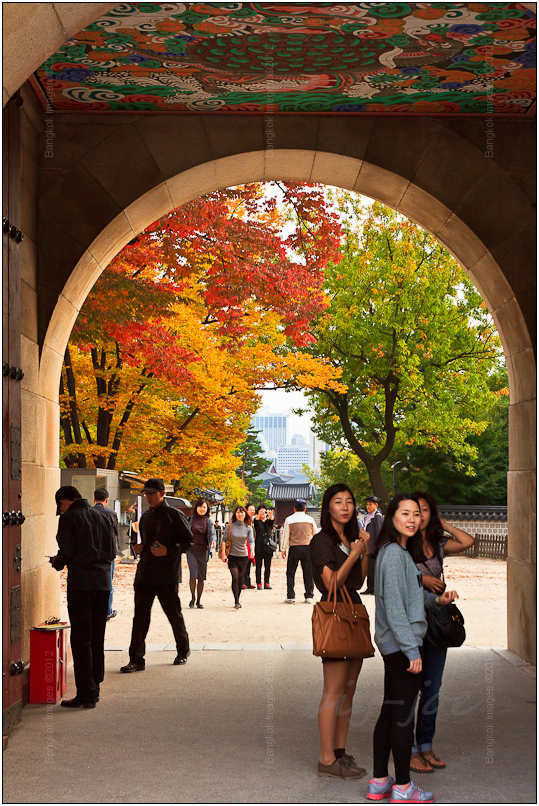
Canon EOS Rebel T2i 550D with EF 16-35 F/2.8L USM lens handheld @ 34mm f/2.8 ISO 1600 1/60th sec
During an outing last fall while walking around the palaces outer walls I was stopped by a security officer and informed that pictures were not allowed. When I arrived at this northern gate directly opposite the “Blue House” presidential
residence I noted Korean nationals freely snapping images right in front of the guards. Assuming the “When in Rome” attitude I resumed taking pictures capturing the fall leaves and pretty ladies through the arch.
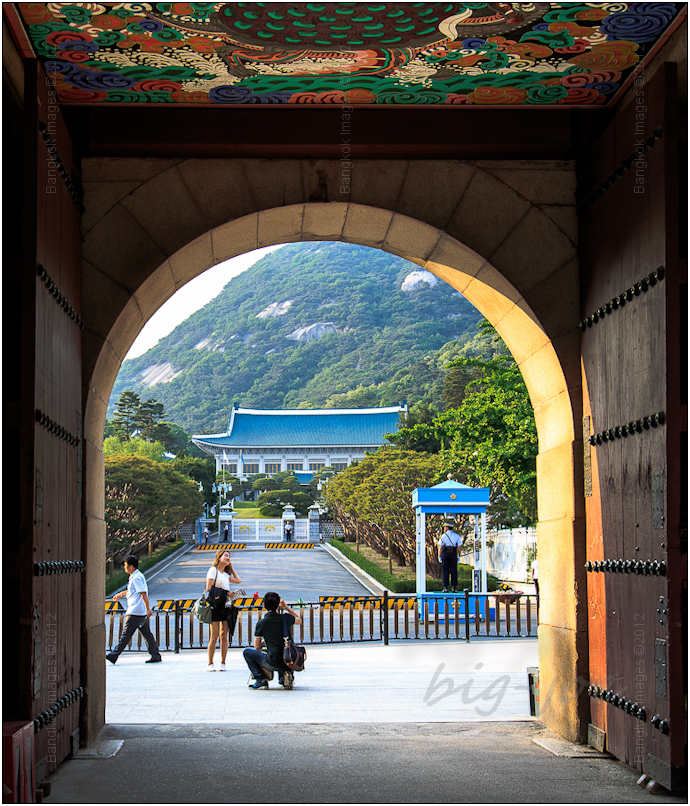
Canon 5DIII with EF 24-105mm F/4.0L USM lens handheld @ 35mm f/4.0 ISO 100 1/125th sec
My plan this trip was to approach the arch from the inside and capture an image of the “Blue House” through it. This I did, producing a decent image but I would like to take more time to do it right. While taking the picture the feeling
of watchful eyes came over me hastening my actions and prompting me to shoot quickly without thought. After taking the pictures from inside I walked through the gate with my camera in hand to check out the lighting on the other side. A business
suited security officer on the far side of the road to notice me and quickly signaled to the palace security. Not waiting around to allow the officials to ruin my evening I made my way back into the palace. I’m sure if they wanted to
catch up with me I would be easy to spot so my infraction must not have been too serious.
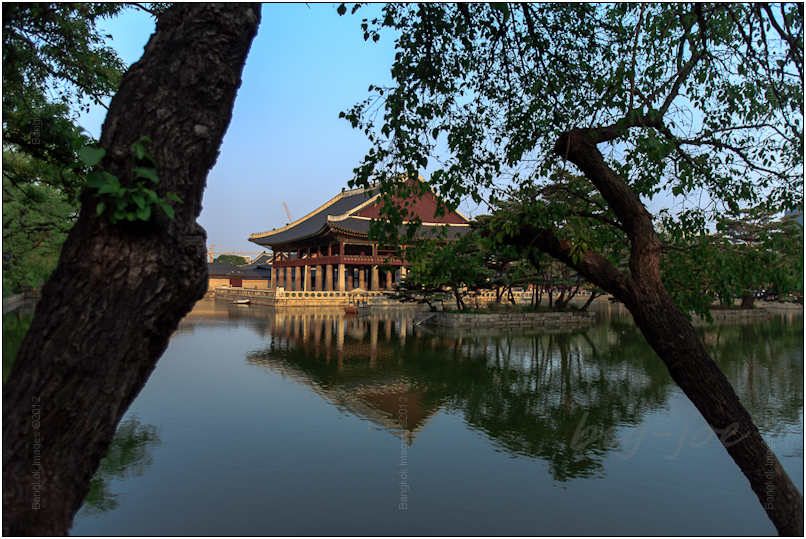
Canon 5DIII with EF 16-35mm F/2.8L USM lens handheld @ 26mm f/2.8 ISO 100 1/320th sec
The parks’ closing time is 1800 during the summer months so time remained for more images. I proceeded back to the first lake and captured the above image of the Gyeonghoeru Pavilion with its reflection on the water. The crowd surrounding the lake
had grown considerably larger by this time so I decided to move again back to the inner palace for a few shots before returning for the last folk show of the day.
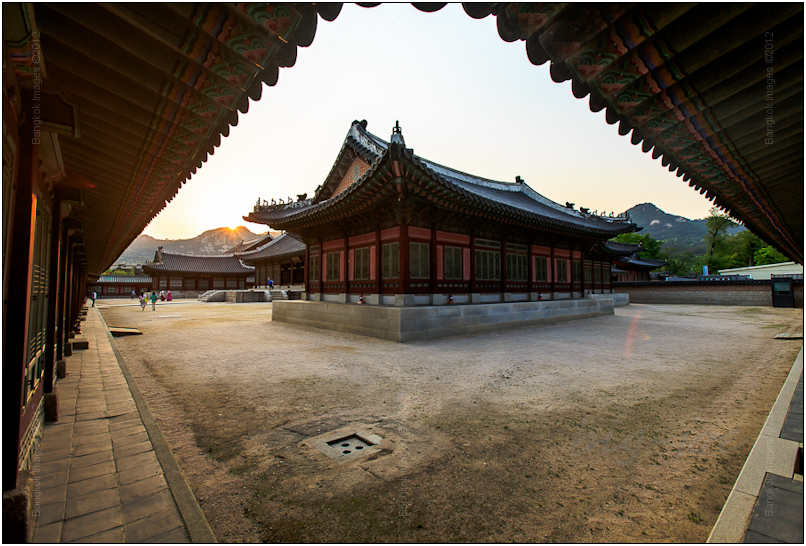
Canon 5DIII with EF 16-35mm F/2.8L USM lens handheld @ 16mm f/8.0 ISO 100 1/80th sec
Finding a courtyard with a view of the sun setting behind a mountain I squeezed my rather large frame as far as I could into a corner in order to capture the above image. This is another instance where a tripod or monopod might have proven useful. After
a couple of shots I wanted to stay until the sun was past the horizon but was instead ushered out of the area by park workers as they cleared the grounds for closing.
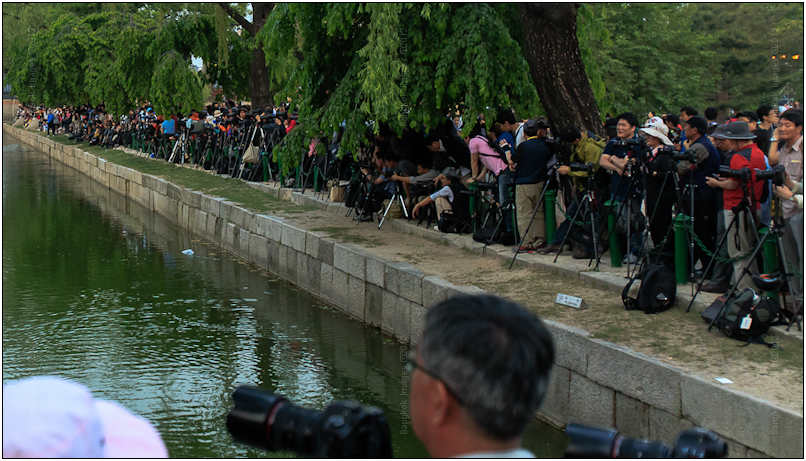
Canon 5DIII with EF 16-35mm F/2.8L USM lens handheld @ 34mm f/2.8 ISO 1600 1/250th sec
On days when special events take place in the park certain areas remain open past closing time. Such was the case with the folk dancers at the western lake where the large crown was gathering. Upon my return it was obvious that what I earlier thought
to be a photography club was actually an assemblage of random photographers gathering to capture a special event. Packed into every available inch of space along the lakes west and southern banks were photographers, tripods and cameras. Pressed
up against and straddling a length of chain fencing was the front rank. Some kneeling where they could with tripods lowered and a second rank behind them with tripods at eye level. Behind the second rank stood a third with tripods and lenses
offset. It all took on the resemblance of a crude American Civil War formation.
The amount of digital technology with quality glass attached was impressive to say the least and the stereotype of picture happy Asians rang true on this night. Finally, behind the ranks of tripods was a mass of cell phone wielding amateurs and well…
me. I still hadn’t figured out what the draw was so I roamed around in the back wondering if there was going to be some sort of extravagant laser show with erupting fountains and exploding fireworks. Of course none of this came to pass
and as the light of day faded it became as clear as its reflection on the water. The layout of the lake with the lighted pavilion in its center is unique as it’s only accessible from two sides. This leaves the north and eastern sides
void of people with the sweeping palace roofs as a natural backdrop. The pavilion and its watery floodlit reflection under the twilight was an opportunity only presented on days the park is open after sunset. Moving back and shooting images
of the crowd was my only real chance of any type of decent composition so I did what I could, changed lenses and moved on to the folk show.

Canon 5DIII with EF 70-200mm F/2.8L IS USM lens handheld @ 200mm f/8.0 ISO 2000 1/320th sec
Across the lawn from the lake musicians sat on stage dressed in bright red awaiting the other performers. With a slight height advantage over the surrounding Koreans I set up in the crowd to the left of the stage. My vantage was from ground level shooting
up between two sets of stage lights. With the 70-200mm f2.8 mounted, aperture set on f8.0 (I’m not sure why but it worked out) and metered using the histogram. Adjusting the ISO I looked for a reasonable shutter speed to capture the
slow movement of the dancers I had witnessed earlier.
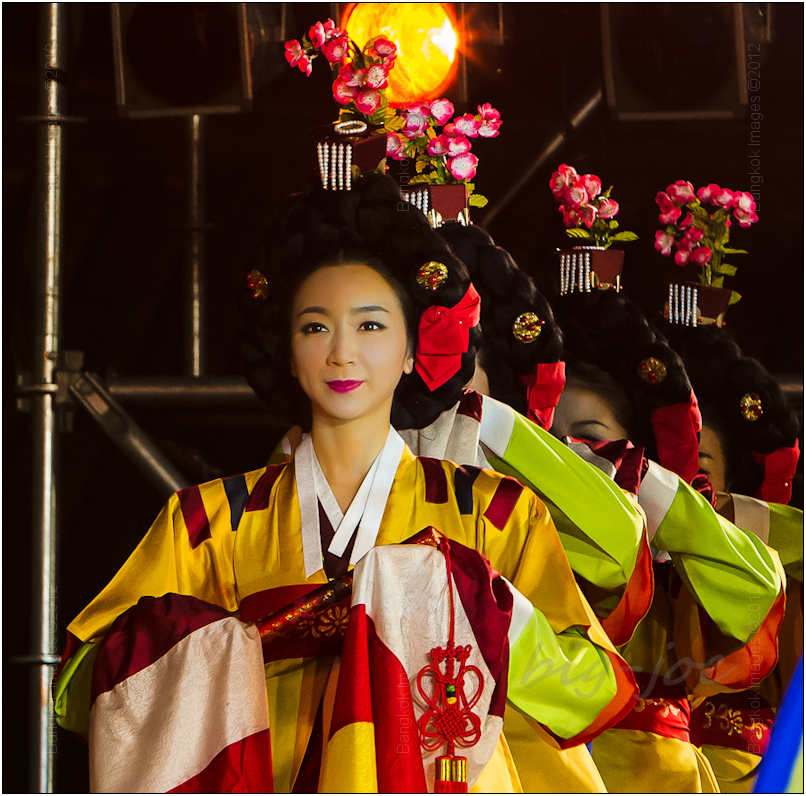
Canon 5DIII with EF 70-200mm F/2.8L IS USM lens handheld @ 200mm f/8.0 ISO 2000 1/100th sec
The doors behind the band opened and onto the stage came the attractive troupe of Korean ladies complete with flowerpots on top of their heads. The above image is approximately a 1:1 crop that I’m calling a success, with the help of the attractive
ladies of course.

Canon 5DIII with EF 70-200mm F/2.8L IS USM lens handheld @ 150mm f/8.0 ISO 2000 1/320th sec
The colorful hanbok dresses lit up nicely under the stage lights working well with the exposure settings I had dialed in.
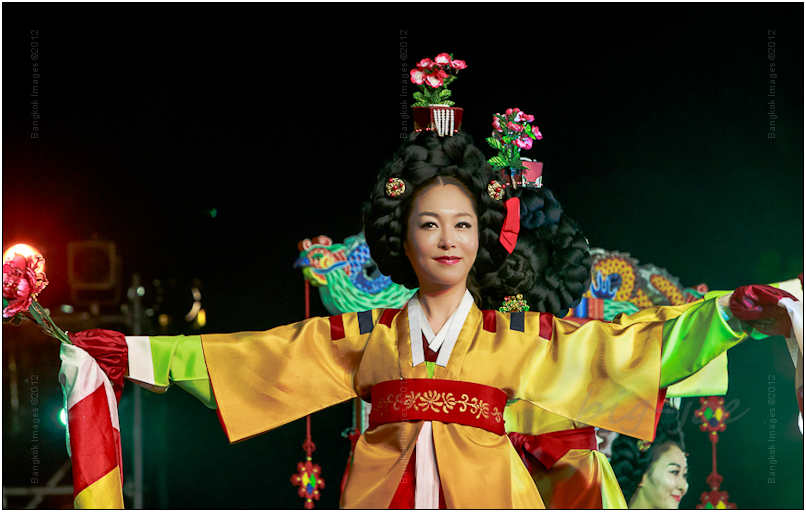
Canon 5DIII with EF 70-200mm F/2.8L IS USM lens handheld @ 200mm f/8.0 ISO 2000 1/320th sec
When the music ended the ladies crowned in flowers took a bow and left the stage. Satisfied with the days outing I headed for home ready to process the days capture.
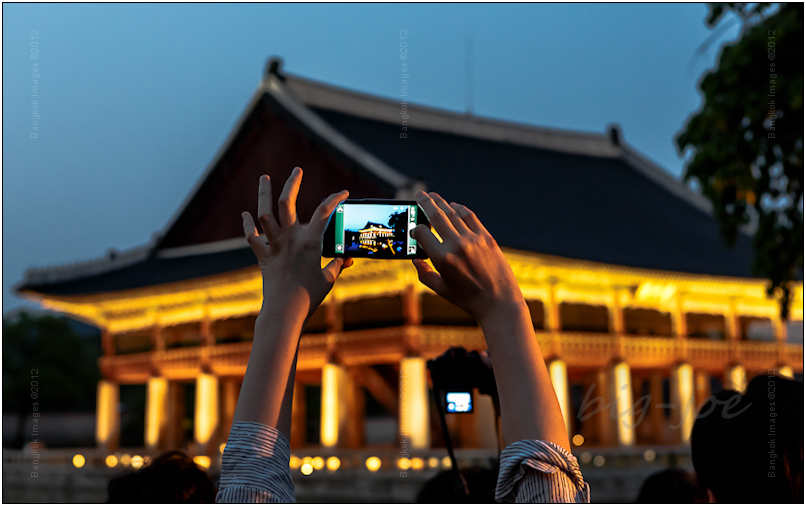
Canon 5DIII with EF 16-35mm F/2.8L USM lens handheld @ 58mm f/4.5 ISO 3200 1/20th sec
Earlier, after capturing the image from across the courtyard, I moved back to the mass of photographers and recomposed for another shot. Choosing the crowd as my subject with their subject as the backdrop I captured and leave with you one of my favorite
shots of the day.
Remarks:
The extensive Seoul park system ranges throughout the city and includes their national landmarks. These parks are among the cleanest and best maintained parks I’ve seen in the world. My afternoon and evening at the Seoul National Palace was a positive,
affordable experience with many photographic opportunities that I would recommend to anyone visiting Korea.
For palace information go to; http://english.visitkorea.or.kr/enu/SI/SI_EN_3_1_1_1.jsp?cid=264337, where information on guided or recorded tours are available. Of note, there are limited concessions inside the park so bringing bottled water is advisable.
References: Wikipedia, Google Earth
How To Capture Panoramic Photographs using a DSLR *menu
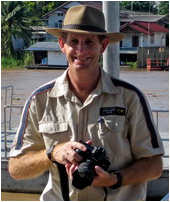
Most of you know Charles through his many contributions in the readers questions and submissions areas. A self-made photographer he's worked his way to a level of expertise through sheer effort and hard work. He asked questions, he experimented, he carefully selected gear on the budget any new husband and father would struggle with, and steadily his photography improved. Recently he built his own website which you can visit here which is a major undertaking by itself, and he's also started writing instructional articles and sharing them with our site here. You can't help but admire such drive and determination. You can provide feedback to Charles here.
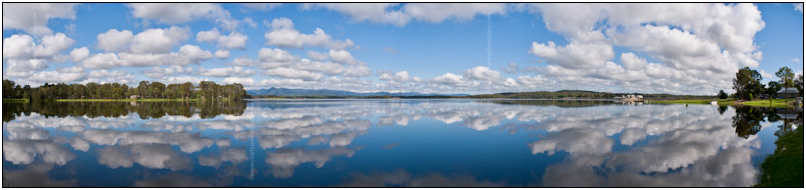
Photographing landscapes is an enjoyable experience, and can be a lot of fun. But! I’m sure there have been times when you just wished you could capture everything your eyes saw. Well this is where panorama photography comes in, and in this tutorial
I’ll lead you through the steps of taking and then editing your images to create a panoramic image that you’ll be proud to show of to friends and relatives.
A Panorama photograph is the result of stitching multiple photographs of a scene into a single wide angle view image, and can be in either horizontal or vertical orientations. This Tutorial will explain how I capture Panoramic Images using a DSLR camera,
and then edit these images using Adobe Lightroom and PTGui to produce a wide view panorama. If you're unfamiliar with the following camera functions like; setting the aperture & shutter speed manually, adjusting the ISO and White balance
on the camera, then please read your D.S.L.R camera manual and it will show you how to do these functions.
Please Note!
Unless you use a dedicated Panoramic head for your tripod, some of your panoramas may show signs of parallax error, this depends on what you are photographing and if there are any foreground detail in your panoramas. Most landscape panoramas have little
foreground details, but parallax error can be minimized and something totally fixed by using software like PTGui or Photoshop CS5. If using a tripod without a dedicated Panoramic head, then shooting your panoramas in landscape mode instead of
portrait mode will also minimize parallax error has the nodal point of your camera will be closer to the center of the tripod
The instructions below might seem long, but once you’ve done them a few times will only take you a few minutes before you’re photographing your panorama.
1: When using your D.S.L.R camera, always have the histogram showing on your cameras LCD screen. This helps in setting your aperture & shutter speed correctly, as if the histogram data is too far to the left, your image is under-exposed and to far
to the right and it’s over-exposed. I try to have the colours in the histograms peaking in the center of it, or just to the right of center.
2: To start of there are two way to photograph a panorama, who can either shoot your panorama hand-held (holding the camera in your hand) or by using a tripod and fixing the camera on it.
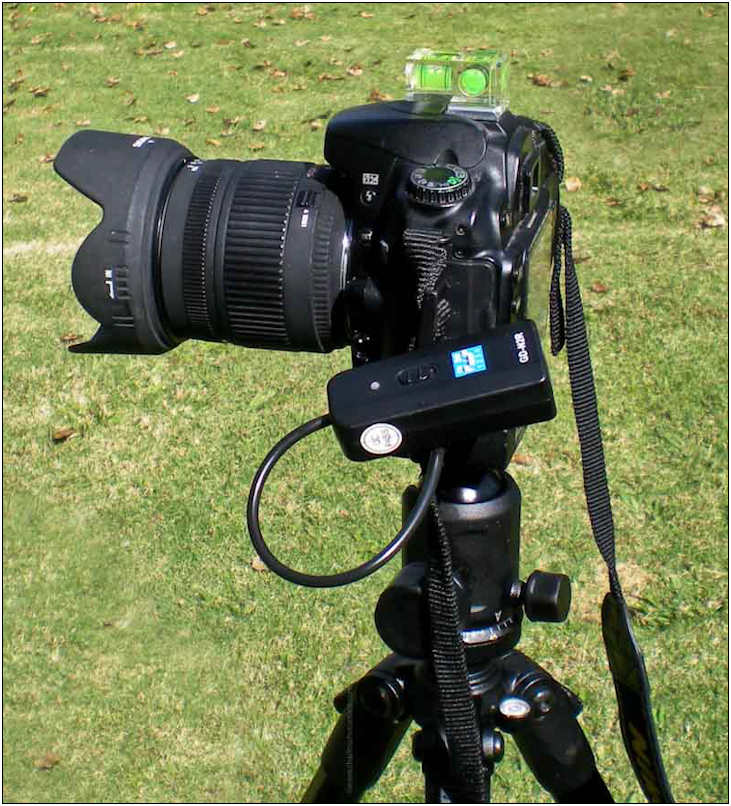
· The best and most reliable way is to use a tripod and a remote shutter release, the tripod will keep all your captured images on the same level and a remote shutter release, whether it's a wireless or a cable release will avoid the vibrations
caused by using the shutter button on the camera.
· You’ll also need to make sure that your tripod and camera are level in both horizontal and vertical planes, use a small spirit level that is attached to the camera’s hot shoe slot to level the camera ($5 from eBay).
· There’s little point in using a tripod and not leveling it, as this defeats the purpose of using a tripod.
· If you’re capturing your panorama hand-held, then you must position yourself so that you minimize camera movement while you’re taking the panorama. Don’t stand with your feet apart and the camera at eye level, try to stand
at 45 degree angle to what you’re going to photograph and place the camera in the palm of your hand, then as you take each image use your wrist to rotate the camera for the next shot.
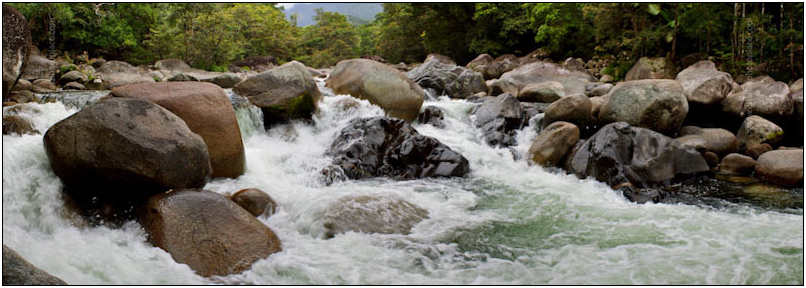
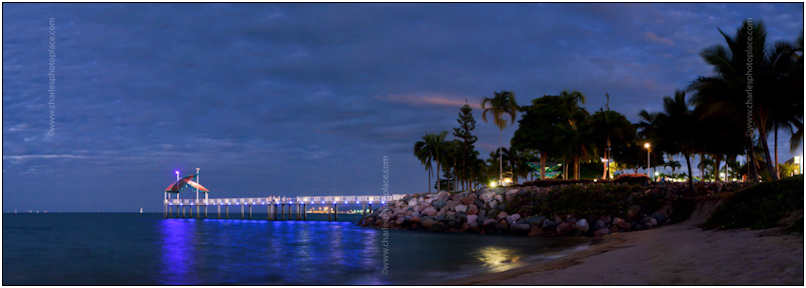
3: Ok, so you’re found a nice location "Lake Samsonvale, Petrie, QLD, Australia" and you’re ready to take your panorama, but before you start photographing you’ll have to setup your camera.
· Use a wide angle lens zoomed out to its lowest mm length, eg;18mm, unless you’re far from what you’re trying to capture.
· Set the camera ISO setting as low as possible; ISO 100 is best (but on cloudy days, you may need to increase it).
· If shooting hand-help then you may need to increase the ISO to keep your shutter speed above 1/100sec.
· Use RAW as your image format for best results, if using JPEG as your image format, then use low-compression JPEG.
· Set the camera to Aperture Priority mode and then chose an Aperture between F8 and f11, if it’s a really bright day even f13, the reason for such wide Apertures is to increase the depth of field so that your whole image is in sharp focus.
· Press the shutter release button halfway as you look through the view finder, you’ll see what shutter speed the camera is going to use and use this shutter speed for your test shot.
· Switch the camera into Manual mode and set both the shutter speed & the aperture that you’re going to use.
· Take a photo and see what it looks like, if the histogram looks good then you’re ready to take your panorama, if not then adjust your shutter speed and take another photo.
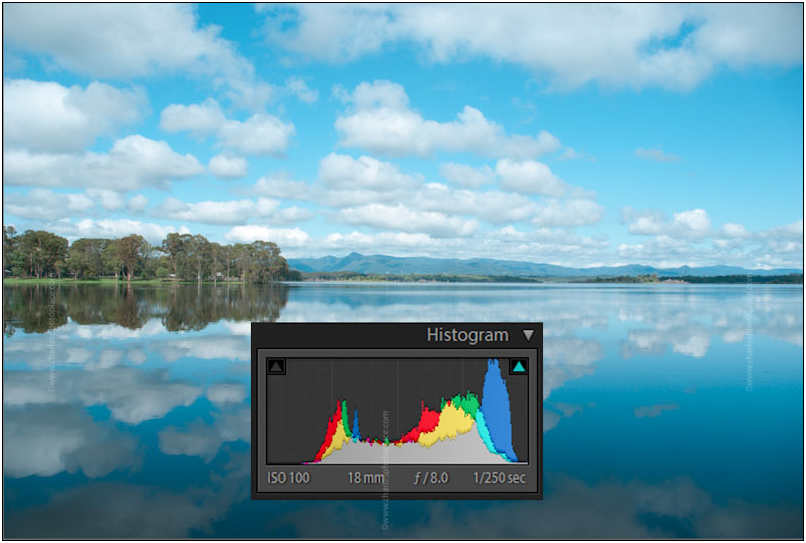
· Has you can see in the photo above, the histogram looks good, I use an ISO setting of 100, but used an aperture of F8 and a shutter speed of 1/250.
· This panorama was shot Hand-held at about 8am in late October 2010, there still wasn't a huge amount of light in the sky which is why I used an aperture of F8 and a shutter speed of 1/250.
4: Now to take your panorama, it’s best to shoot from left to right, this’ll make it easier to stitch your images together later. Focus on a point 1/3 into your image, then set your camera to manual focus. This will keep all your images
at the same focal distance and will help when stitching the images together.
· Focus on a point 1/3 into your image, then set your camera to manual focus. This will keep all your images at the same focal distance and will help when stitching the images together.
· If taking a panorama where people or traffic might be an issue keep an eye them, you may have to take more than one set of images.
· Now has you take each shot and rotate your camera for the next shot, remember to have a least 1/3 of the last image you took in the next image, this will give the stitching software enough points of reference to stitch your images into a panorama.

· If you shooting Hand-Held try to keep your camera has level as possible to maximize the finished viewing area of your panorama.
5: Now that you taken your images of your panorama, it’s time to download them to your computer and stitch them together with your graphic program of choice.
6: There are many programs to choose from that’ll stitch your images into a panorama, some of these are; PTGui, Panorama Factory, Panorama Maker, and Adobe Photoshop to list a few. Some of these will let you use RAW files while others will need
either TIF or JPG files to work. I use PTGui to stitch my panoramas together, but first I use Adobe Lightroom 3.4 to edit the RAW files then save them as TIF files, I then use PTGui to stitch them together. I’ve found that PTGui has many
extra features that most of the others don’t have.
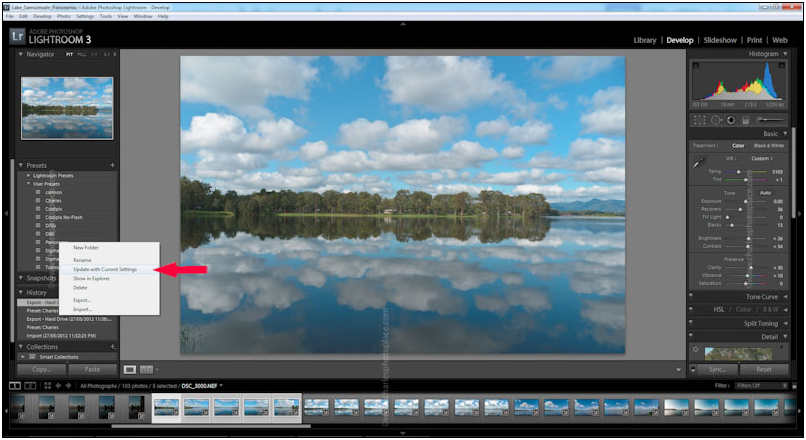
When editing the images in Lightroom, I’ll only edit one image then go to the User Preset Folder and click on Panorama (I created this preset just for this purpose) and right click on Update with Current Setting (this saves all the adjustments
that I’ve done on the photo).
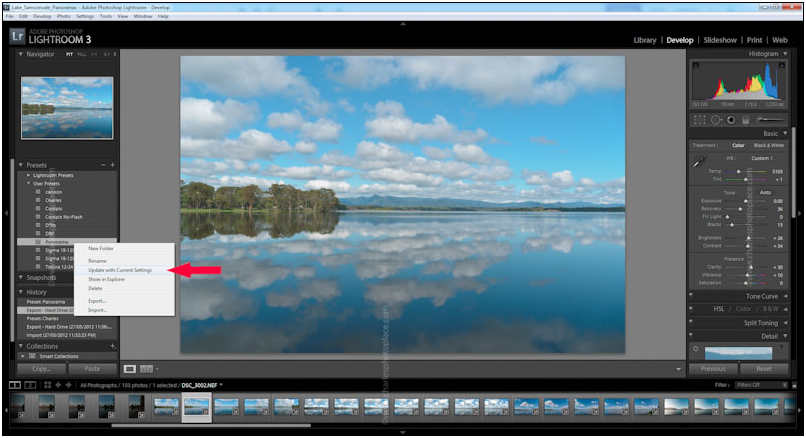
I then select all the images in the set and click on the Panorama Preset, this will apply the setting from the edited image to the rest of the images in the set so that all the adjustments that I made to the first photo are applied to the rest of the
photos in the set.
These files are then saved as 8bit TIF files.
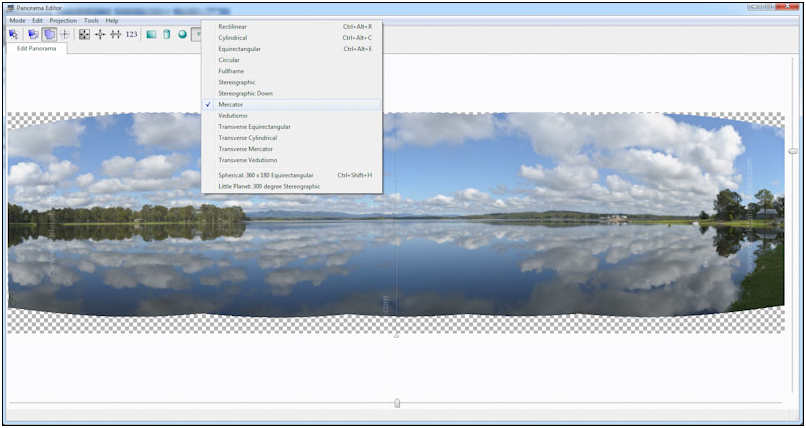
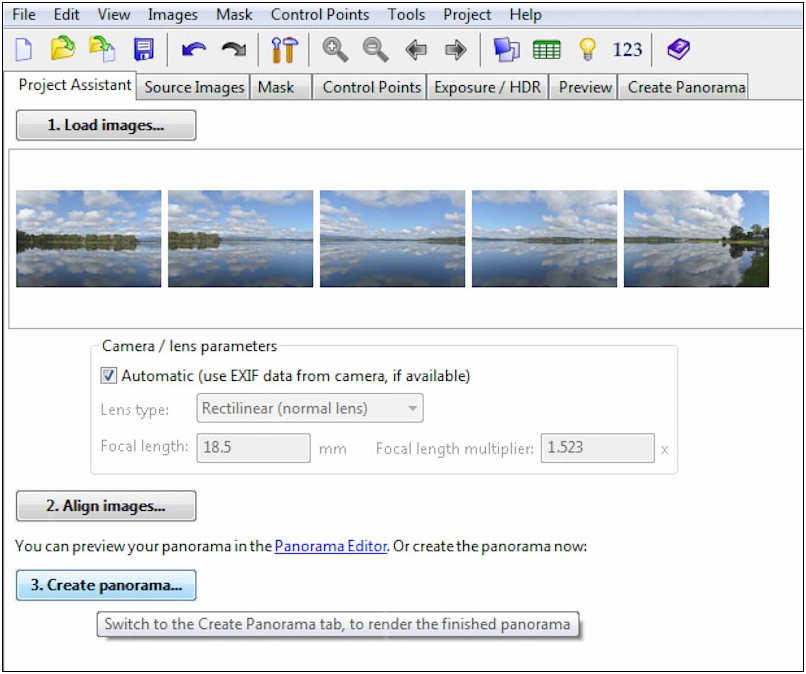
7: Now I open PTGui and import the TIF files;
· Once the files are imported, click on Align images

· Then chose Mercator has your Projection Setting (I’ve found that for most horizontal panoramas that this projection setting will give you the most accurate view of what you photographed.
· Make the necessary adjustment that need to be made; like Straightening the horizon and correcting any vertical distortion that may be present, then crop the image to eliminate the areas that are not need any more. (the help file within this program
will show how to do this).
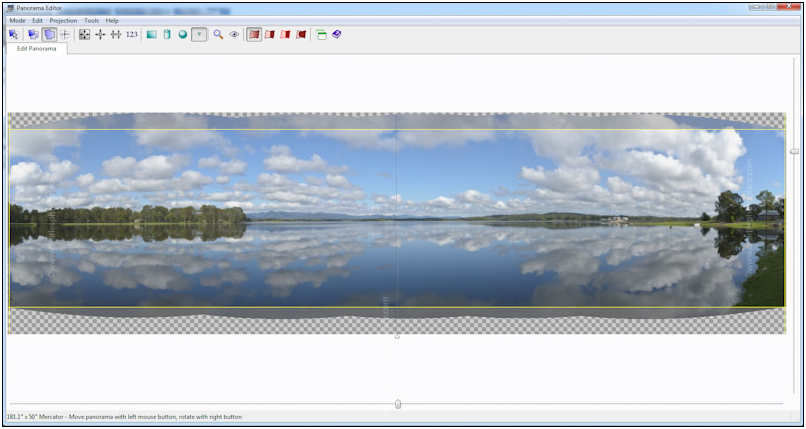
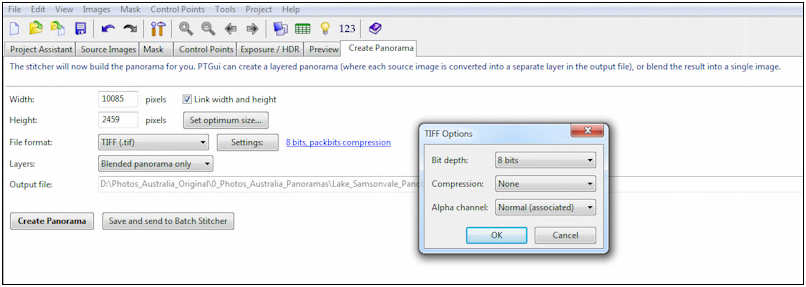
· Once you’re satisfied with what your viewing, click Create panorama.
· You then be given 4 choices of file formats to save your panorama; JPEG, TIF, Photoshop (psd) and Quicktime (.mov) which is use to play your panorama as a Quicktime movie file. I use TIF in 8bit format (you can use 16bit TIF if you want) with no
compression.
8: Now that the panorama is saved, I re-import it into Adobe Lightroom.
· I do this for two reasons;
No1: It’s part of my workflow in cataloguing all my image files.
No2: I’ve found that sometimes I need to adjust some aspect of the image like; saturation, brightness, and contrast.
· The panorama is then cropped at a 6 x 17 ratio, then saved as an 8bit TIF file.
· The 6 x 17 ratio is just a personal preference that I use after much researching on image sizes for Panoramic Photographs.
·
9: Now you can show off your Panoramic photograph to all your friends and/ or upload them to flickr for others to see your efforts.
10: My personal experiences photographing Panoramic Photographs.
· I use a tripod for 60% of my panoramas, the rest are shot hand-held, and I’ve learnt over many years how to keep my hands steady while rotating the camera in my hand.
· Sometimes it just isn't physically possible to use a tripod, and at other times I may be out with my family or friends and I see a scene that's worth capturing as a panorama, so I shot it hand-held.
· It's true that you should use ISO 100 to get great panoramas, but! Time of day, weather conditions, and other factors play an important part in determining the ISO setting I'll use and also what aperture & shutter speed I use.
· I've found through trial and error that if you overlap your images by more than 40% when capturing you panorama, the stitching software sometimes has problems stitching your panorama together.
· I never shoot a panorama in anything else than manual mode, as this is the only mode on your camera that the setting will not be over-ridden by the camera.
· I make sure that before I start capturing any panorama that Auto ISO is switched off, as this setting can change the ISO that you've set originally and this will affect you images.
Here are a few of my other panoramas that I've captured.
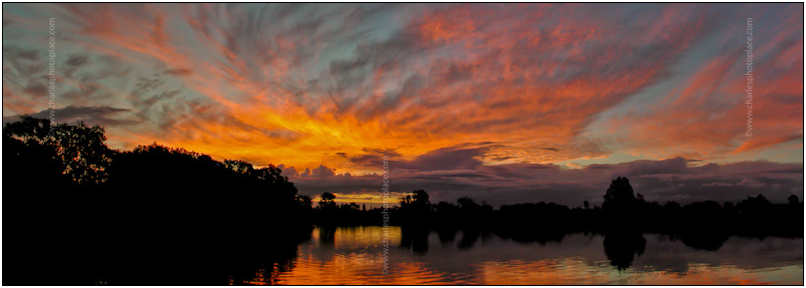
1: Flaming River Sunset, Caboulture River, S.E. Qld Olympus D3040, 1/160s, F2.6, ISO 100 (not a D.S.L.R but shows what can be achieved with a Compact camera.)
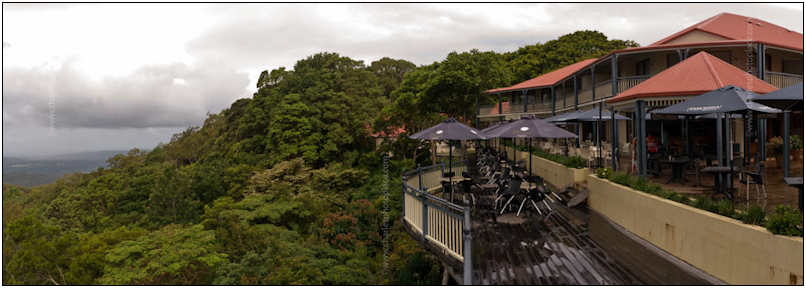
2: Montville Tourist Precinct, S.E. Qld. Nikon D80, 1/320s, F6.3, ISO 250
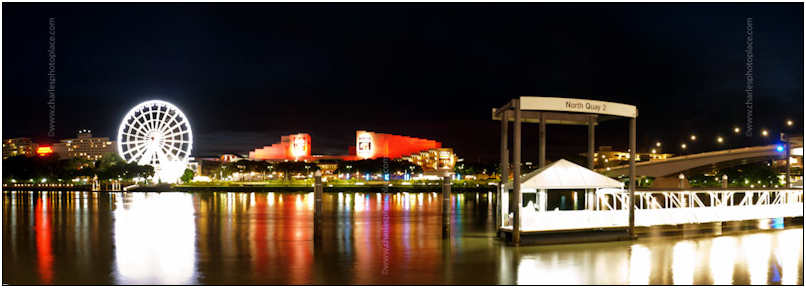
3: South Bank Parklands, Brisbane, S.E. QLD Nikon D80, 10s, F8, ISO 320
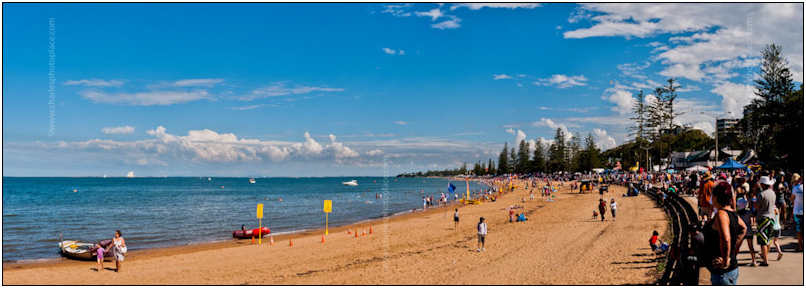
4: Festival of Sails, Suttons Beach, Redcliffe, S.E. Qld Nikon D80, 1/320s, F8, ISO 100
5: The Strand, Townsville, North. Qld. Nikon D70s, 2.5s, F5, ISO 200
Portrait Professional Software Review *menu
Tom Tweedel is a good friend with significant experience in China and has self-published several interesting volumes of his travels in China complete with many great images and informative narrative. Last year he visited Thailand for the first time and
I had a great time showing him around the area. Somehow he found time to put together a like 340 page book of his travels around Thailand and you can get your copy here! I've
got a copy of this book and I can tell you it's well worth it, especially for first time travelers or if you haven't seen more of Thailand than downtown Bangkok.
For those whose plans include extended travel in Thailand and China I’d recommend contacting Tom and inquiring into obtaining copies of his books. Tom Tweedel is an Austin, TX based photographer and can be reached at: tomsds@austin.rr.com
Portrait Professional
Over the years I’ve used several generations of photo retouching software. Like most things related to electronics they keep getting better and cheaper. The results have been mixed, the software took some time to master and I was seldom thrilled with the outputs. I’m happy to say that Portrait Professional has crossed a line of usability/results and I’m very happy with the output.

To keep it in perspective I would rate my photo-retouching skills as “intermediate”. I can do most of what I want, though not necessarily in a time efficient manner. This is why Portrait Professional impresses me so much. It gives me most of what I want (and sometimes more) in an easy to use interface and allows me to do the job in a time efficient manner.
Going through an Image
When you launch an image you go through an identification process to locate major facial features. This is both quick and easy. It starts by asking you if it is male or female and/or child. This is essential as it goes through the later processes it uses programmed “beauty” criteria specific to your subject. This “intelligence” about beauty is perhaps what distinguishes this product from its predecessors. It takes into account the geometries and features that make someone “good looking” sparing the user the need to learn all that.
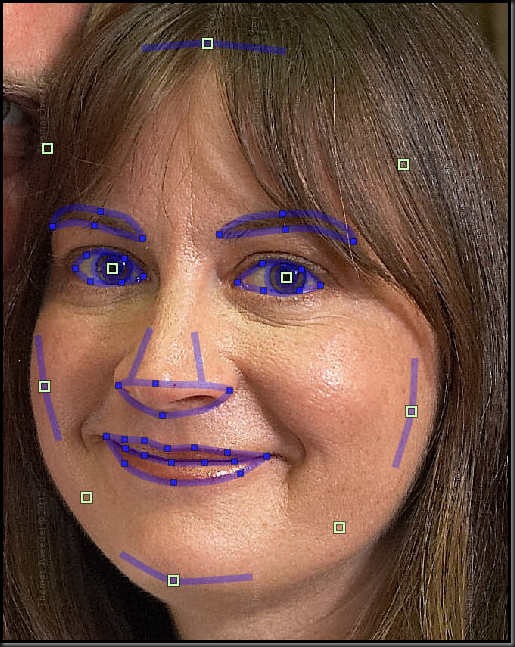
The system uses this data to build the equivalent of selection masks for use with the further processes. After the system does a rough selection you refine the mask by dragging selection points to cover the eyes, mouth, eyebrows, nose and outline of the face.
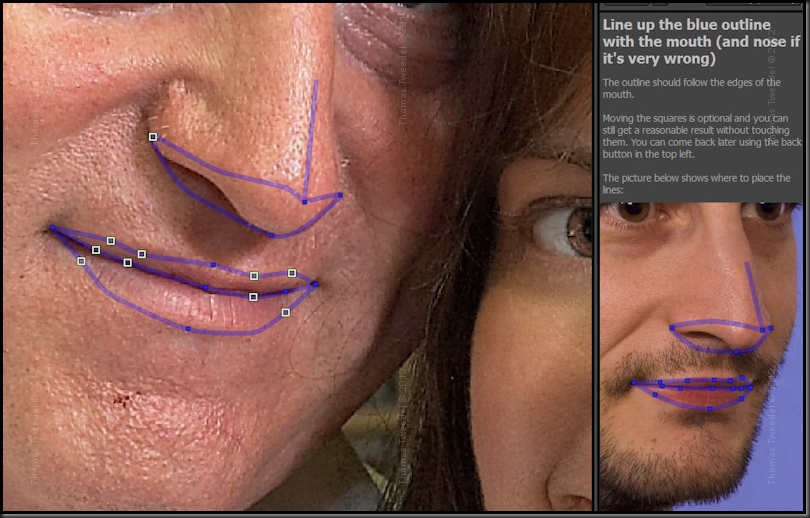
It’s even smart enough to show you some example guides with the portrait oriented in the same way as your subject, a very nice touch for beginning users.
Once the masks are built you get into the controls. It starts with its “best guess” of settings to use. Then you’re off into editing.
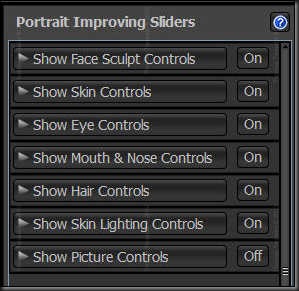
The interface is broken down by features such as skin, eyes, mouth, hair etc.
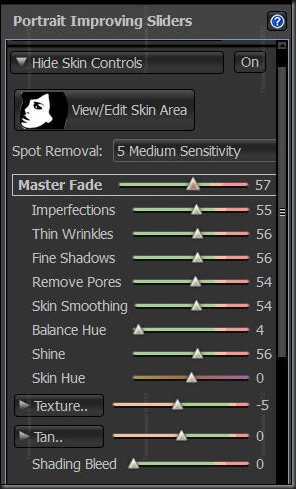
When you open each control you have the Master Slider which applies all the various settings in a pre-determined ratio. Or you can move each slider individually to increase or decrease a certain setting.
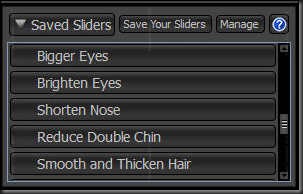
For common tasks (whiten teeth, bigger eyes etc) there are some easy presets if you find the sliders too intimidating. You can also save your own settings to speed up workflow.
Working your way down the controls, you can customize the edits to your liking. It takes a while to appreciate the subtlety required to bring the image to its best level of perfection without going overboard. Like other products if you do too much of a good thing you end up with plastic people.

But if you back it off a bit you can get some excellent results. What really impresses me with this software compared to others is how well they did the skin texturing, even at the more industrial strength settings.

For finishing touches there is an excellent touch up brush for zapping moles and wrinkles too large to be smoothed over by the general settings.
Multi-Faced Work
The software is capable of doing multiple faces individually, which is another improvement over other packages which slather the same settings across the board. After you are done with one face you can move on to another and go through the masking process again. The only catch is you can’t go back and forth, once your done the edits are saved.
Different versions
There are three different versions of this package, the main difference being the bit depth, image type and relationships to workflow. A comparison of versions can be found here.
The basic version is a very affordably priced. Do the options on the more expensive packages make a difference? Here is the same image processed from JPG vs. a 16 bit TIFF straight out of Lightroom.
8 bit JPG Source

16 Bit TIFF Source
Here is the Original out of Lightroom for comparison
Lightroom JPG export
The trial version is fully functional from a user standpoint but the image is watermarked on the screen and you can’t save any type of output.
My Thoughts
I think this software is great, for me it’s a real timesaver. It lets me quickly and easily add something to those special images. It also makes me more comfortable in offering photo retouching services to my portrait clients. After a bit of practice I can confidently price retouching services knowing I can deliver consistent results without spending more time than I want in order to deliver that value.
Many of the edits the software can be duplicated in Lightroom (and certainly Photoshop) with a steady hand and a bit of knowledge. If you’re just looking to whiten some teeth or zap a mole this might a bit much (though you can turn off the different edits).
Processing images thought the software is a good learning tool in and of itself. There is a lot of knowledge captured in the programming. Spend some time playing with the sliders of the different settings. Look not only at what it’s doing but imagine behind the scenes how you would use other tools to accomplish the same effect. You begin to see how tools like clarity, saturation, fill light, contrast can be used to improve a portrait. The trial version is perfect for this even if you don’t want to buy the software.
I’ve also found that it does “more” for light skinned and fair haired subjects and for darker skins and hair. Maybe because light skin is like white canvas, it responds better to painting.
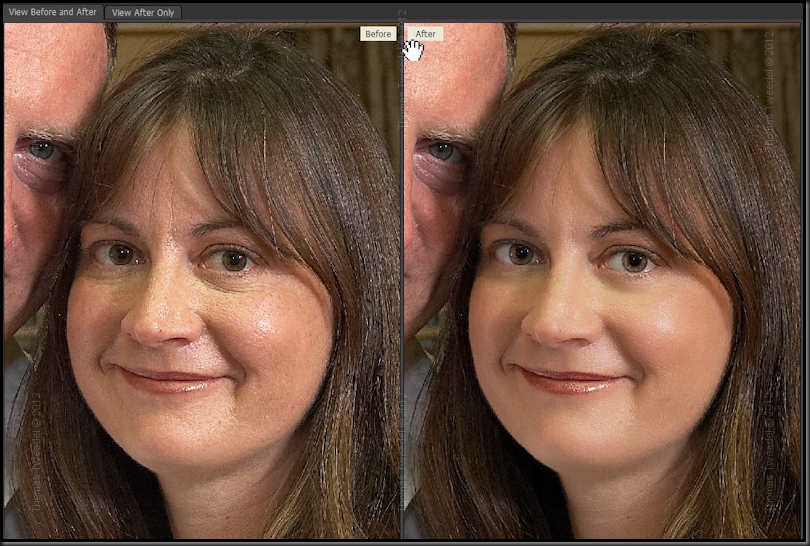
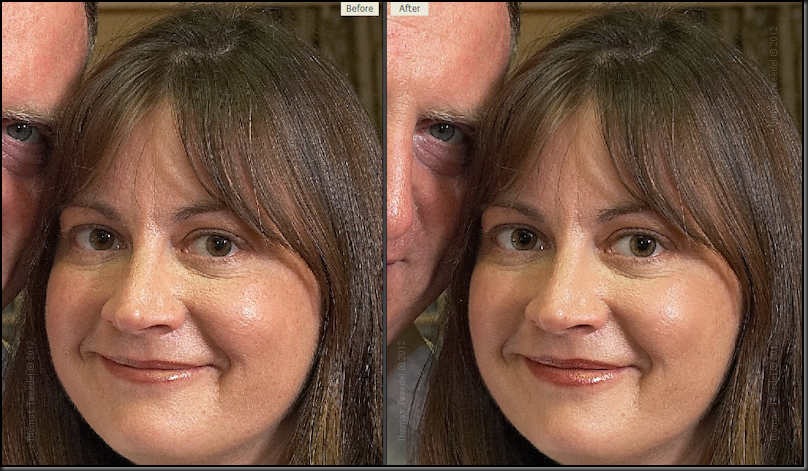
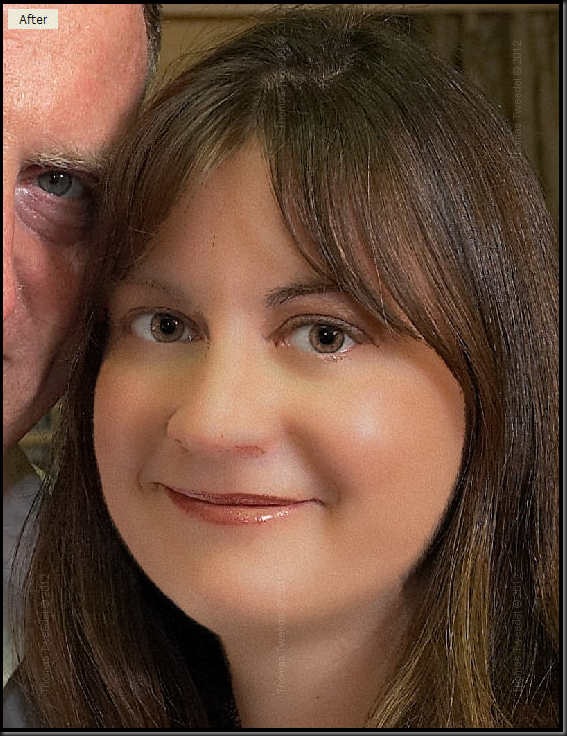
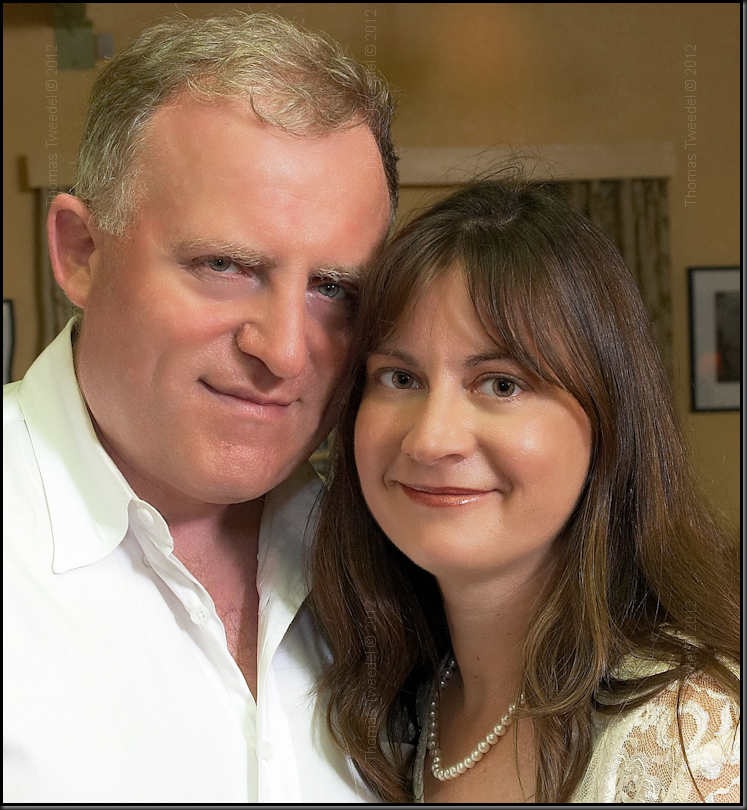
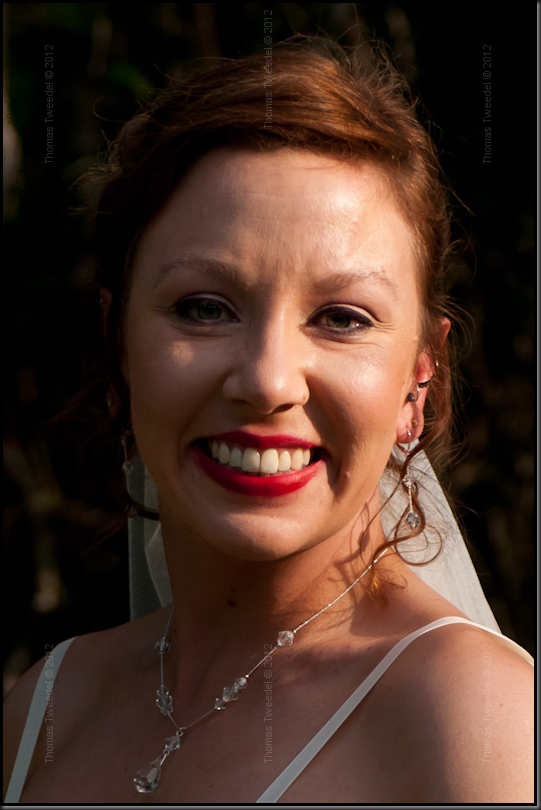
The Real Challenge
For my final test I took a picture of a weathered friend of mine, in some lousy lighting at F2.0, ISO 3200. This was a real test of software to make him look better. Did it pass? You decide.
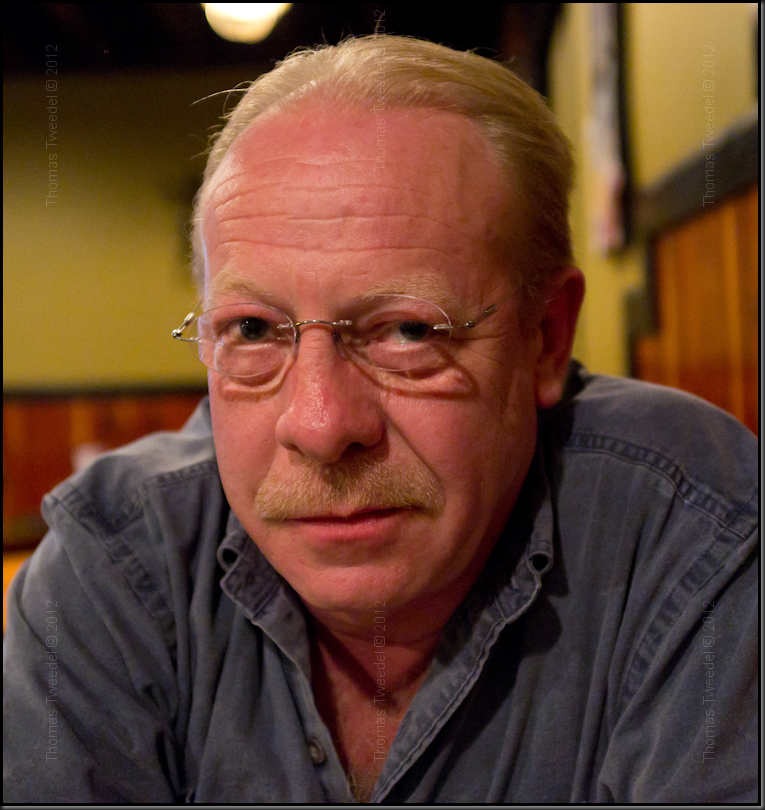
Before
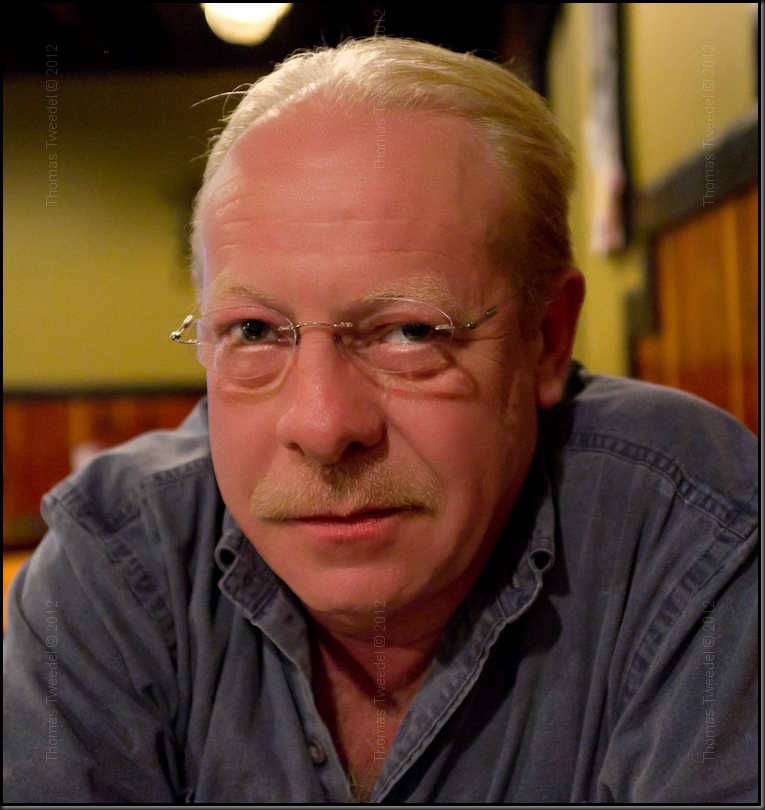
After
Conclusion
Portrait Pro is the best retouching software I’ve ever used. I’m very excited to have it and wouldn’t hesitate to recommend it. If you’re a Photoshop Guru maybe you can do better faster with your crazy skills, but if your not get this software. Its feature rich, has a good interface and best of all is reasonably priced, even the high end version.
Silver Efex Pro 2 Review *menu
Tom Tweedel is a good friend with significant experience in China and has self-published several interesting volumes of his travels in China complete with many great images and informative narrative. Last year he visited Thailand for the first time and
I had a great time showing him around the area. Somehow he found time to put together a like 340 page book of his travels around Thailand and you can get your copy here! I've
got a copy of this book and I can tell you it's well worth it, especially for first time travelers or if you haven't seen more of Thailand than downtown Bangkok.
For those whose plans include extended travel in Thailand and China I’d recommend contacting Tom and inquiring into obtaining copies of his books. Tom Tweedel is an Austin, TX based photographer and can be reached at: tomsds@austin.rr.com
Fuji x100 F5.6 1/60s ISO 320
Black and White photography has been with us more or less as long as we’ve had photography. Generations of photographers learned the fundamentals of exposure, tone, ISO and all the other foundations of the craft on black and white. This began to change with the advent of cheap color film and then again with the advent of digital. No longer do most know the smell of developer, the thrill of watching the image appear on the print, or the agony of having a day’s work of concentration, effort and careful logging wiped out because of a careless developing error (we just loose it all in a hard drive crash).
Fuji x100 F2.8 1/60 ISO 3200
Yet those who grew up with it, and those learning it today find the black and white holds a certain artistic magic not replicated in color. In the digital world we find ourselves needing to synthesize black and white images out of our color shots since no camera manufacturer has come up with a B&W only camera that would sell millions (hello Fuji, are you listening?).
Nikon D70 38mm F9 1/1/60s
The methods of going from color to black and white are many and varied. At the easiest we simply use our software to completely desaturate the color and work with that. More sophisticated methods involve manipulating different color channels, contrast, clarity and the like. The problem with those, especially to those who didn’t grow up photographically on black and white is visualizing the effect on the final image.
Fuji x100 F2.8 1/60s ISO 2000
Even if you get your tonal manipulations down there is the character of film grain that adds a dimension to photographs. I find it funny that for decades we tried to minimize or eliminate the effect of film grain on the image. Now we are trying to figure out how to put it back. I wonder in the future if we get cameras that shoot glass smooth sharp images in lousy light if we’ll be trying to get sensor noise back into our shot.
Nikon D70 18mm F11 1/200s ISO 200
To solve all these problems the folks at NIK software (who produce Nikon’s OEM processing software) have created Silver EFX Pro, a program that is rapidly become the gold standard of black and white conversion. They really put a lot of thought into black and white and came up with a way to have near infinite options in an interface that doesn’t require technical understanding to use.
Getting to Black and White
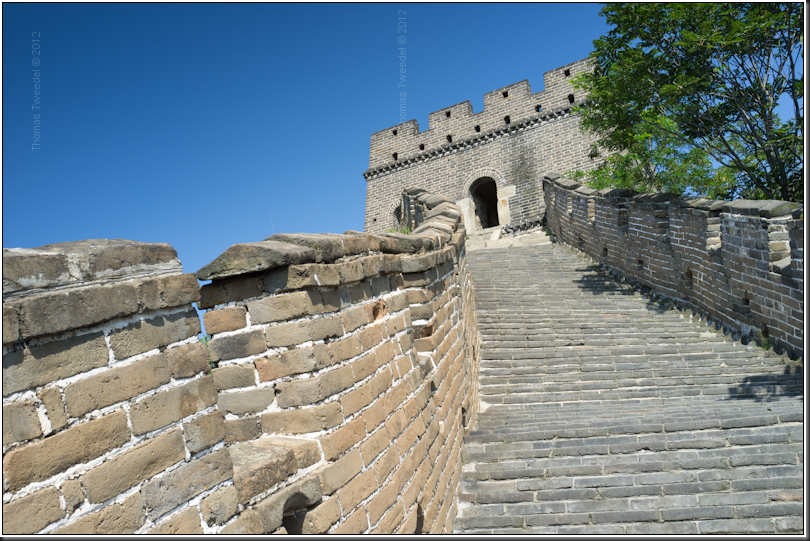
Our starting Image in Color – Fuji x100 F8 1/250s ISO 200
Its important to understand that Silver Efex Pro 2 is NOT a stand alone application. It has to be run through another image processing application. See the system requirements here.
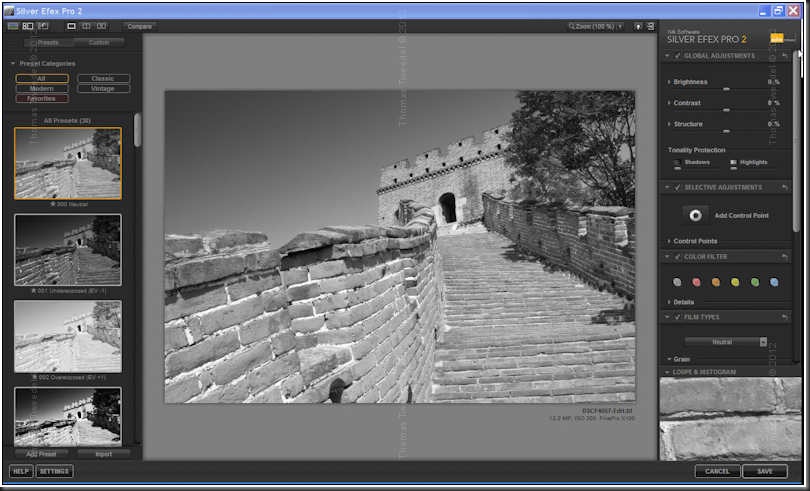
After you have selected your image and activated Silver Efex Pro it brings up its working window. It defaults to a neutral black and white which is pretty similar to a straight desaturation.
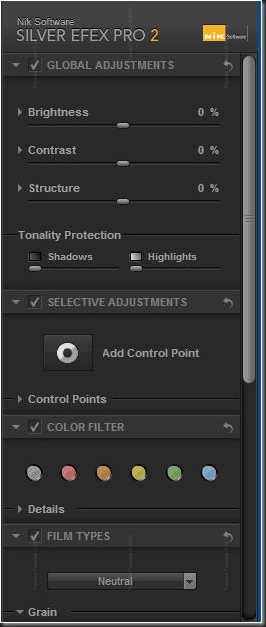
The business end of the software is a strip of slider controls on the right hand side. This contain all the possible adjustments.
If you find the controls too intimidating you can start with the presets on the left hand side. There are a variety of settings grouped by theme.
If they are not to your liking then you can dive into the main controls on the right hand side. All the presets are just combinations of those controls.
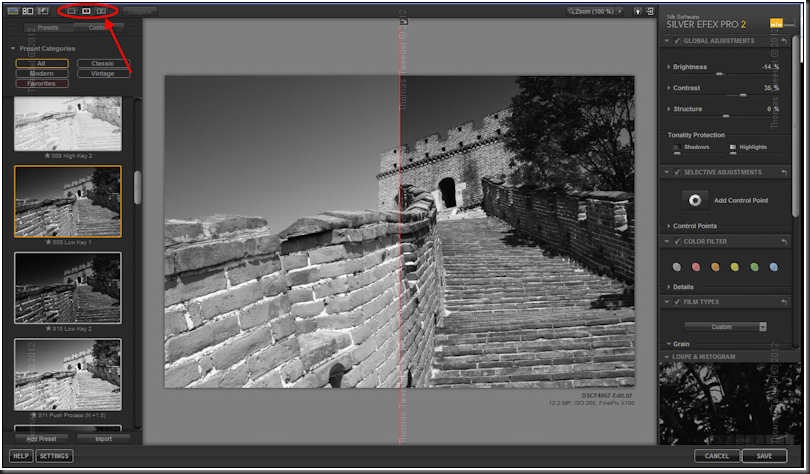
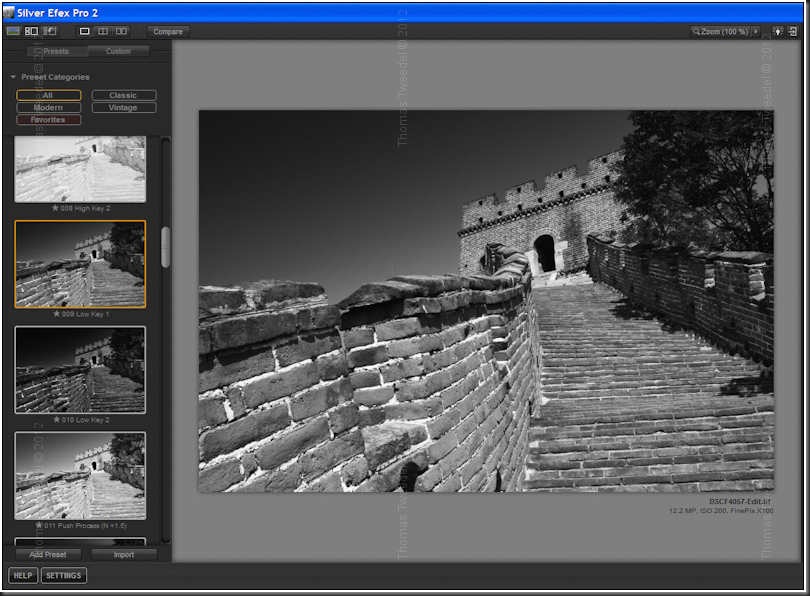
Another cool feature of the interface is the ability to have side by side or split views of your edits allowing you to compare before and after.
Getting Control
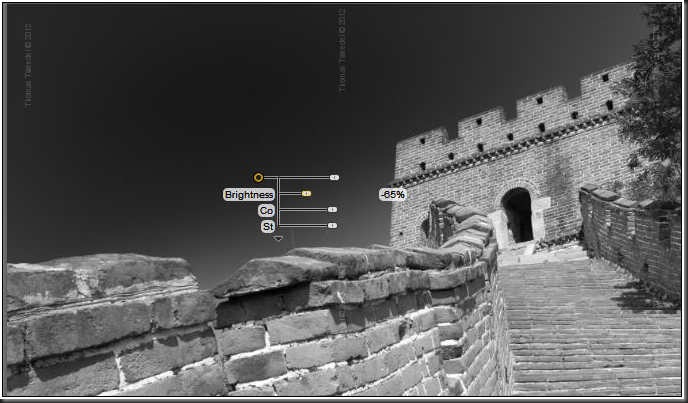
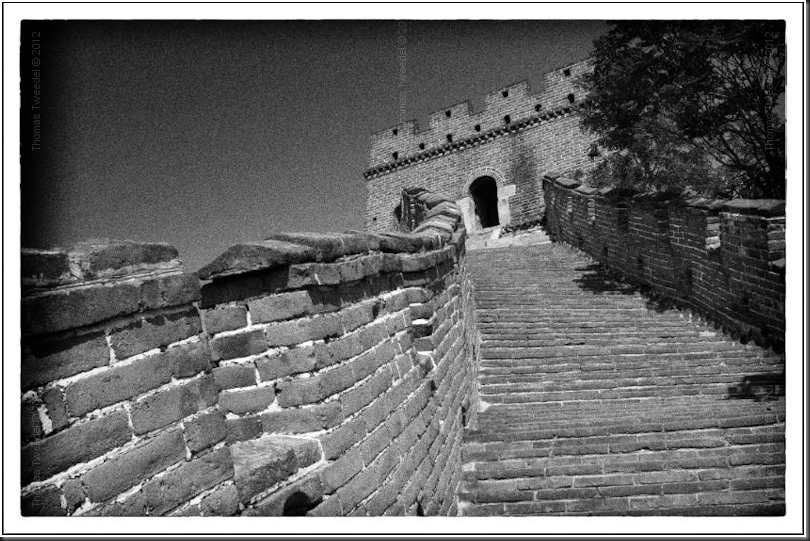
The three main controls are brightness, contrast and Structure.
Brightness and contrast work more or less the same as any program. The “Structure” command is somewhat unique. It is a variation of the “micro-contrast” concept which allows you to enhance surface detail without destroying too much dynamic range.
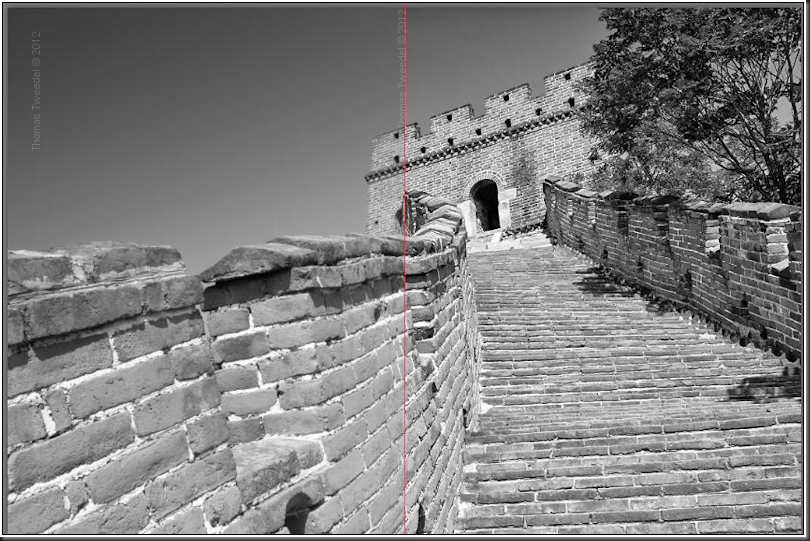
On the right is an example of Structure dragged to 100%, on the left it is a neutral setting.
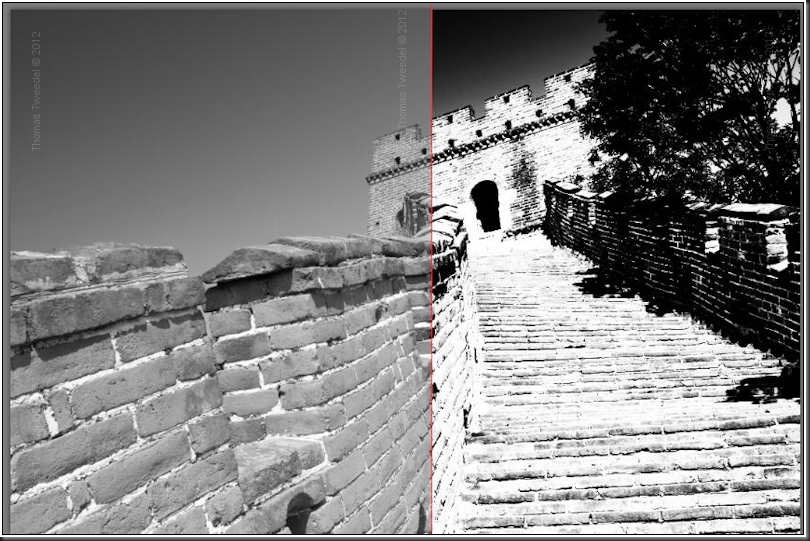
Compare that to Neutral Structure but 100% contrast.
Fine Adjustments
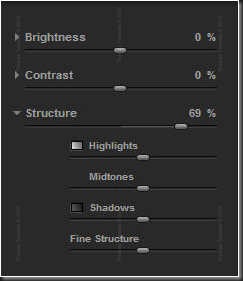
If your looking for even more control clicking on the triangle in front of each of the controls breaks it down into sub controls to fine tune it to your taste.
Control Points
Silver EFX Pro uses the control point selection method from their Nikon Capture NX to build selection masks, this allows you to set a point and then expand the area of change for selective editing.
You click on the point and then increase or decrease the size of the circle to increase or decrease the area of influence for your edits. The edits themselves are done with the sliders that appear off the point. Its an interesting concept, that takes some getting used to.
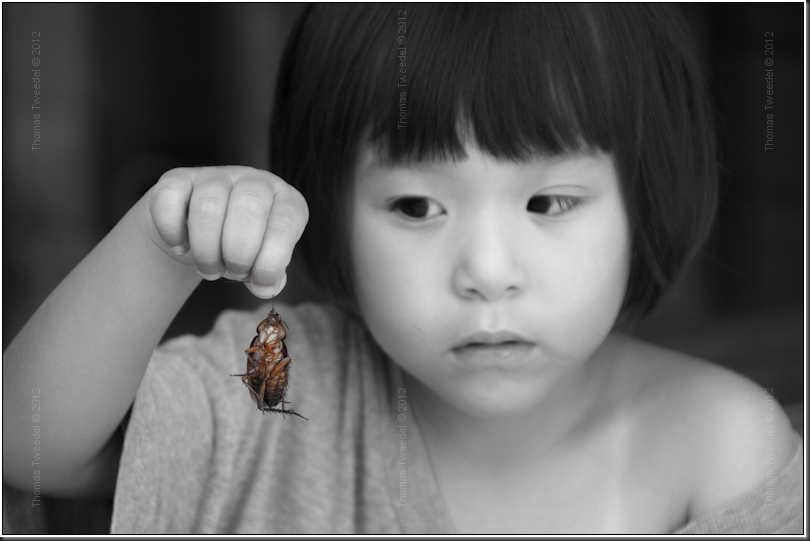
Nikon D300 150mm F5.6 ISO 800
You can even take it a step further and do selected saturation with the control point tool.
Color Filters
Back in the day putting color filters on your lens was an interesting way to manipulate the tonality of your final output. What filter did what was something I never learned, why would I want to use green instead of orange?
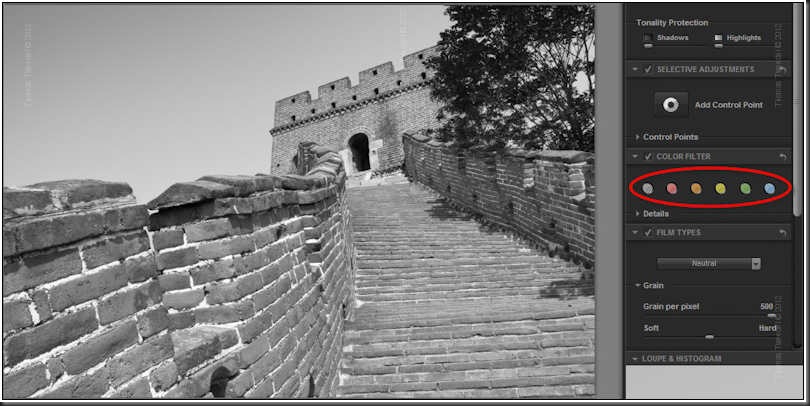
Silver EFX Pro makes learning that after the fact easy. They have some neat little colored filters to click and simulate the effects, like this shot where we added a “blue” filter.
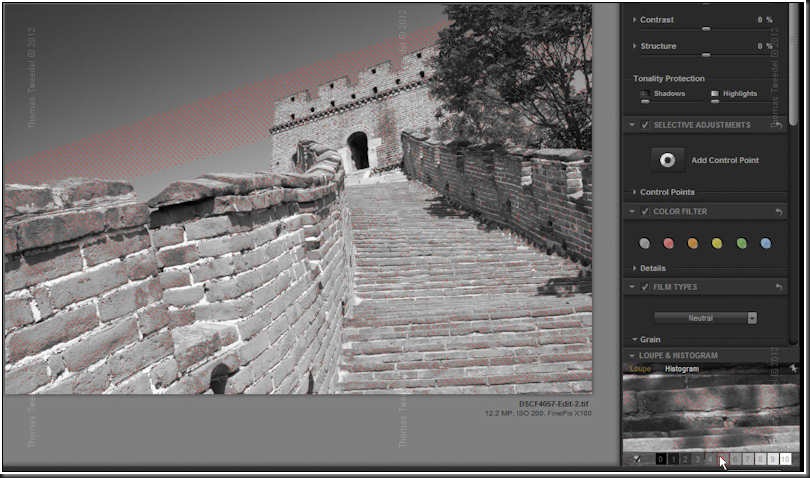
Another learning tool is the Loupe and Histogram down at the bottom. What makes it interesting is that it has the zone system of exposure evaluation built in. Hover over an exposure zone and it will highlight the areas of the picture that match that zone.
Film Types
When shooting B&W we often chose specific films for specific looks. A combination of the grain structure and tonality. This has been one of the more difficult to reproduce effects in the digital world.
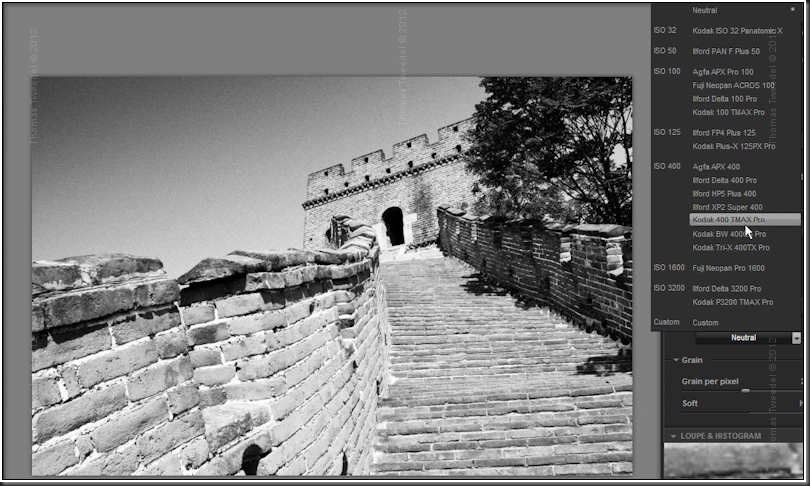
Simulated Kodak TMAX ISO 400
Silver EFX Pro comes with a bunch of film types pre-set and they give you a live preview as you select them.

If the presents are not to your liking the Grain and Levels and Curves controls gives you the freedom to go where you want.
Fuji x100 F2.8 1/45s ISO 3200
I am especially impressed with the grain control, it doesn’t just put a grain layer over the picture like other conversion utilities I have used, it reconstitutes the picture with the grain. This is perhaps my favorite feature of the program, to me grain is an essential part of the B&W look. It gives it a warm and character that a totally smooth image lacks.
Toning and More
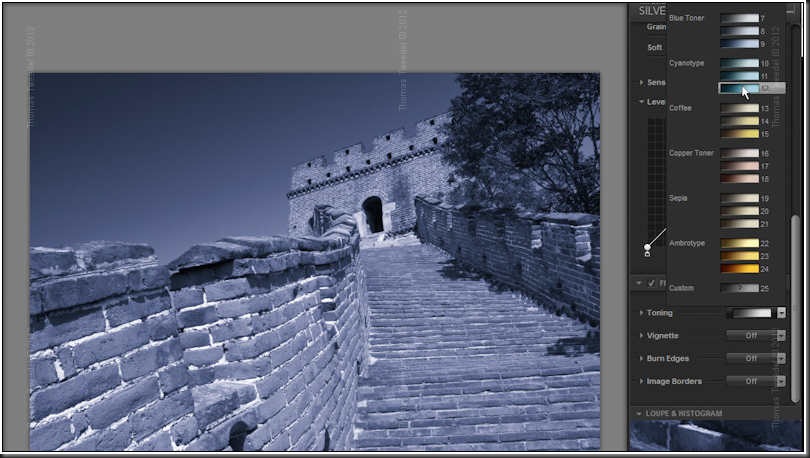
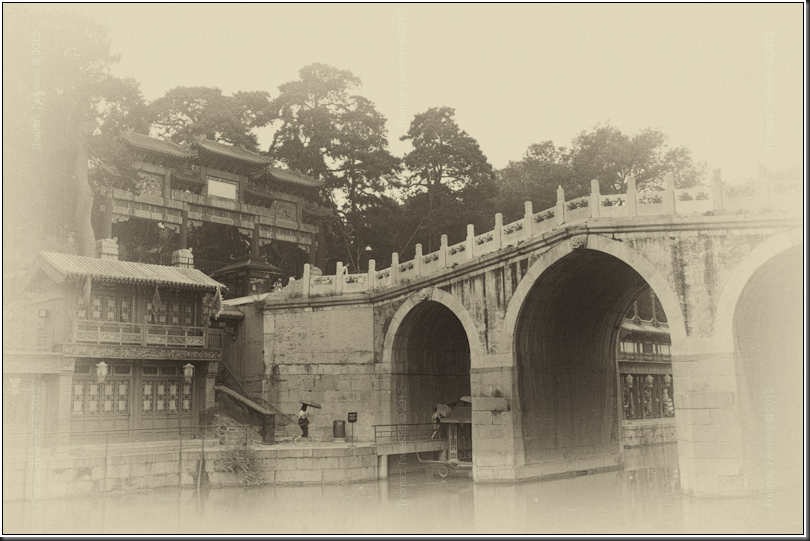
While not strictly black and white sepia, cyanotypes, tints and the like tend to be grouped artistically into the same category. The toning tool makes it easy to simulate a variety of effects.
Fuji x100 F8 1/250s ISO 200 Processed
Finally there are a variety of edge effects and borders to round out your picture.
Conclusion
After you have processed your image you hit Save and it exports it back into your source image processing program. From there you can do any additional manipulations before saving it in the final form.
Silver EFX Pro is an amazing tool for B&W conversion. It can be used at a very simple level with the presets or you can drill in to achieve all the detail your vision posses.
Photography News of Interest *menu
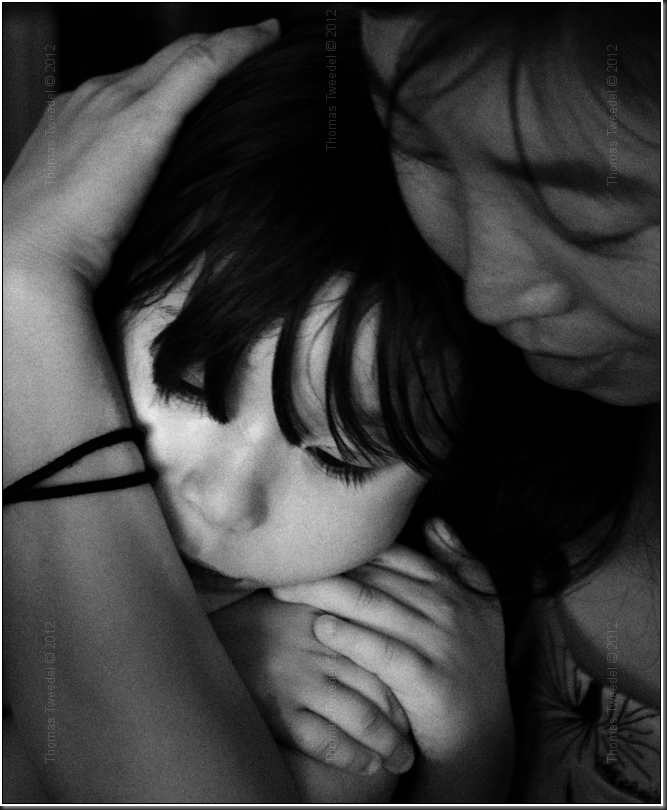
Time Magazine Breast-Feeding Cover sparks controversy over an image we haven’t seen since Demi Moore posed nude while pregnant. If you haven’t already seen this one you were probably living in an igloo on one of the poles. OVERWHELMINGLY the reaction to this photograph was negative and in some cases hurtful and nasty. A great example of how even a posed image can still the flames of controversy. Another link here with Forbes view on the issue..

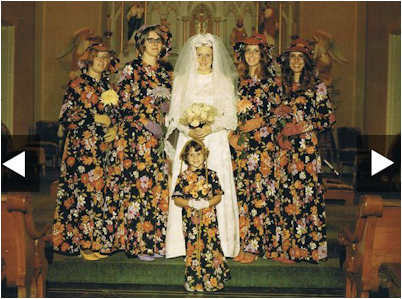
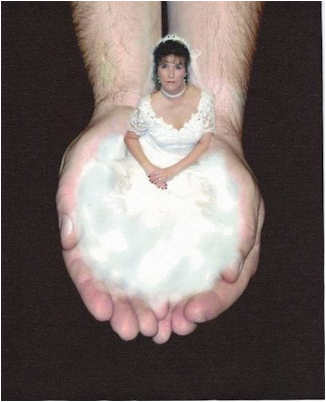
Bad Couple Wedding Photographs. After the last piece of news we needed a laugh. Do you have any similar photos in the family album?
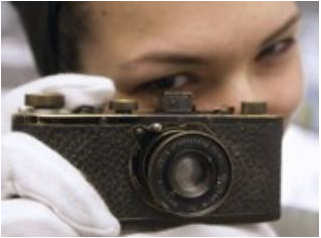
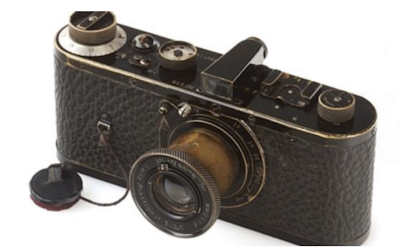
1923 Leica Camera Fetches 2.16 MILLION Euros at Auction. Talk about resell value! People are really crazy about their old Leica’s.
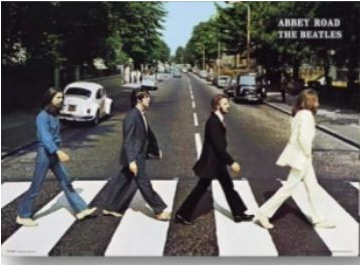
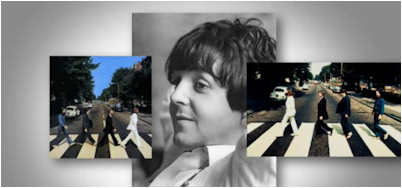
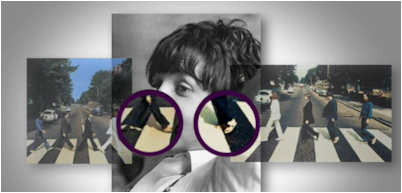
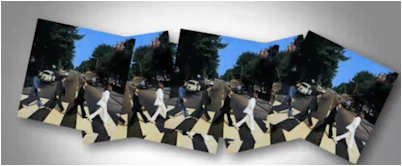
Rare Picture from The Beatles ‘Abby Road’ Shoot Up For Auction. You’ve gotta love this new twist on an iconic photograph. I’ve often wondered if the photographer would have got them going both ways and then sorted it out later. I know I would have.
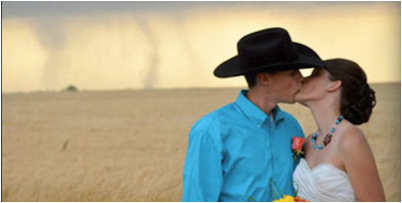
Tornado Backdrop in Kansas Wedding Photos. Oh my, do you think this is a sign of things to come? I think these are very memorable wedding photographs!
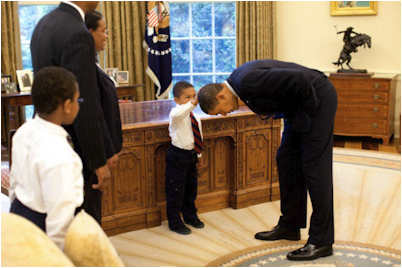
Boy Who Touches Obama’s Hair: The story behind the White House Photo which has touched so many and will probably stand the test of time as an icon photograph. The boy wanted to see if the Presidents hair was just like his so President Obama bent down and told him to feel it and find out for himself.
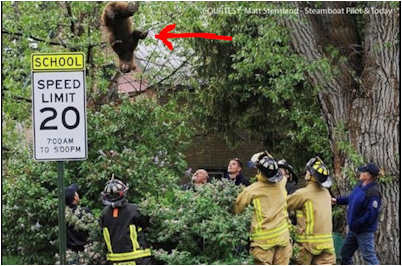
Another Bear Falls From Tree. There’s been a lot of these. But this looks just like Yogi himself and he’s smiling. Probably thinking about that picnic basket.
Ridiculously Photogenic Surgery Girl. She’s following in the footsteps of the recent web sensation of the ridiculously photogenic man who was picked out of a marathon group.

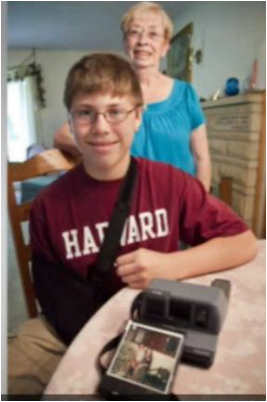
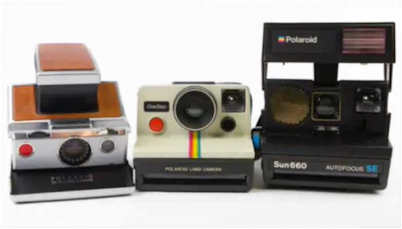
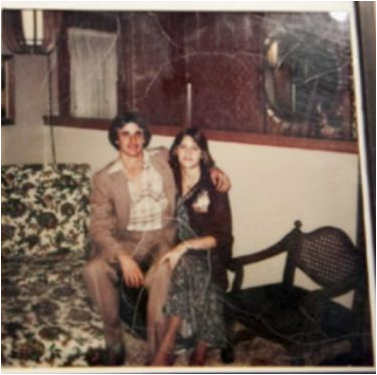
A Boys Garage Sale Fine Reveals Long-Lost Photo of Uncle He Never Met. Is this a case of a very small town, or was this really special? The boy bought a Polaroid Land camera and found the picture inside.
Readers Submissions *menu
There were no readers submissions this month.
I’d like to mention that everyone, myself included, is really enjoying the current trend of readers submissions. Everyone loves them, but remember we can really use more. I have only another week’s worth in my queue, so please take the time to put together a few images and words if you can and send them in. Thank you. info@BangkokImages.com
Readers Questions *menu
Steve:
Just checking in to be sure your packing for BKK is on schedule.
While I always looked forward to your weekly columns, I must say the monthly releases have certainly been very good reading. They are full of good info and great pictures.
I have sold all my photographic gear on E-Bay over the last few weeks including the FujiX-S1 and am now building on my new Nikon D5100 body. Looked at other (D7000 etc.) alternatives for my needs, but it kept coming back to the D5100. Lenses to date are the Nikon 18-55, Nikon 28-300, Sigma 18-250 (great lens) and due in a week or so the Sigma 120-400. (When I hit the lottery, it will be the Nikon D800, sweet). My wife and I share these lenses as needed.
A few items of interest:
I am testing SMUGBUG as a picture-sharing site. Fun, easy to use and the cost are about $60 USD per year. My link is (http://ricklove1.smugmug.com/) if you are interested in checking it out.
I sold the Fuji X S1 after returning home mainly because of sharpness issues. Could not get the clarity I that I hoped for with that camera. It is a great bridge camera, easy to use, looks great and has many, many great features. The net loss for the 6 weeks of use was $135, not bad, at least in my mind
A few question if you have time prior to departure for BKK.
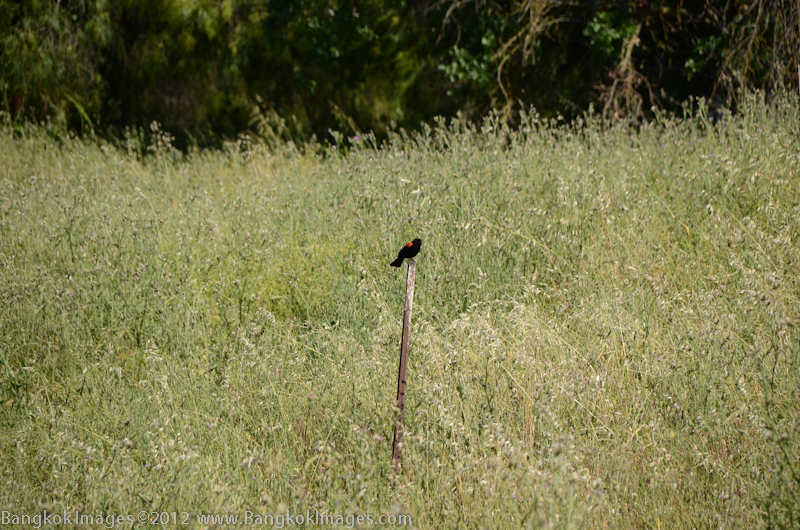
The attached pictures of the Red shoulder black bird are always very dense and show very little feather details. I have tried many different camera setting with little if any improvement in definition. Spent time with Lightroom 4 and PaintShop Photo Pro x4 with little if any change to the final product. Attached pictures were taken using RAW/fine setting on the camera and with the Sigma 28-200 lens.
The other question involves something you had mentioned earlier concerning post processing a number of pictures taken in a sequence. It was that LR4 would allow you to alter the first one then save the settings to use on the rest.
Looked thru my LR instructions and did not find information on this feature. Any help or advice would be great.
Enjoy your trip and stay safe.
Rick
RIck –
I haven’t packed yet.. but I will start staging my equipment soon. I’ll be trying to bring a lot of equipment – cameras, lenses, strobes, speedlights, lightstands, etc.. in the smallest possible package..
I’m happy you’ve enjoyed the columns. I think having a variety of guest writers really improves the column more than anything.
A comment about your long focal ranges:
Wow! If I could make a suggestion.. look at a higher level of lenses. You’ll realize the most difference with quality glass. Oh.. and you’ll need to invest in a quality tripod. Have you read Thom’s Tripod 101? http://www.bythom.com/support.htm
A comment about your images:
Two issues with this image after looking at the RAW file.
1. You’re not nearly close enough to the bird to capture good detail. Birds are very hard to photography because you either need to be extremely close to fill the frame due to their small size.. or you need a really high quality long telephoto
and all that entails to capture them from afar.
2. The lens you used is of medium quality.. so even up close you’d have obtained marginal results.
A comment about syncing develop settings in Lightroom:
This is an easy one to answer. Do this.
a. Adjust the reference picture in the develop module to taste.
b. Right click on the thumbnail of this picture and then click on “develop settings, and then “copy settings.” You’ll get a dialog box which allows you to select or deselect specific settings. Make your choices and click on
save.
c. Now, highlight all the images you want to transfer those settings to. Once highlighted right click on any of those thumbnails, click on “develop settings” and then click on “paste settings” and it will change all of the
highlighted images to show those settings.
d. Alternatively you can tell it to “sync” by highlighting the images you want to change, and right clicking on the reference image and choosing “sync.”
I hope this helps Rick.
Thanks Steve for info.
I canceled the Sigma lens for now. The D5100 body does not have a focus motor. With that in mind what upper level Nikon lens(s) would you think would be good for my bird and other critter photography? I am sure it needs to be 200-300 mm min and would like a zoom. From what I read the Sigma and Tamron lenses are not the best glass out there.
Any suggestions?
Rick
Hi Rick –
There are very few really quality zooms in the telephoto range. I think everyone should have the 70-200 F2.8 AFS VR (if they shoot Nikon) and the 1.4x teleconverter in their bag.. but after that focal length you have only the 200-400mm zoom ($7000) which
is of acceptable quality. I doubt you want to spend 7-8K on that lens right now..
You’ve seen my Beung Boraphet gallery here? http://www.bangkokimages.com/Galleries/Nakon-Sawan.aspx 95% of these images were shot with a 300mm F2.8 IS (VR) lens.. a very expensive lens and way too short for this subject. Most of this images are severe crops. So this should give you some idea of the quality you can expect at 300mm with probably the sharpest/best lens Nikon or Canon makes. With a crop frame camera that would make it a 450mm focal length.. and with the 1.4TC 580mm. Yet, I’m doubtful you want to spend the 6-7k for that lens as well.. and all of these above lenses are big/heavy and require an additional $1500-$2000 in tripod/head combinations.
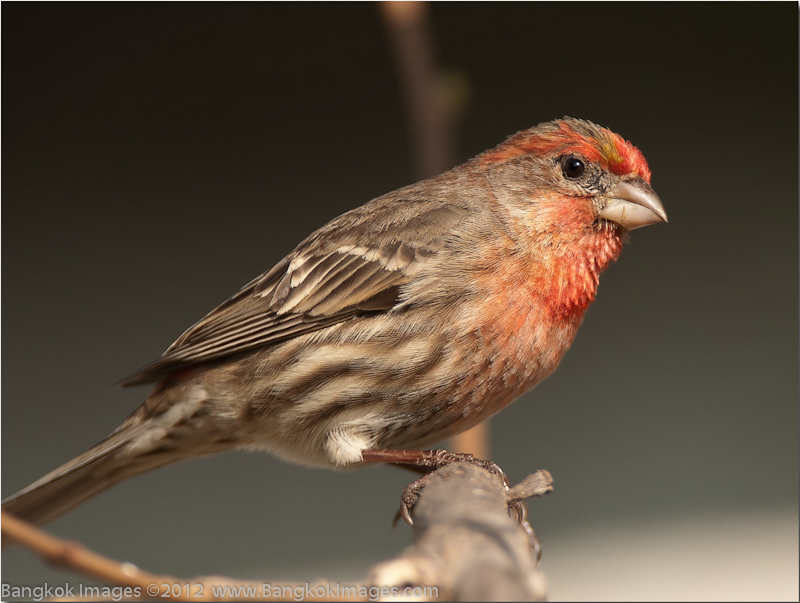
When I was shooting a crop frame camera using the 300mm F2.8 with a 2x teleconverter (900mm equiv) I took a few of these images of a small 3-4” tall sparrow. These were taken 12 years ago so I’m sure the equipment has improved since.. and
these are the full size after the crop.. I was less than 20 feet away. So this should give you some idea of the focal length and effort it takes to make good bird captures. Birders have some of the most skill of any photographers.
All I’ve said above.. is with 10k worth of lens/tripod/teleconverters.. if you can get within 20 feet.. you’ll some mediocre images and that’s only with lots and lots of practice. I can’t tell you how much practice it takes
to have made these images.
So.. a reasonable compromise? The 70-200 F2.8 VR or 70-200 F2.8 VR II ($2400).. I wouldn’t hesitate to buy grey market or used from a reputable seller. With the 1.4tx you’d have a max reach of 420mm effective at F4. With the 1.7x you’d
have a 510mm effective at F5. Still, about half the focal length of the setup I used for the sparrow pictures. Yet, the 70-200 is a really great lens and very useful for many other types of photography that it takes on more value because of that.
After you got the 70-200 I’d seriously consider a good used Nikkor 300mm F4 ED-IF lens ($1380). These are much smaller and much less expensive than the 300mm F2.8 VR II($5300) so you can get into the focal range with excellent image quality (better
than the 70-200 and better than any of those Sigma’s you’re looking at) relatively cheap.
Next down the list would be the Sigma 120-400mm you cancelled.. It’s a compromise.. but you’ll have to figure out which is more important to you.. focal reach, image quality, aperture, etc..
This is where most people take the lesser expensive route, use it for a few months to a year, sell it at a loss, and then buy the one they wanted/needed anyway.. J
Think about the 70-200.. you’d love it for general use, portraits, short wildlife.. and much more.. And you could see what it feels like to have a quality lens with both image quality and focus speed.
If the 70-200 is too much.. don’t hesitate to get any used 70-200.. or even the older 80-200’s. This genre of lens has always been good.
I hope I’ve been helpful.. but I fear I’m just scaring you.. J
Steve
Please submit your questions to info@BangkokImages.com All questions will be answered and most will show up in the weekly column.
A Snapshot of Bangkok Images Month in Review *menu
![]()
This months column is humbling. Almost the entire column has been written by guest contributors and I couldn't be more thankful. It's also a strong indication our column is growing and acquiring a larger readership and of the keen interest in
photography among the Kingdoms visitors and expat community. I remain thankful to Stick for providing this platform.
I’ll be in Thailand from June 21st through July 21st and available for workshops and other assignments. If you’d like to discuss a workshop or reserve a date shoot me an email at info@bangkokimages.com So far the response has been very good so contact me as soon as you can to reserve your date if interested.

I continue to advance my business on this side of the Pacific and I'm doing more and more local gigs. Yet, I can't wait to return to Thailand in a few weeks and spend the month doing shoots and holding workshops for my clients and meeting up
with good friends.
Infocus Blog, Thailand Photo Stories by Dana *menu
LensCap Stories
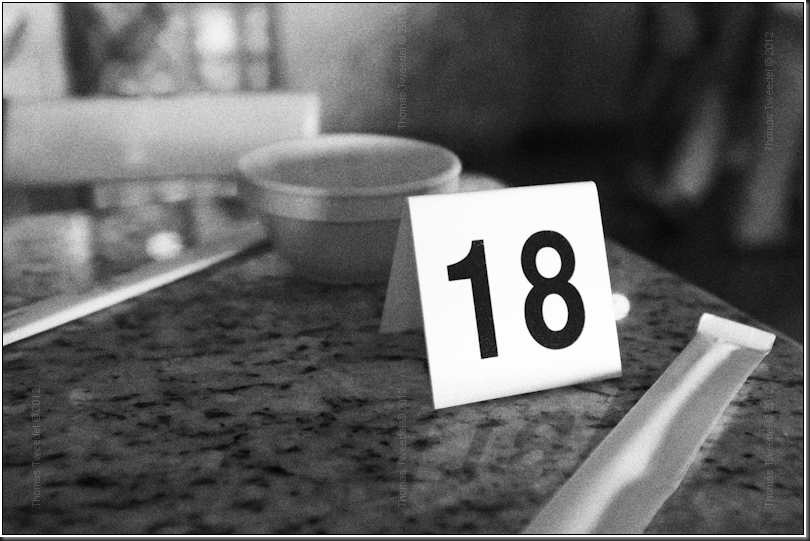
1. So here's the deal. I'm in the newly renovated Foodland grocery store on Soi 5 in Bangkok when I see him. God. God was there looking at the 18B notebooks. Same notebooks I use for making journal entries when I am visiting Thailand. Anyway,
we get to talking. He had kind of an Eskimo-Russian-Scottish-Japanese-Australian accent. Apparently, after making the heaven and the land and the water and 'all that dwelled within' he just headed for the Kingdom. Six days of
really hard work and then chillin' ever since. Said he had an apartment on Soi 22 and hung out at the Denny's Bar. Anyway, I got a picture. Actually, two shots of him looking at mangos. Only thing is, I left the lens cap on.
Well, I didn't actually leave the lens cap on; it's more like I forgot to take the lens cap off. A small point but the result is the same. So I don't actually have the pics to show you but take my word for it, I got two
great shots of God weighing up a sack of mangos. Lens caps. Whose idea was that? Oh, I forgot; God's.
2. Here is a story from many years ago.
Year: 1516
Place: Turin, Italy
Event: Italian Astronomer and Witchcraft Club (IAWC) meeting
Speaker: Genalco Guido
"Thank-you astronomers and witchcraft coven delegates. It is my pleasure to announce that February 18th of this year at 2:46 a.m. I saw a black hole explode in star formation X495SL. Yes, I got a picture. Only thing is, I forgot to remove the lens
cap before I depressed the shutter release button. But take my word for it, the most interesting photo in the history of heavenology was taken by me.
3. Ok, this is too awesome for words, especially if you are a fisherman. Fishing near the headwaters of the Mekhong river with specially designed rod, line, leader, hook, and boat I caught a 957 pound catfish. In the ensuing battle my boatman was knocked
overboard and drowned but the important thing is that I was able to get this fish monster ashore and get a picture with my boatman's camera. I didn't know how to work around the telephoto lens so I had to back up two hundred
yards to get the picture. But I got the picture. Only thing is, I forgot to take off the lens cap. Look, just take my word for it; I got the fish and I got the picture. Nine hundred and fifty-seven pounds.
4. This man does not feel tainted by stupidity. He is going to run for mayor.
Year: 1159
Place: Manheim, Germany
Event: City Hall steps
Speaker: Gunter Hesse
Hello, my name is Gunter Hesse and I would like to announce that last night at 1:18 a.m. my wife gave birth to the Devil. Before killing him with a hoe handle I got a picture. I'm sure this was the first picture of the Devil in history. I accept
your thanks and admiration. Unfortunately, I forgot to remove the lens cap on my camera so I don't actually have a picture to show you.
Angry crowd noises . . .
Ok, look; it could have happened to anyone. I just forgot to take off the stupid lens cap is all. Could have happened to anyone. How about a little love and a little credit here. How may of you have taken a picture of the Devil as it came out of your
wife's body? I plan to run for mayor of Manheim.
Sound familiar fellow photo fools? Do the words 'been there, done that' come to mind? Stories about forgetting to remove the lens cap on the camera? I have a theory that the greatest photos in the history of photography were all taken with the
lens cap on. How about you? Got any lens cap stories to tell? Why not write them out and send them in to this website. And sure, we'll believe you; whatever you tell us. Sure, we'll believe you.
Sincerely yours,
Dana
![]()
