Pai, About And Around Town/Monitor Basics
![]()
|
• Koh Tao Cabana Resort • Koh Tao Coral Grand Resort • Ko Tao Resort • Dusit Princess Korat Hotel |
I have some unfortunate news to report on this project and total 100% transparency is how I feel this should be handled. My planned beneficiaries of this project, innocent very much in need children at a certain orphanage, have fallen victim to their local manager who we have found cannot currently be trusted and I doubt this is likely to change. Decisions need to be made if we're going to carry this project forward and if so who the new beneficiaries will be. I do expect this project to generate significant revenue so I take it very seriously. As you read this I'll be back in the Mae Sot area investigating further. I'll keep you informed. For now I'll still collect images with the intention of making the best most meaningful mosaics possible and as always, I'm asking for and will greatly appreciate your help with the images.
We are still accepting (and pleading for) images of children from SEA. No matter how terrible you think
they are, please send them in anyway. These images will be used to complete a set of 3 high quality mosaics which will be sold to benefit the Karen and Burmese Orphans living in the orphanages and refugee camps. The more images the better, I can
use all you have. Please take the time to go through your images for anything you think might help. If you missed the "No Place to Call Home" special, you can
click on the link and read more about this. Thank you! info@BangkokImages.com

Quick Click Links
Feature Photograph
Pai, About and Around Town Monitor Basics

Photography News of Interest
Readers Submissions
Readers Questions A Snapshot of Bangkok Images Week in Review
Infocus Blog, Each Week Is A Surprise!T

Feature Photograph *menu

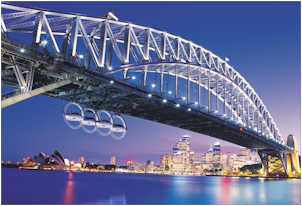
Canon 5d Mark II, 24-70mm F2.8L USM @F8 1/160th 24mm ISO 100
Koji Inchiro desperately needed to get this right, his fragile military future depended on it. His next assignment would either be a relatively cushy job as part of Admirals Staff documenting the Imperial Fleets victories in the Pacific, or assigned as a prison guard serving out the war in this hell hole of South East Asia. Balancing the 1920’s vintage American made Afgha ‘Clipper’ view camera on a triplex of carefully hewn poles formed into a crude camera stand he carefully measured his focal distance to avoid parallax error, gently took up the slack on the film advance winder ensuring the film lay flat against the box, and holding his breath incrementally pressed the shutter release until he heard the worn focal plane shutter slide open over the film, and then back again. Roughly 1/20th of a second.
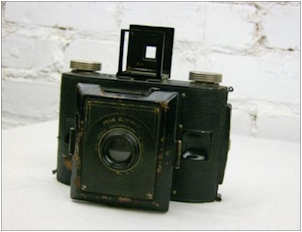
The camera was a trophy taken from a British prisoner which he’d discovered in the property room the week before. Diligently he studied its odd language markings and functions all of the last week until he was confident he understood its secrets. If Imperial General Headquarters were impressed with his photographic skills, perhaps the cushy staff position would be his. Excited with his capture he rushed off to his makeshift darkroom to develop his last remaining negative. All around him prisoners of war were busy working, hammering spikes, laying rails, and moving heavy logs with the help of the local Thais and their strange beasts called elephants. The blistering heat and stifling humidity were barely noticed today in his haste to develop his prize. A thousand thoughts went through his mind as he practically flew down the hill towards his improvised darkroom.
I made that up. Yep. Fun isn’t it? In reality I probably spent a solid dozen hours processing this one image over and over again, trying to make sense of its vintage construction amidst modern surroundings. 7-8 color versions didn’t work for me, 2-3 black and white versions didn’t look right either. This was when I started researching the history of the bridge and my mind wandered back in time 60-70 years and I briefly became Koji Inchiro. It could have been a true story, maybe it was, that’s the fun of writing.
Initially I wanted to tell you how difficult it is to make such a capture, especially to the degree of accuracy and lucky weather I was fortunate enough to combine. But the history won out. You see, when I started researching his bridge I found much conflicting information.
The general consensus and thatlisted on Wiki claims this bridge was built by Dutch, British, Australian and American POW’s as was The Bridge Over River Kwai which is well documented in the Death Railway Museum in Kanchanaburi. Others would lead you to believe that while the road was completed the 135 km from Chiang Mai to Pai, and from Pai into Burma, the bridge was never completed until after the war, and only then because it benefitted the locals.
The more accurate historical account was a bridge was completed by the Japanese using POW labor and local Thai’s using their elephants to drag 30” diameter logs from the local forests used to construct the wooden bridge. However, the Japanese burned down this bridge as they retreated from the area and then another less solid wooden bridge was built by the locals, but didn’t last long when a storm that same year took it out.
Later, the villagers petitioned the government to move the Nawarat Steel bridge from its then current location. Their wish was granted and over the course of the next year the bridge was erected, and is the bridge we see today which we call the Ta-pai bridge, or by its other name “The World War II Pai Historical Bridge.”
This wood and steel bridge very much resembles The Bridge Over River Kwai. The similarities in construction and materials are evident. Yet, it doesn’t stand up to history that it was built by Allied POWs. But the wooden bridge before it was.
Bridge Over River Kwai, Kanchanaburi. Canon 1ds Mark II, 24-70mm F2.8L @F8 1/250th 32mm ISO 100
Pai, About And Around Town *menu
This is the second installment on our trip to the Mae Hong Son province. Initially I considered running it all together into one long special. More, I was tempted because I really enjoyed Mae Hong Son and I weighed putting all the information together in one ‘special’, vs. four separate shorter pieces while keeping the regular column format intact.
What was it about Mae Hong Son that go to me, that ‘settled’ my spirit in such a significant way? I wish I knew the answer. Perhaps it’s because there is a such a stark contrast between the small towns like Pai which you can find throughout the province, and the busy metropolitans like Bangkok and Chiang Mai. Perhaps it’s the slower pace of a more genuine and honest people, compared to the predator nature so common in the bigger cities. Or maybe it’s just the feeling I had during my time there, peaceful, happy, relaxed, and almost spiritual. I don’t know the answer, but I highly recommend you take 5-10 days and visit the area.
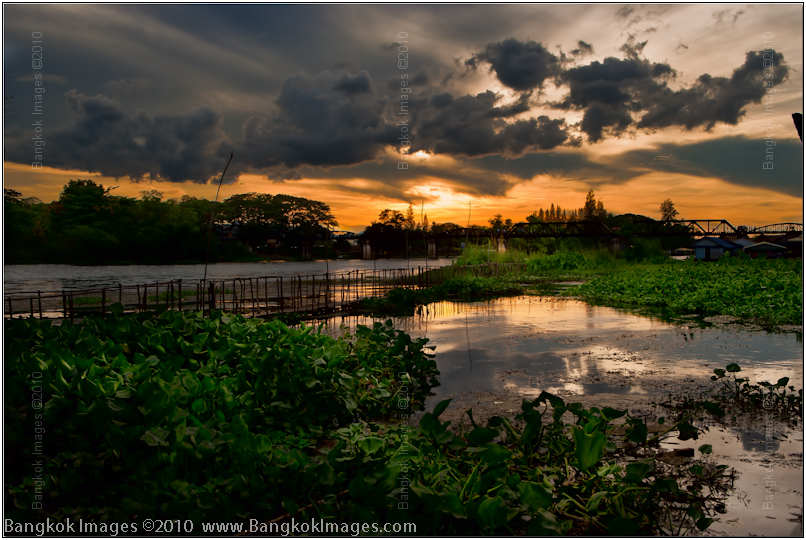
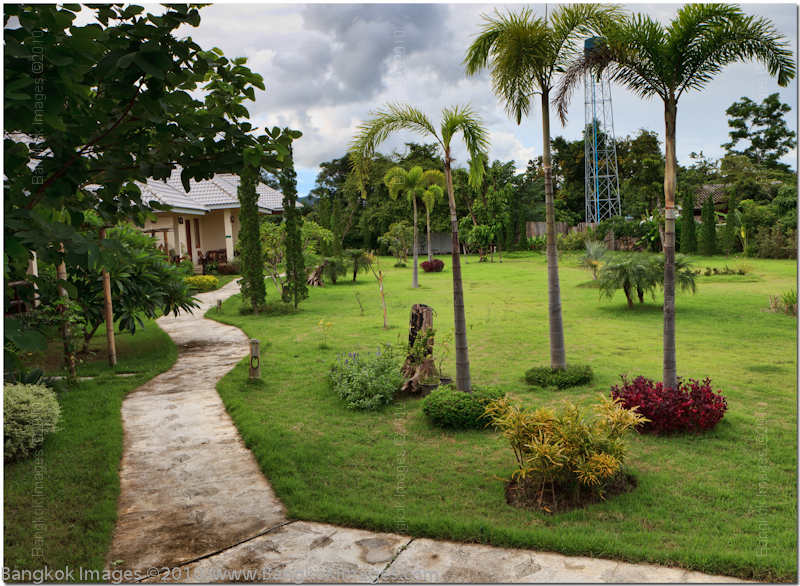
This week I’m going to give you a ‘feel’ for Pai. What it looks like, what you can expect to find there, different restaurants, guest houses, and more.

Canon 5d Mark II, 24-70mm F2.8L USM @F5 1/40th 42mm ISO 800
Let’s start with the few traditional massage parlors were Thai Traditional Massage is practiced. The work ethic and value of these establishments are remarkable. Prepare yourself for a slightly different, but much better massage experience.
Canon 5d Mark II, 24-70mm F2.8L USM @F5 1/50th 43mm ISO 160
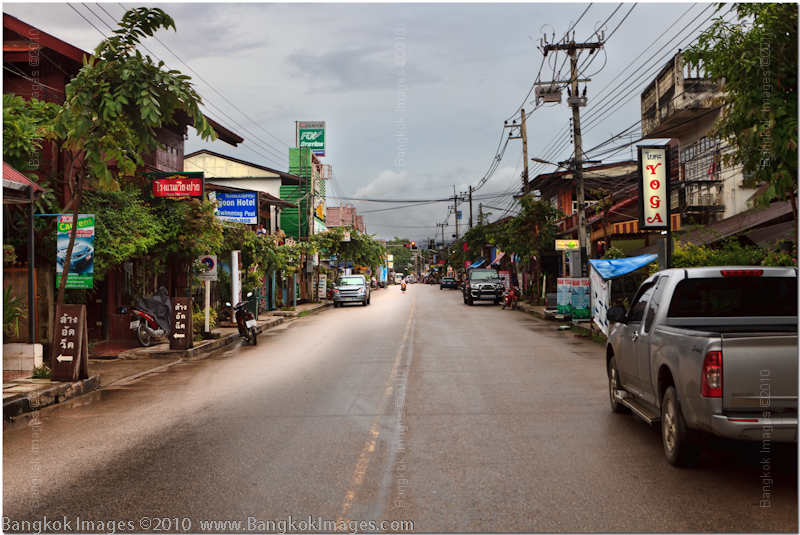
This quiet street is the most busy street in Pai, and it’s typical of all the streets in town. Easy street parking, clean mostly obstacle free sidewalks, cool temperatures, and all the fresh clean air you care to breath in.
Canon 5d Mark II, 24-70mm F2.8L USM @F5 1/20th 24mm ISO 400
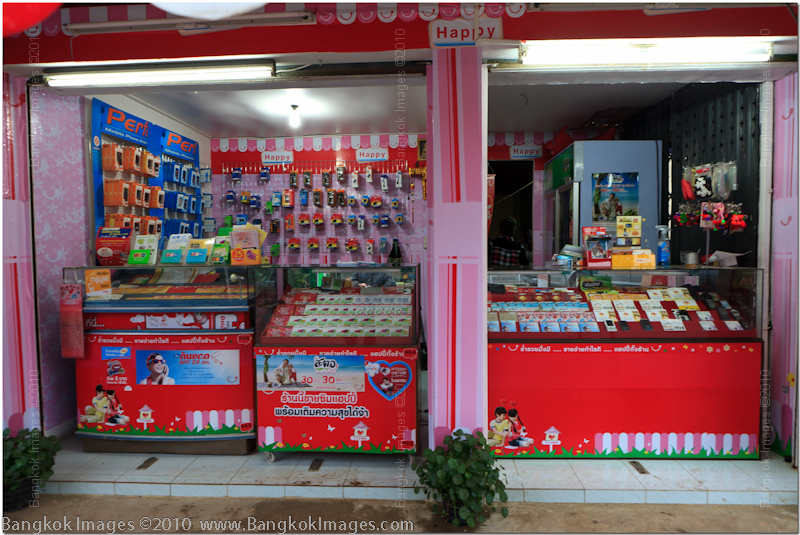
They do film in Pai! And you can also buy small digital supplies such as memory cards, chargers, and batteries for the more common models. Don’t expect much more than this.

Canon 5d Mark II, 24-70mm F2.8L USM @F5 1/60th 62mm ISO 800
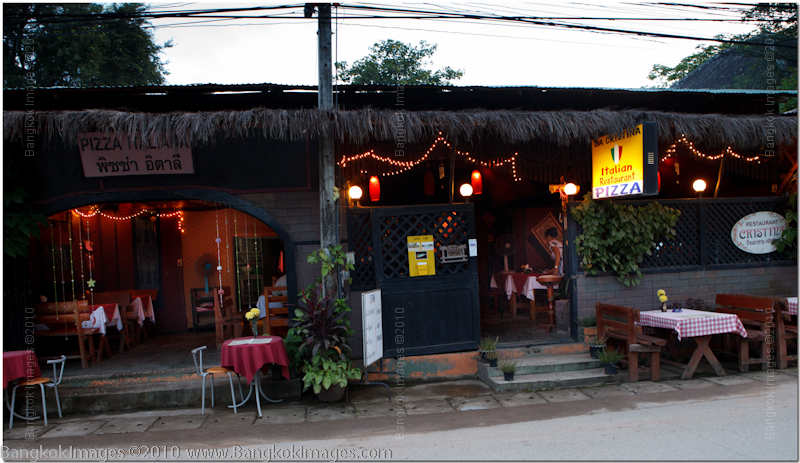
Everywhere you look you’ll find western style restaurants and most I visited are very good value with food on par with many of the better like Bangkok counterparts. This one restaurant has Mexican, BBQ, Pizza, and Thai food. Still, go by the common sense rule of thumb, if a restaurant has many customers it’s probably because they have good food at reasonable prices. If not..
Canon 5d Mark II, 24-70mm F2.8L USM @F5 1/40th 42mm ISO 800
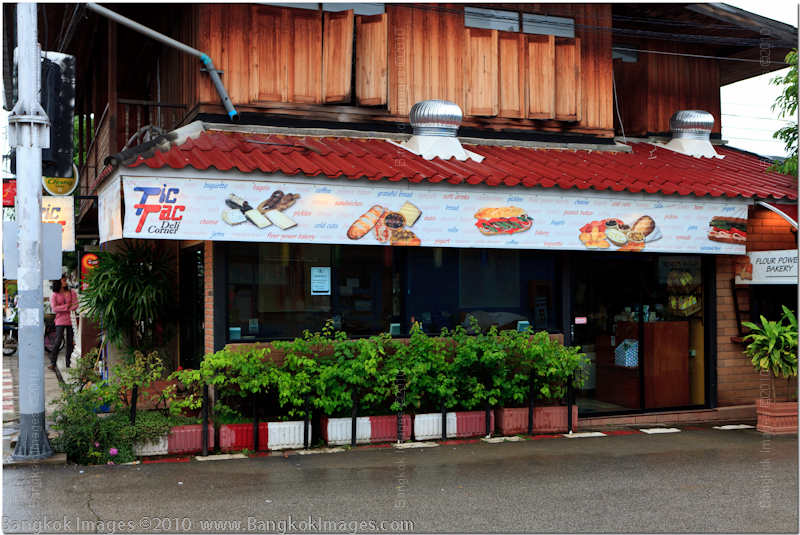
This is a genuine deli. Fresh cold cuts, cheeses, and bread baked daily. I can’t say enough about how nice it is to be able to easily park outside most any place in town.
Canon 5d Mark II, 24-70mm F2.8L USM @F8 1/20th 24mm ISO 1250
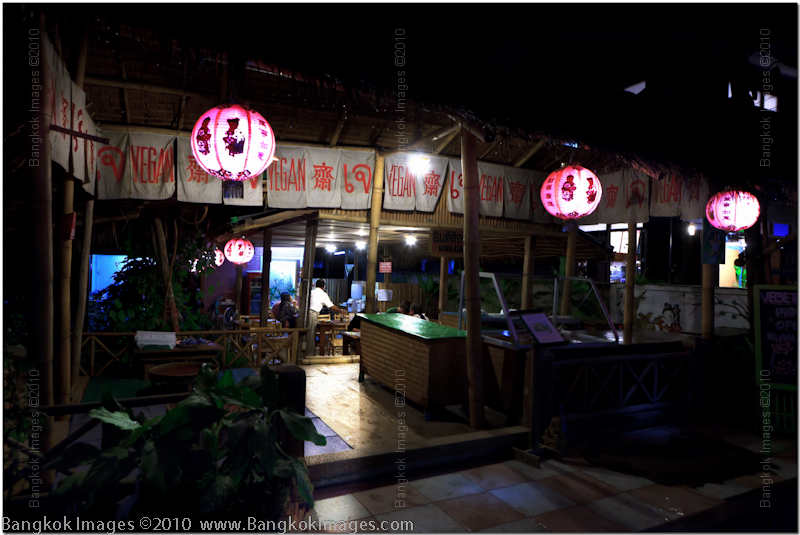
Of course there are plenty of outdoor Thai food places and most I saw were clean and comfortable. Cool, almost chilly evenings, lend themselves nicely to outdoor dining. In fact, I ate almost every meal either outdoors or in a restaurant without air conditioning and never once did I feel uncomfortable or shed a single drop of sweat.
Canon 5d Mark II, 24-70mm F2.8L USM @F5 1/15th 24mm ISO 3200
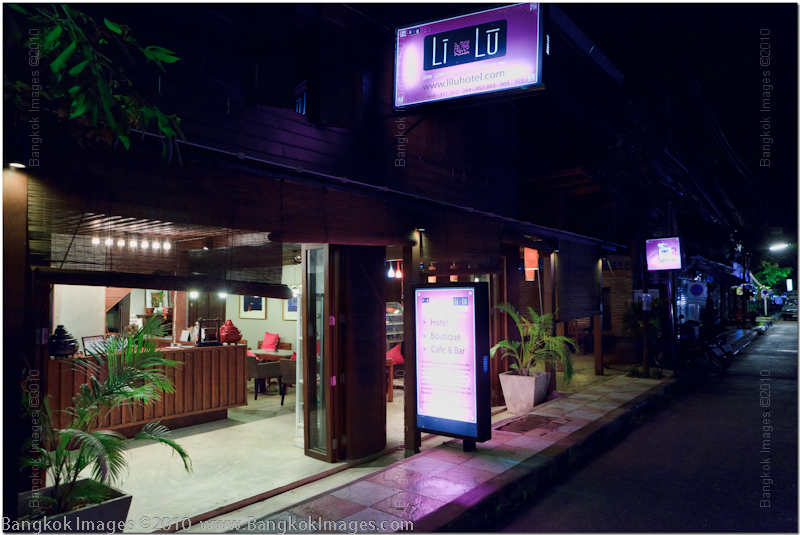
This is probably the best hotel in town. I stayed here for the duration. I had a nice modern 1 bedroom suite with a huge walk in glass shower, a very comfortable bed and comforter, television, frig, and all the normal amenities. Internet is free.
Canon 5d Mark II, 24-70mm F2.8L USM @F8 1/100th 30mm ISO 100
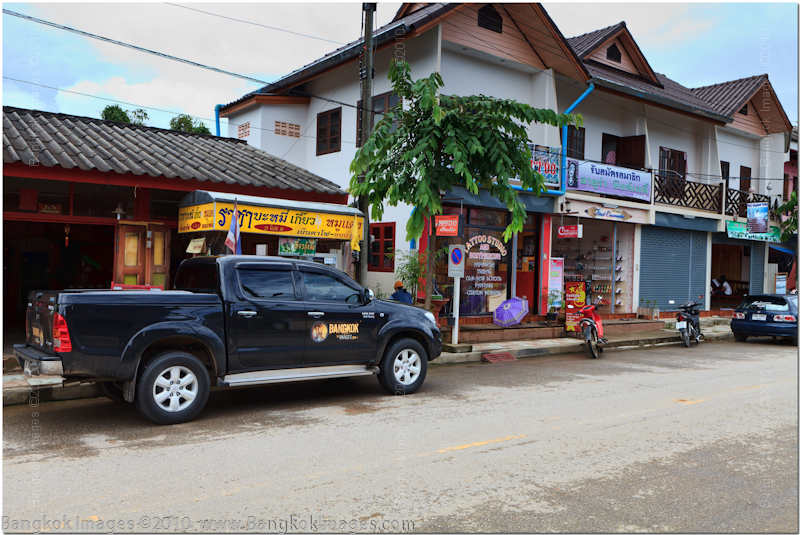
Here we are parked outside a burger joint I probably won’t visit again. The people were very friendly but the food didn’t impress. The tattoo parlor right in front of where my truck is parked seemed to be very popular. Clean too!
Canon 5d Mark II, 24-70mm F2.8L USM @F8 1/50th 50mm ISO 640
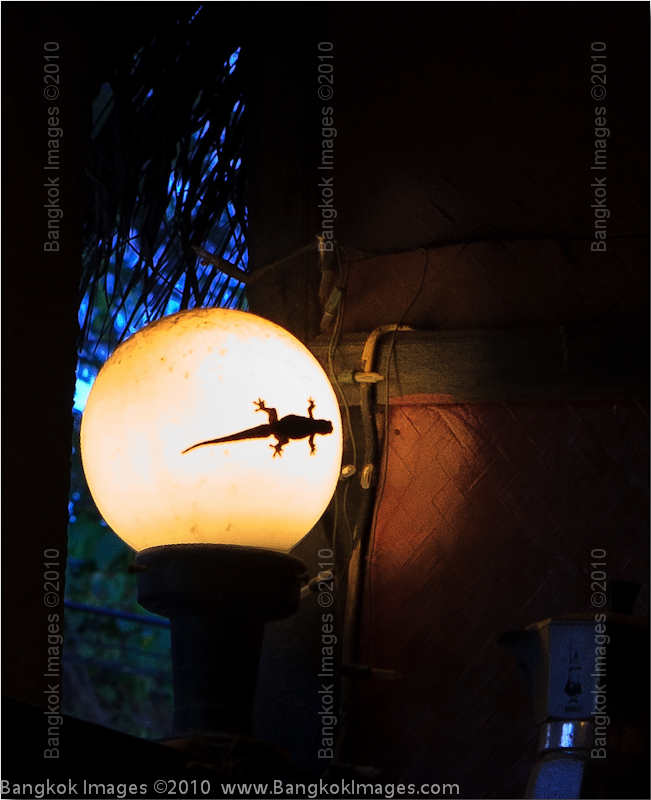
There are many barking geckos everywhere you look and I’m sure they’re at least partly responsible for the mosquito free environment.
Canon 5d Mark II, 24-70mm F2.8L USM @F5 1/40th 38mm ISO 250
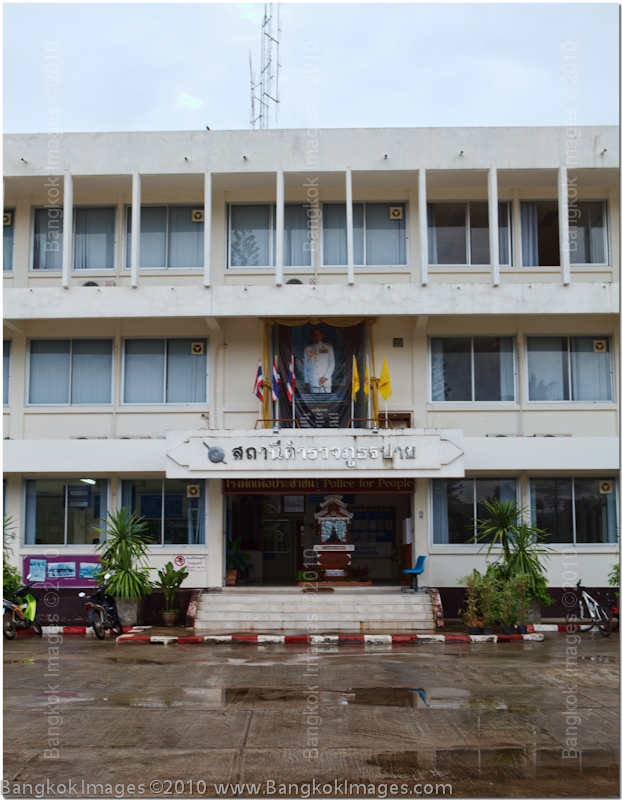
This is your local police station. They’re right in the middle of town and you’re free to park your vehicle there for as long as you like, including overnight. During the late afternoon part of the parking lot turns into a soccer/football field and the locals have a grand time playing.
Canon 5d Mark II, 24-70mm F2.8L USM @F5.6 1/25th 30mm ISO 1000
Here, I’m sitting inside an Italian restaurant owned and operated by Lisou’s which will take you completely by surprise the first time you taste their food. Completely authentic. Not the fat cheesy unhealthy pizzas and pastas popularized in the Americas and the UK, but the almost paper thin crispy crusts and homemade pastas, breads, and sauces you don’t get from a can.
Canon 5d Mark II, 24-70mm F2.8L USM @F5.6 1/20th 48mm ISO 3200
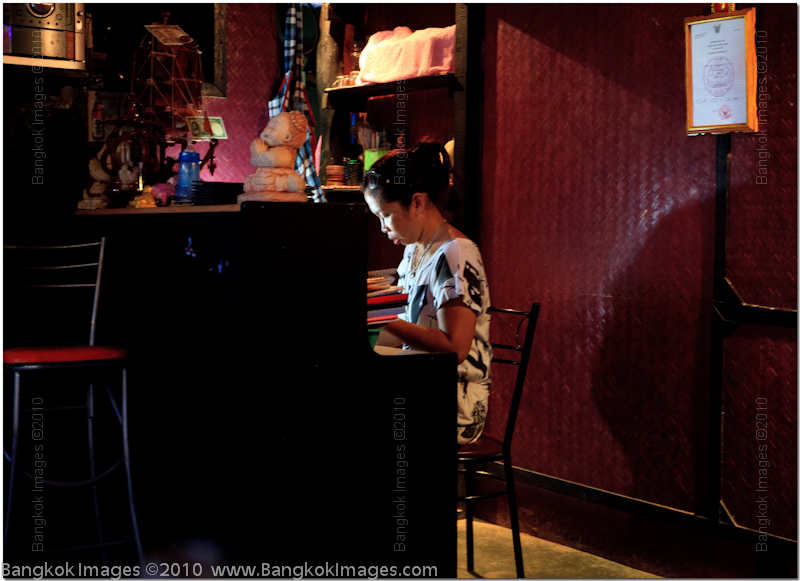
This is one of the owners. I find making such captures in virtually no light satisfying. Getting a nice clear focus at low shutter speeds and high ISO’s with directional light on the face is a challenge, but more than doable.
Canon 5d Mark II, 24-70mm F2.8L USM @F5.6 1/20th 24mm ISO 800
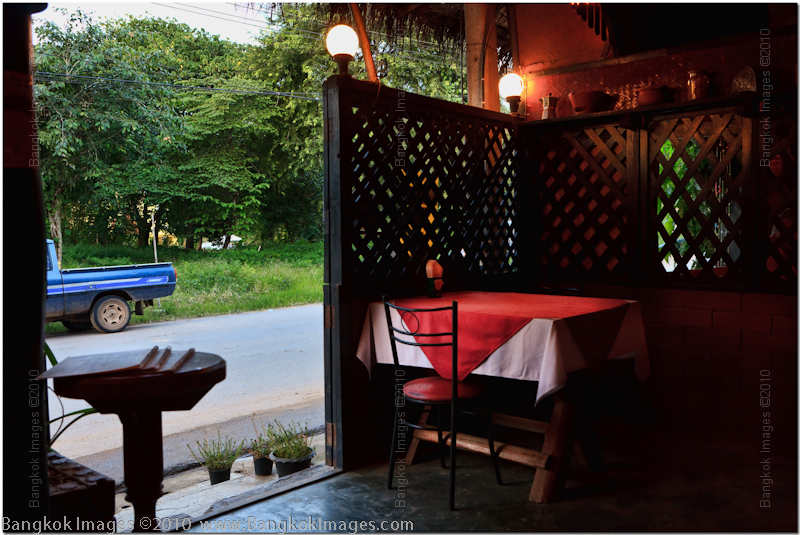
This is the third picture of this Italian restaurant, and the outside shot so you can be sure to find it. Totally covered, yet open air, you’ll be comfortable here any time of the year. On my last night here I treated my friend Eyal to dinner, as an inadequate way to say thank you for showing me around all week. We had several antipasto dishes, breads, a large pizza, drinks, and the bill was under baht 500!
Canon 5d Mark II, 24-70mm F2.8L USM @F5 1/50th 42mm ISO 800
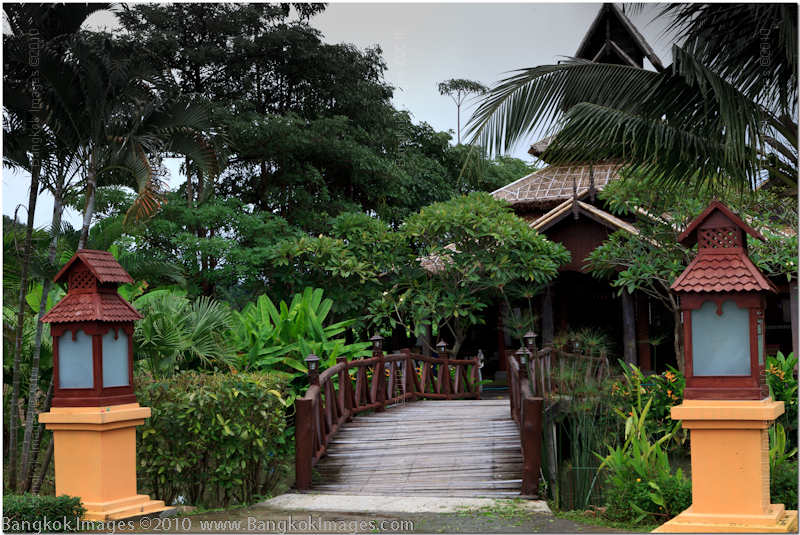
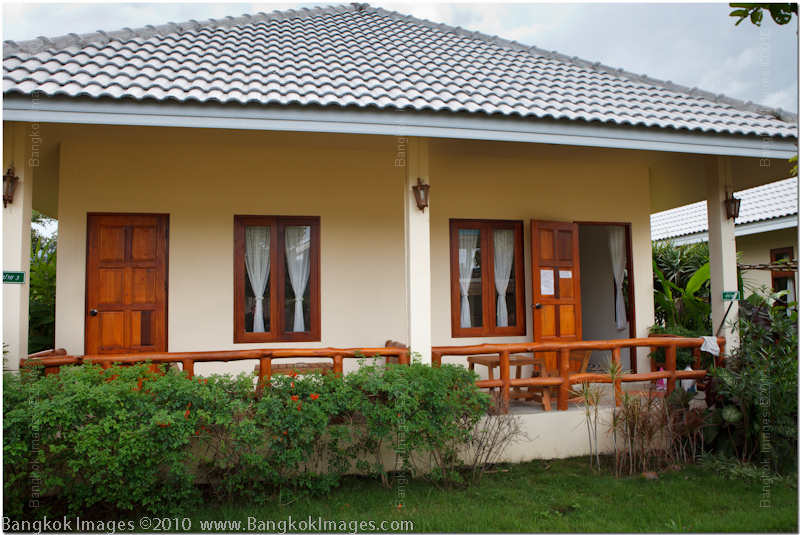
This is a very typical guest house and the remaining pictures show you this guesthouse in detail. Its important to note that Pai isn’t a ‘farang’ based tourist town. Instead, it’s a town visited by Thai tourists so you’ll find the establishments comfortable, clean, and staffed with friendly people who know what service is. Much different from the farang weary establishments which don’t care about the condition, cleanliness, or standards of service.
Canon 5d Mark II, 24-70mm F2.8L USM @F8 1/60th 52mm ISO 125
As you drive in the grounds you’ll find 20+ of these duplex bungalows with parking right in front of each unit. They’re open, airy, and very comfortable.
Canon 5d Mark II, 24-70mm F2.8L USM @F8 1/50th 25mm ISO 100
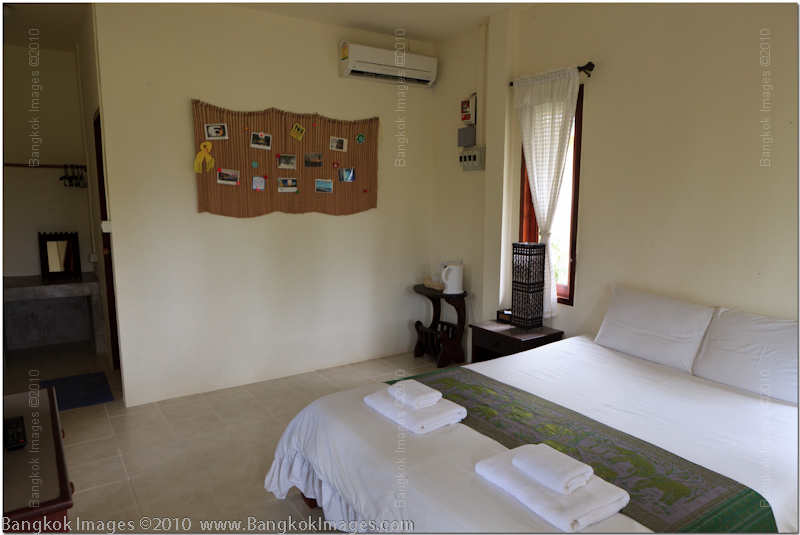
Inside you’ll find the rooms very clean, the beds firm and comfortable, and the familiar Thai style common in establishments that serve the locals. I didn’t stay here, but the desk clerk was happy to open the rooms and show me several. This room is normally baht 600 a night, or baht 3500 weekly.
Canon 5d Mark II, 24-70mm F2.8L USM @F8 1/80th 24mm ISO 100
The grounds are open and beautiful. I love the smell of fresh cut grass and the long walkways that wrap around the grounds. You’ll notice that most of these guesthouses have been built in the last 4-6 years. Pai wasn’t even on the map for Thais or tourists until about 5 years ago when a concerted effort went into promoting the region. The town literally boomed since.

Canon 5d Mark II, 24-70mm F2.8L USM @F8 1/125th 24mm ISO 100
A wider view of the parking area shows you the easy parking, manicured grounds, and the duplex bungalows pictured above. You wouldn’t believe how quiet it is while you’re standing there, or how cool and clean the air is. I never did use my A/C, I just cracked the screened windows and enjoyed the fresh air.
There are literally hundreds of guest houses just like this one scattered throughout the town, outside of town in both directions, and while they’re mostly the same, many have a different theme. Some offer traditional mud walled houses, some have big fishing ponds, others feature exercise areas. You can walk from one end of town to the other in about ten minutes. The one main street goes from end to end, and several cross streets take you in other directions which includes the Lisou and Chinese Villages which we’ll visit next week. We’ll see you then.
Monitor Basics *menu
This is a huge subject so I’m going to intentionally concentrate mostly one what we need for imaging, and list the information in a list order.
I’ll start by saying there is nothing that will bring more personal satisfaction to your photography than being able to properly see the output of your camera whether it be on print or on screen. And the better the screen, the more easy and more accurate your post processing will be and the more you’ll enjoy doing the work. If you have to struggle on a small screen post processing will be a chore you’ll avoid rather than look forward to. Put a decent imaging monitor on your list before your next camera or new computer and you’ll be well served.
Laptops
Most people these days are using laptops as their only computer. Laptops have long been powerful enough to replace older desktops and you can’t beat the ease of putting a system together or lugging it around. And it’s nice when it only occupies a small footprint on your desk.
However, laptops have their drawbacks. A standard laptop screen is only capable of displaying roughly 40-50% of the sRGB color gamut. What is a color gamut? A color gamut is like a box of Crayola Crayons. Some boxes have 16 crayons, some 64, others 128 and more. They come in different shades of colors. A color gamut is the same. The internet/web uses the sRGB color gamut as a default.
Gamuts
Look at sRGB as a box of 64 crayons. There are bigger boxes, and smaller boxes. However, if your laptop can only display 40-50% of those crayons, how can you possibly tell what the picture on the paper looks like? You can see some of the lines and markings from the crayons you can see, but you can’t see what the other 40-50% have drawn. You’re only seeing part of the picture.
Some laptops such as the Dell Precision Mobile Workstations, Dell Studio XPS 16 (a great bargain for an imaging laptop both in power and its excellent wide-gamut screen), and the Lenovo W series have very
good screens, ideally configured these models can display upwards of 97% of Adobe98 which is a larger gamut than sRGB.
Viewing Angle
However, these monitors are exceptions, and as nice as they are, gamut notwithstanding, they’re not as good for imaging as a standard desktop display. They’ll get you by when on the road, but your final post processing should be done on a desktop display. Also, laptop displays generally have uneven lighting which means the color and luminance will vary over different parts of the screen. They also have much less of a viewing angle, often a laptop screen will require a very precise viewing angle to see the true colors, contrast, and brightness. I’m sure we’ve all experienced having to tilt the screen to see the best display.
Desktop displays are almost always better than laptop displays. Even a low end 4000-5000 baht desktop monitor will be better suited to imaging than even the best laptop displays when you take all factors into account. Laptop displays just don’t have the thickness necessary to evenly backlight the displays and this creates uneven color and luminance. Even the new RGB LED backlit laptop displays suffer from this issue. What good is a full gamut if its colors and luminance aren’t uniform from one end of the display to the other?
If you use a laptop I highly recommend purchasing an external desktop display to use for imaging purposes. Also, keep in mind that most every laptop sold up until the last few months were incapable of suppling the LUT (look up table) from the video card, which is necessary to hold the color profile which then adjusts the colors/brightness/contrast on the monitor. If you have a monitor which requires a video card LUT, and that would be over 98% of the models sold, then you
can only assign one color profile to one monitor at one time when using a laptop. A caveat would be the newest laptops with the ATI Mobility Radeon 5000 series video cards. The specs are showing these can support two, but I haven’t tested
one yet. I hope to soon.
Desktop Displays
Panel Type
These have several panel types. There are two types we’ll talk about. S-IPS and the others. S-IPS are the preferred panels for image processing. They used to be limited to the very expensive professional models, but recently we’ve seen some very reasonably priced S-IPS panels with the release of the Dell U2410, and U2711. Viewsonic has also very recently released their VP2365WB S-IPS monitor and other manufacturers are announcing S-IPS equipped models for future release.
The advance of S-IPS monitors are their 178 degree viewing angle and color uniformity. They also tend to have wider gamuts approaching or exceeding 100% of sRGB and some even exceed 100% of Adobe98. Other monitor types like my new Samsung BX2450 which I purchased for my travel uses, to have a better monitor than a laptop monitor while on the road, only displays roughly 75% of sRGB. 75% is very workable if you can’t afford an S-IPS equipped panel, so while it’s nice to have more coverage 75% will serve you well.
So, if you can afford a S-IPS equipped desktop display, but all means get one. The Viewsonic VP2365WB is $289 in the states but I can’t find one here. The Dell U2410 is about $469 in the States and the U2710 about $740. Both the Dells can be ordered from Dell Thailand. But if you can’t find or afford an S-IPS monitor, look for a LED backlit matte screen model like the Samsung BX2450.
Size and Resolution
All else being equal, the bigger the display and the more resolution it has, the better. There’s nothing like a nice large 24 inch monitor to make post processing and image viewing enjoyable. If you can possibly afford it, get some nice 26-27 inch displays. 30 inch displays are awesome in size, but there are only two out there worth owning. They tend to have severe problems with color accuracy and luminance from one end of the screen to the other.
24” screens will usually have 1920×1200 pixels of resolution. My 25.5 inch NEC LCD2690uxi2’s also have 1920×1200 and I love them. I’d rather have quality pixels than more pixels. Most 27” monitors like the Dell U2711 have 2560×1440 and I’d stay away from anything less at this size. 30 inch monitors are 2560×1600. Newer less expensive 24” monitors like my new Samsung BX2450 are geared towards multimedia so they have a 1080p geared display which means 1920×1080.
Matte or Glossy?
Matte screens are always far preferable to glossy screens. Matte screens have much less reflection, more uniform color, and will appear sharper than their glossy counterparts. Don’t let the high contrast and over saturated colors used to market monitors to those mostly interested in gaming or movie watching fool you. They look impressive at first, but when you try to work with them for any length of time you’ll soon discover their faults. If you have doubts, notice that not a single professional graphics or imaging monitor comes with a glossy screen. The top end monitors sold to imaging and graphics professionals are 100% matte.
Connectivity
There are four major types of monitor connections. VGA, DVI, Displayport, and HDMI.
VGA – This is an analog signal common on older desktops and most every laptop. It’s a D shaped blue connector with 9 pins. If your laptop only has a VGA output, then you’ll need a monitor which supports VGA.
DVI – This is a digital signal and is the connector you’ll find on most serious desktop displays. It’s a D shaped 15 pin connector. Very few laptops, 3 that I know of, ever came with DVI outputs.
Displayport – This is a relatively new connector and it has more capabilities than DVI. It carries both sound and video information and you can even ‘daisy chain’ Display port capable monitors. More and more new models will include a Displayport connector and they’re already standard on many video cards.
HDMI – This is a connector made popular with newer HDTV televisions, DVD players, and Blue-ray players. It’s a multimedia type connector which is digital and it carries both sound and video channels. These are great for television and work well for computers. Current generation laptops often come with HDMI output ports instead of the older VGA ports, and virtually all newer cameras have mini-HDMI connectors so you can connect your device directly to your HDTV, of if so equipped a computer monitor.
Which connectors to shop for? If you’re shopping for high-end imaging monitors look for DVI and/or Displayport. HDMI is nice but doesn’t really offer much advantage over the others because most computer monitors don’t have speakers.
If your laptop only supports VGA then get a monitor that supports both VGA (analog), or you might look for one that supports both VGA and HDMI so it will also support future laptops.
Many models will support all three like my Samsung BX2450.
My new NEC dedicated imaging monitors have both VGA and DVI, but no Displayport or HDMI. All the digital outputs (Displayport, HDMI, DVI) will provide the same level of image quality. So basically, you buy to support the laptop,
desktop, graphics cards you have now, and perhaps ‘future proof’ a bit by making sure it has a digital output, and if your future includes a new laptop make that a HDMI output. I know that’s
a lot to chew on, but those are the choices we have.
Other monitor connectors like USB ports, speaker ports, card readers, aren’t necessary and I wouldn’t consider them a plus when choosing a monitor.
On Screen Display (OSD)
Look for an OSD that supports at least: Contrast, Brightness, and the Red/Green/Blue channels. The more useful features the better, but these are the minimum you should be looking for. It’s possible to profile a monitor without these controls (as you would a laptop), but the profile won’t be nearly as accurate as if would be if you had access to these controls.
Base/Stand
There are many types, but what you want to look for is a stand that is heavy enough to solidly support your monitor, yet provides the full range of adjustability (as the screen is orientated to you) you’ll personally need. The better displays will be able to easily tilt up/down, and rotate from landscape to portrait modes. Personally I have no use for a screen that “rotates” but I find the tilt and angle adjustments mandatory.
If you’re planning on using more than one screen, and if you have the space and budget this is another area I highly recommend, then you’ll want a nice multiple display stand. These should have a curved bar (don’t get one that’s straight, you’ll hate it) that naturally angles the monitor in towards the viewer. When you use this kind of stand you’ll have to remove the panel from the original stand and mount it on “VESA” mounts which come with the multiple display stands. VESA standards are international and depict the spacing of the mounting screws, either 100mm or 200mm, necessary to attach the panel to a accessory stand or mounting arm. Any high quality monitor will support both. The lesser expensive displays like my new Samsung BX2450 won’t have VEGA support at all. So take this capability into account when planning your purchases.
Look Up Table (LUT)
Roughly 98% of monitors sold require the video card to provide the LUT. I’ll explain in detail below why you would want the monitor to have its own LUT, but this is a compromise most people make based on cost. Video card LUT’s are usually 8 bits. Internal LUT’s (on the monitor) are 12 or 14 bits, which equate to a few million more shades of colors. If a video card LUT and you want to run more than one color profiled monitor you’ll need a video card which can do this. I’m not going to go intovideo cards other than to link you to my lasttwo video card reviews where I’ve went over this subject in detail. The subject of internal monitor LUT’s vs. video card provided LUT’s is perhaps the most important choice you’ll make at the higher end of monitor purchases.
Last week I responded to Rod C.’s feedback about LUT’s here. Since I already explained the subject of internal and external LUT’s and how they relate to color profiling, I’m just going to repost the information here.
My Reply:
Sounds nice. You won’t have any problems color profiling two U2711’s (they use the video card LUT’s) because you have two video cards.. your only problem will be choosing which color profile you want to use. Every other purpose will be a compromise. Let me give you an example. I have 5 major profiles I use:
- sRGB for the web. I want to process an image and have it appear 100% on the web, as I see it in Lightroom or Photoshop. This means other people as well can see it the way you desire, because sRGB is the web standard. This includes shops that make your prints. Also, when set to this standard it allows you to see the work of others on the web as they designed it to be.
- CYMK I use this for processing images used for advertising brochures and the such. We call it pre-press.
- In house printing. Here, I use the full color gamut with my own in house printers. I want to be able to see output from my printer that looks exactly as it does in Lightroom or Photoshop. This means the monitor will usually be very dim compared to sRGB, which means I’ll need to increase the exposure relative to sRGB to get correct prints. If I sent out these files to an out of house printer who’s set up for sRGB.. they’d not only turn out underexposed, but the colors would be off.
- Out of house specialty wide-gamut printing. This is a profile for when I want to process my images in Lightroom or Photoshop, at their widest possible gamut, and then pay a specialty print house who uses wide-gamut inkjet art printers. This type of file printed on an sRGB printer, or viewed on an sRGB monitor.. will look severely oversaturated.. especially in the reds.
- And finally.. I want a profile less bright than standard sRGB but where the colors still look correct.. for my every day web viewing.
This is five profiles. With the NEC’s I can profile each of these on each monitor using my calibration software and hardware (in this case Spectraview II), and because the NEC’s use 12-14 bit hardware LUT’s, I can switch between them with the click of a mouse.
In contrast, your U2711’s use 8 bit video card LUT’s (the difference between 8 and 12 bits is a few million shades of color).. This means when you profile your monitor, you’ll have to choose a single purpose, and during the calibration process you’ll need to manipulate the monitor controls (brightness, contrast, red, green, blue) on the monitor itself.. so the monitor will be set up to work ONLY with that one profile. I did it this way for years.. and I learned that if I was profiled for one, I could get close to the others by upping/lowering the exposure, or increasing/decreasing colors.. but it was always a guess.. and I NEVER got the web part right.
So.. while the U2711’s are S-IPS quality monitors.. they lack this major ability photographers really need. I’ve only been fortunate enough to have this capability since I’ve had my new NEC’s.. but it’s like someone took the handcuffs off.. and I’m now 100% accurate on all profiles.. and I can do one kind of work now, ten minutes later another kind of work, and so on.. with no penalty. It’s great..
Other Factors
Keep in mind that monitors age. Pixels go bad, backlighting grows dim, and the power supplies can go bad. I recently replaced two high-end monitors which were 6-7 years old and had been repaired several times. They had to be replaced because the backlighting (CCFL’s) had grown so dim over time they could no longer be profiled. Laptop monitors are worse. If your laptop is just 18-24 months old, its monitor is probably less than half as bright and/or evenly lit/color accurate as when it was new. Laptop display panels age much more rapidly than desktop display panels.
Summary
In a nutshell, laptops are ‘gamut challenged’, a desktop display is almost always preferable to any laptop display, look for a monitor 24 inches or larger, 1920×1080/1200 resolution, matching connectivity to your current system, matte screen, a decent stand, and if you can at all budget for an internal LUT monitor, then do so.
Next week I’m going to go more in-depth about why you want and how to use different color gamuts, how color gamuts are related to what you see online in your web browser, which web browsers are color aware, what gamuts are suitable for which printing, and more. Look for Part III of our monitor series next week.
Photography News of Interest *menu
This camera commercial from Casio will either leave you shocked, or with a silly smile on your face. Please don’t tell me which.

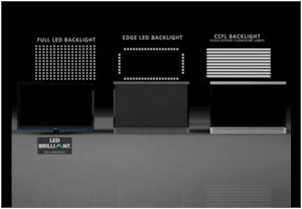
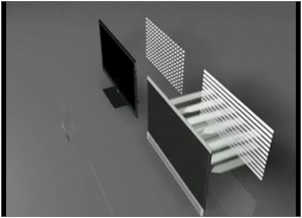
This is an interesting video which clearly and visually shows how the term “LED” TV or substitute computer monitor, can be very misleading. Even if you’re not in the market for a new television or computer monitor you’ll want to know this terminology for when you do. It could save you from paying too much for a dud.
You’d think it’s difficult enough to photograph a golf ball in flight, but what about if its heading right at you from a very short distance? Not hard enough, what if it was Tiger Woods hitting the ball? This is exactly what happened at the Ryder Cup this week. Check it out!

Have you ever wondered if a news photo or some photo you’ve seen on the web has been photoshopped and how much? Of course you have. But now, thanks to Error Level Analysis (ELA)
available at this website you can find the answer.


Hmm.. Let’s see if our feature photograph is manipulated.
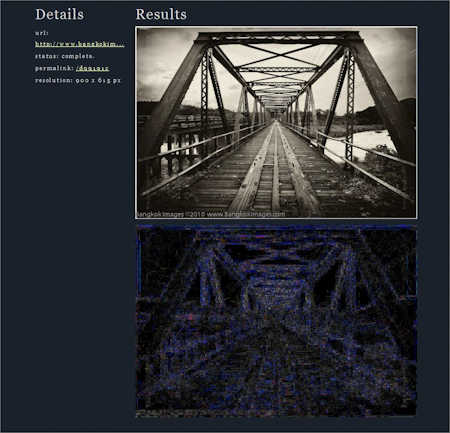
What do you think? The results show only areas in color which are probably due to “the way various programs save images..” Surprised?
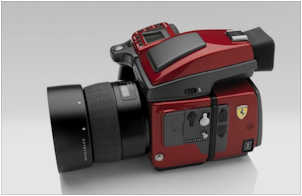
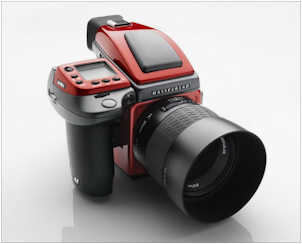
How would you like a Ferrari Limited Edition Hasselblad H4D in Rosso Fuoco red and a prancing horse emblem? High end camera makers have long made special edition models of their more popular models. A regular H4D costs more than $20,000 USD so let’s not ask what this one will cost.
In the Tiger Woods photo above you might have noticed the “Cigar Man” sporting a coon hat, Groucho style mustache, and a cigar.. a unique looking character for sure. The Tiger Woods picture is now more famous for people trying to find out who this guy is, or pasting his image into other photos and posting them on the web, than the great photo of catching a closely hit golf ball in flight. It’s funny what catches the publics interest.

I’m posting this because I love photography and I love cars. It’s pretty bold to hang cars from a bridge to promote them, but Audi did just that and the accompanying photography is really good. Check out these images!


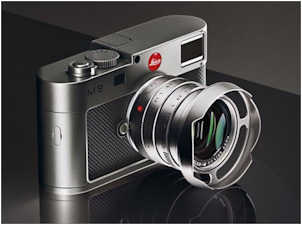
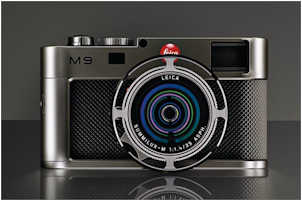
Another one, a VW themed/sponsored Leica M9 in Titanium. For people with more money than sense I’m sure. It comes in at roughly $31,500! Get yours while they’re hot.
Readers Submissions *menu
Hi,
Just found your column on Stickman and thought I would pitch in. I have thousands of images from SEA but won’t bore you with them all. I will put together a second submission for Asia pics but here are some UK ones.
I think we forget to look around ourselves sometimes and fail to appreciate what is on our doorstep.
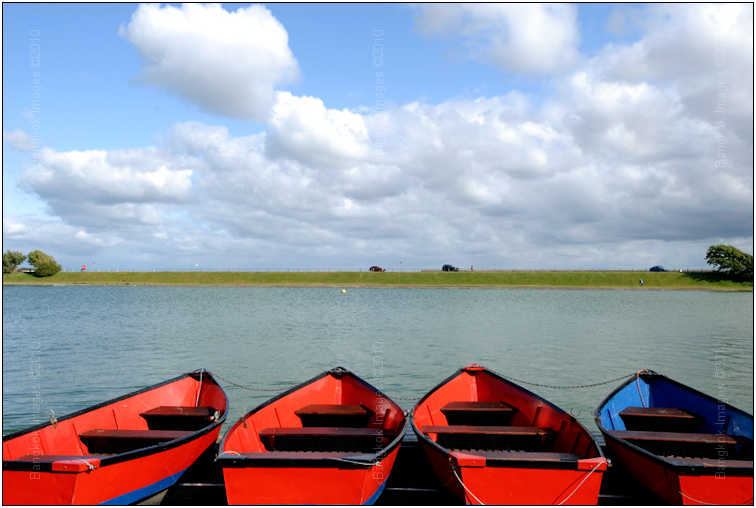
Shot in Lytham on the North West coast of England.

Five minutes from my home at Skippool creek on the River Wyre. I love the name of this wreck.

Again near my home at the port of Fleetwood; Stena Pioneer ready to leave for Ireland.

A nice angle on a pair of heavy horses in traditional regalia.
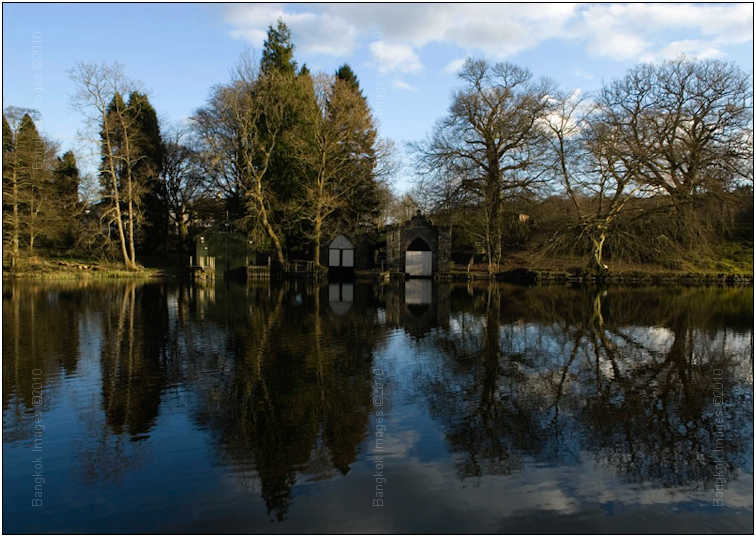

Both shot at Bowness-On-Windermere, a beautiful part of England. Image 06 is a particular favourite, Bowness is normally teeming with tourists so I had to be there very early to get this tranquil scene.
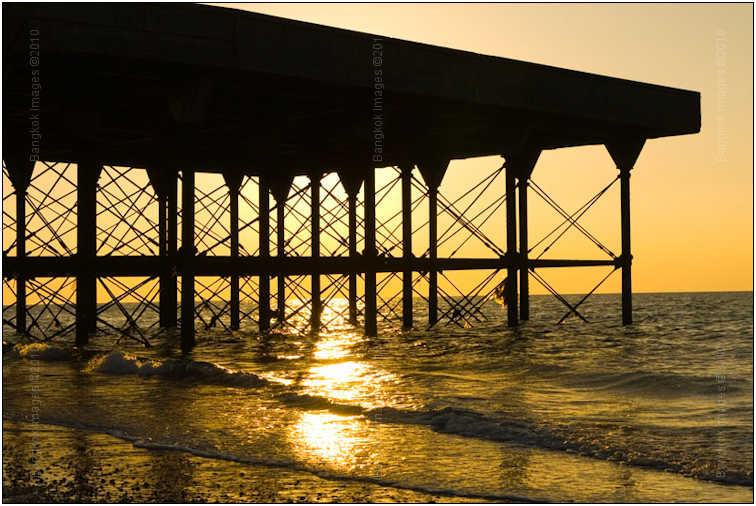
A
ll early evening autumn shots. I love this time of year, great light in my part of the world. 07 is Fleetwood Pier, a Victorian structure that burned down shortly after this picture was taken.
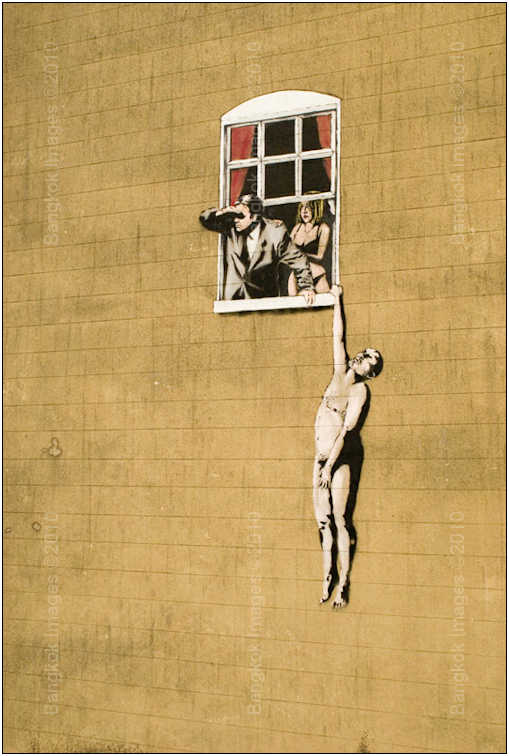
Proof that English people do have a sense of humour. This is an original piece of work by the well known graffiti artist ‘Banksy’. It’s high up on a wall in Bristol City Centre.
Steve
Steve –
I want to thank you. Not only are these really nice pictures, but without them we wouldn't have had a readers submission this week. And this is a really great submission! It's easy to see your talent is keen and I hope to see more of your work.
I hope we all get to see more of your work.
Thank you!
Steve
I suspect the readers submissions will be a highly anticipated section of this column and I encourage anyone with photographs and travel accounts they'd like to share to please send them to me at: info@Bangkok
Images.com
Readers Questions *menu
Steve:
I have downloaded the Lightroom 3 thirty day Trial offer ($229 purchase price) with the intention of comparing it with the Photoshop X3 ($80) that I have used for years.
I have read most if not all of your recent articles on Lightroom 3 and found them very interesting and helpful.
Realizing that I have spent a couple of years with Photoshop and that I never read the instructions literature that comes with a new program I have a few question on how to get started.
My initial pass thru the LR3 were positive and I liked the ease of adjusting various aspects of the few pictures I was able to open with the provided menus.
My confusion is with the importing, handling and saving of the pictures. The whole issue of dealing with all the various “Catalog and Collections” options offered on the file menu screen is a bit confusing to this California boy. I have a very difficult time opening pictures that are in a folder on the desktop or anywhere in the computer and importing them into a Catalog.
Is there a simple explanation for the use of these options when using LR3? In Photoshop, it is a simple matter of opening a picture, adjust as desired and save as a new picture.
It must me a lot easier than what I am doing such as: Open LR3, Create Catalog, import a picture or folder into Catalog and start developing the pictures.
Please advise what I am missing in this process. Please see 2nd attachment.
Thanks as always.
Rickster
Rick emailed me before I could reply and told me he found a Lightroom guru at the local library who showed him how easily these functions are accomplished and I needn’t waste my time responding. I emailed him back asking if he minded if I use the
question anyway, because these are common questions to new users of Lightroom. In the future, I estimate next month, I’ll publish a proper tutorial on the subject of importing and exporting images from Lightroom, but for now I’ll
just point you in the right direction and I’m sure most of you will be fine.
Importing To Lightroom
To import files, look at the top menu and select “File”, and then “Import Photos.” Select ‘Import Photos’ and you’ll get the Import Images screen. This is new and improved in Lightroom Version 3. On the left you’ll see a list of your “source” drives including your computer hard disks and any attached card readers and cards. Select your source. On the middle top you’ll see three choices “Copy, Move, or Add” You can either copy from the drive/card leaving your original files on the original device, Move your files from the original device to a new drive/device, or Add the files to the catalog while not moving them at all.
On the right, you’ll see a panel with your available Destination drives and some areas with the option to add keywords during import, copy your files to a secondary ‘extra’ drive/location, or you can even apply presets like black and white and other toning choices.
That’s the crux of Importing.
Exporting From Lightroom
To export files, look at the top menu and select “File”, and then “Export Photos.” Select ‘Export Photos’ and you’ll get the export Images screen. This is also improved for Lightroom Version 3, but not the big change the Import panel was.
A basic Lightroom installation without extra plugins installed, will have an “Export Location” are where you choose where you want the files to go, a “File Naming” area where you can choose to rename and sequentially name or number your files, a “File Settings” box where you select Jpeg, Tiff, or other file types, the degree of compression/quality, and the color space. sRGB is the default choice. Next, you’ll have an “Image Sizing” box where you can choose the size of all exported images, or not. You can also choose if you want “Output Sharpening” and/or “Watermarking”. Once you check off your choices, hit “Export” and you’re done. Easy.
Also, don’t forget that starting in Lightroom 3, Lightroom now includes standard plugin’s for automated exporting to Facebook, Flickr, and Smugmug. Any major image storage site will probably have a free plugin for Lightroom.
Lightroom is the most popular imaging program in use today. It’s the most popular for good reason, it’s user interface makes it easy for beginners, adaptable for professionals, and the Lightroom RAW engine is the same 2010 RAW engine used in Adobe Photoshop CS5, which is one of the top raw processing engines available today. Only one or two others are as good, and perhaps better in some areas. These others are purely professional level software and nowhere near as easy to use as Lightroom.
I hope this helps.
Please submit your questions to info@BangkokImages.com All questions will be answered and most will show up in the weekly column.
A Snapshot of Bangkok Images Week in Review *menu
![]()
This week there were no workshops, so I had a lot more time to work on the website. I added some simple things like a weather information panel which gives a very complete set of
weather information. Now you can check out the weather and hope for rain and great cloudy skies before going out on a photo outing! There is also a baht/dollar exchange panel with 8 of
the most popular currencies. It’s tied to the Central European Bank and updates the information every ten minutes. Let me know if there is a currency you’d like me to add. I also cleaned up the CSS styles on several of the
information side panels and have a few more to attend to this week.
The galleries are now working very well and the user galleries are ready for you to share your images. I hope to see some of your images posted soon.
The “What’s New” area of our site continues to grow in popularity and the numbers are growing every week. The forums could use more activity, so if you want to meet other like minded photographers or just ask a question check them out. We’ve been updating the What’s New page several times a week and provide either an interesting new image or something of interest. Check it out to keep track of Bangkok Images exploits and commentary throughout the week.
Still a ton of hardware and software reviews being formed. I have Garmin’s newest ‘iphonelike’ GPS coming in next week which includes significant new features like 3D building view, learnable routes, and more. Logitech has also sent us their newest K800 Illuminated Cordless keyboard which I hope will turn out to be better than my favorite, the diNovo Edge I talked about in our 3-way Keyboard Shootout.
Infocus Blog, Each Week Is A Surprise! *menu
Each week when I wrap up a column and send it off to Stick I feel a huge sense of relief. A lot goes into putting a column together and until you’ve had the responsibility for turning out a column each and every week for a few years.. you just
have no idea. But to be clear, it’s not the work I mind. I love the work and Stick is very easy to work with. What worries me is that after sending out next Saturdays column and feeling that relief, is IF I’ll once again feel that
burst of energy, that desire, whatever kick in the azz is necessary to get me to start the next one.
Sometimes the energy is turned on and won’t shut off. There have been times I’ve forwarded 2-3 months of columns to Stick in advance AND a few submissions. I’ll sometimes get the inquisitive email from Stick asking “where do you get the energy?” The truth is, creative energy has no end. Ask any writer, any photographer, and painter.. creative energy ebbs and tides in sync with the events of your life. There will be times when you’re on a creative high and material flows faster
than your ability to put it to print, while at other times you’ll find yourself staring at the wall knowing a deadline is looming yet the creative spark hasn’t flickered in weeks.
I’m writing this on a Sunday which means our last column hasn’t been up even a full 24 hours. But the spark flickered and that familiar sense of excitement is growing as the frame of next week’s column forms in my mind. What made
it flicker? This is really the key, for everyone its different. For me it’s being stimulated by something that starts the creative juices flowing, ideas start forming like fast growing spider webs and in an instant I know exactly what every
part of the next week’s column is going to be about and how I’m going to do it.
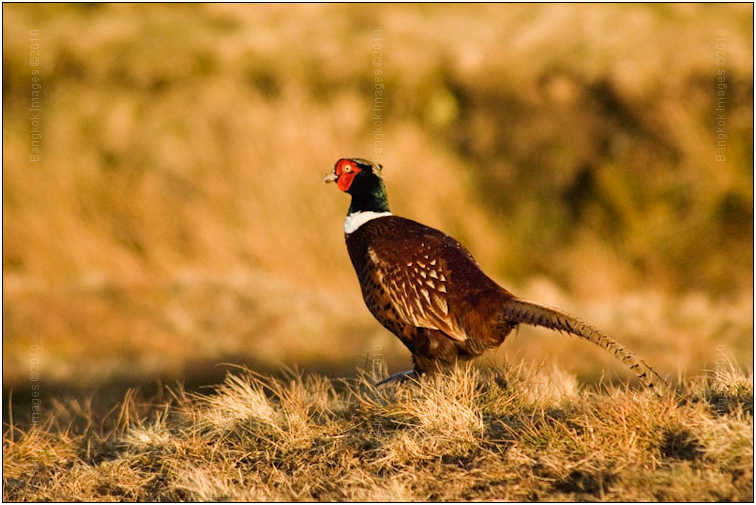
You can help. Yep, in my mind any successful column is highly dependent on the wants and needs of the readership. When I get an excellent readers submission likeRod C.’s fun submission from Australia or Rob from www.1ds.com sends in a new Feature Photograph with a spooky great bird photo
or if I get a great question like “Can I Use a HDTV For a Computer Monitor?”
When these things showing up in my email inbox the odds are high the spark will flicker and I’ll soon be working on another column.
Well, that’s it for this week. Gotta go check my inbox.
Until Next Time…il next week…
![]()
