Interview, Craig Lamson, Successful Advertising Photographer/Self-publish How-To!
![]()
|
• Bandai Silver Hotel • Leopalace Hotel Niigata • Niigata Hotel • Nikko Hotel Niigata |
I want to start off this week's column by letting you know that ALL images displayed in the column will be watermarked with the "Bangkok Images ©2009" watermark. This watermark will go on my images and any images sent in as readers submissions, outings, articles, anything at all. This DOES NOT mean I'm trying to say I own images you as the readers have generously shared. It only means I'm trying to stop other sites from using your images without your permission, and my images without my permission. The issue of unauthorized use really is quite extensive, and the reality is that you can't stop someone determined to steal. However, we can make our intent known and a watermark does this.
Thank you for your generous contributions. We're slowly collecting enough images to make the mosaics. I realize I'm posting the same paragraph each week, but I assure you we're on top of this project and doing our best to collect enough of the proper type of images to make the best possible set of mosaics. This is proving difficult so please help if you can.

We are still accepting (and pleading for) images of children from SEA. No matter how terrible you think they are, please send them in anyway. These images will be used to complete a set of 3 high quality mosaics which will be sold to benefit the Karen and Burmese Orphans living in the orphanages and refugee camps. The more images the better, I can use all you have. Please take the time to go through your images for anything you think might help. If you missed the "No Place to Call Home" special, you can click on the link and read more about this. Thank you! QandA@Bkkimages.com
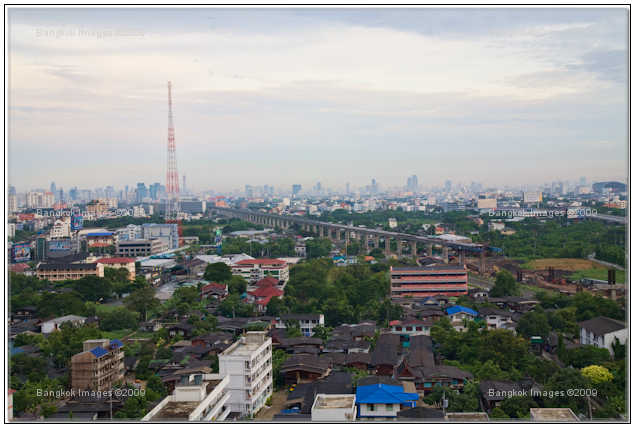
Feature Photograph
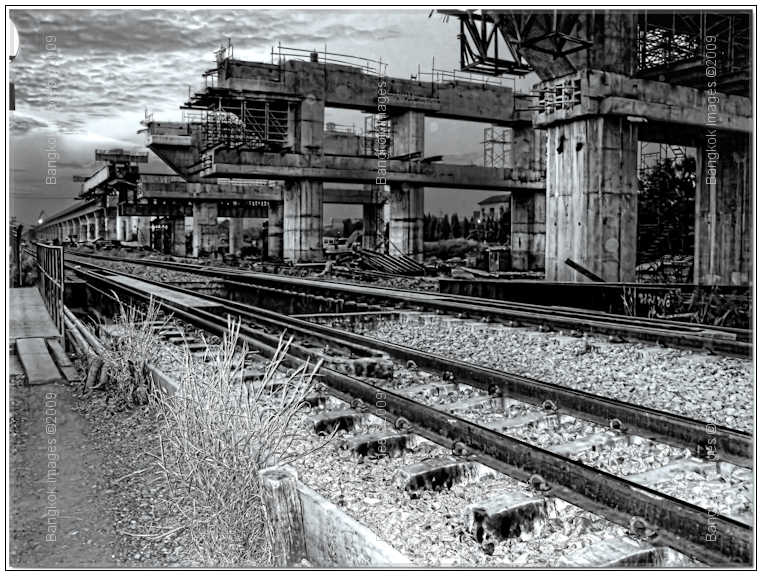
Captured with Fuji F30 point and shoot

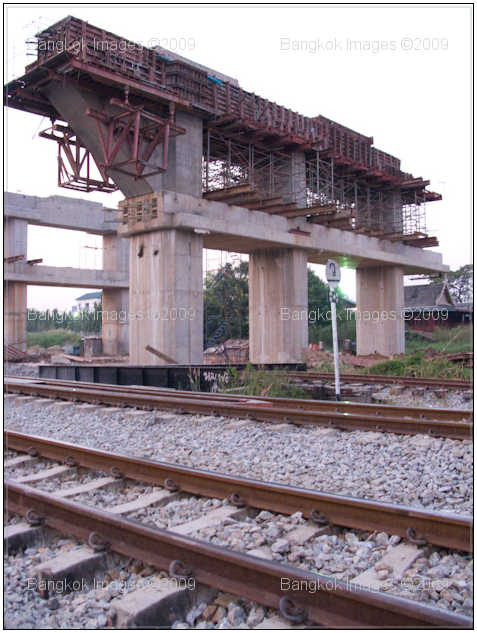
This week's feature photograph is a simple urban landscape captured at sunset. The location is ground zero of the new BTS sky train station near my home. Captured nearly four years ago as the concrete and cement piers were poured and layers of steel
added, all the while not interrupting the land railroad as it blasted its way up and down the tracks doing railroad business with its huge diesel engines.
Railroads hold a special place of nostalgia in the hearts of my countrymen. Stories have been told and songs sung as powerful locomotives powered their way from seaport to big city after big city, delivering vital supplies and important people. In America
we used immigrant labor, many of them Chinese, to build our railroads. They lived in camps alongside the growing tracks, often with their families and everything they owned.
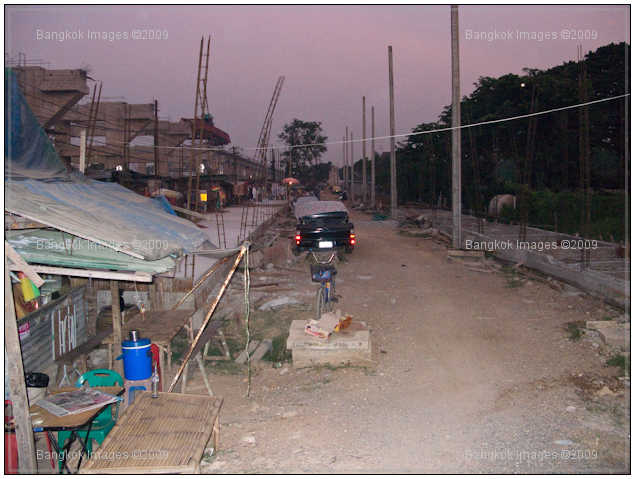
Over sixty years ago the Japanese used prisoners of war andindentured locals to build their death railway from Thailand to Burma, desperate to complete their link to China to keep their war machine supplied.
Thailand has historically used immigrants from less developed SEA countries in the same way and still does today. Several years ago I'd walk along this area for a bit of exercise and observe the immigrants in their shanty town going about life and
I'd marvel at how happy they seemed to be with so little. Each day promised only more hard work for little pay.

During these times I'd carry my pocket camera and make the occasional capture of interest. This image is significant because it's processed to accentuate its urban hold and IMO it does so well. Urban landscape opportunities are everywhere, but
it takes a careful eye to catch one of interest and impart a feeling at the same time. Desolate, lonely, and detailed for interest of viewing. The composition is strong, the exposure spot on, and the processing purposed.
Canon 1ds Mark II, 25mm, F5.6 1/60th, ISO 100 handheld
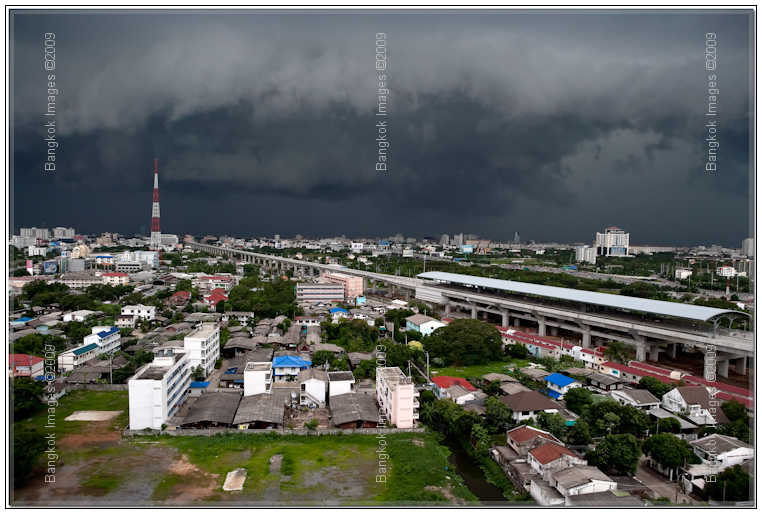
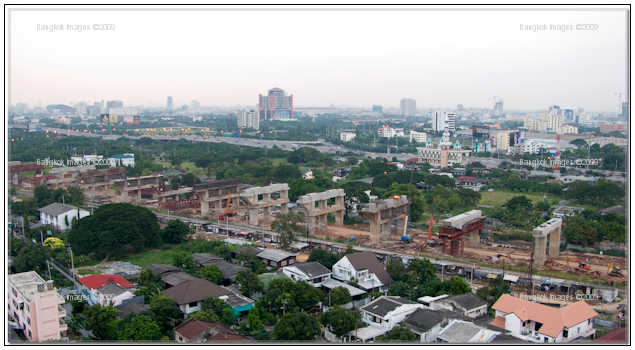
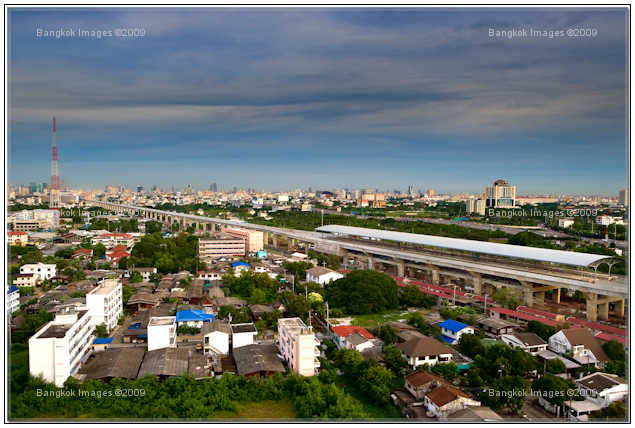
Years later during a break in a thunderstorm I made this capture of the now completed sky train station. The difference in perspective and processing give an entirely different feel. What differences do you feel between the two images? Yes, these differences
are stark but I wanted to make a point. The point is you can capture the "feeling" of urban landscapes with purpose.. but you need to think about what you're going to capture before you make the capture and use these thoughts to
frame the best composition possible. Be sure to read my blog entry at the bottom of this article to learn more about this BTS Sky Train station and why it's not yet running as it should be.
Interview, Craig Lamson, Professional Advertising Photographer
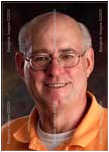 I would like to introduce Craig Lamson.
Craig has been a professional product photographer for over 3 decades. Craig has done it all and I encourage you to check out his website for the best product photography you’ll ever have the privilege of viewing. Often times I can spend a great amount of time viewing just one of his images and learning while observing how he uses light. Craig is a master of light, and I’m afraid that is an understatement. If you've ever wondered who I go to when I have a question you now have your answer.
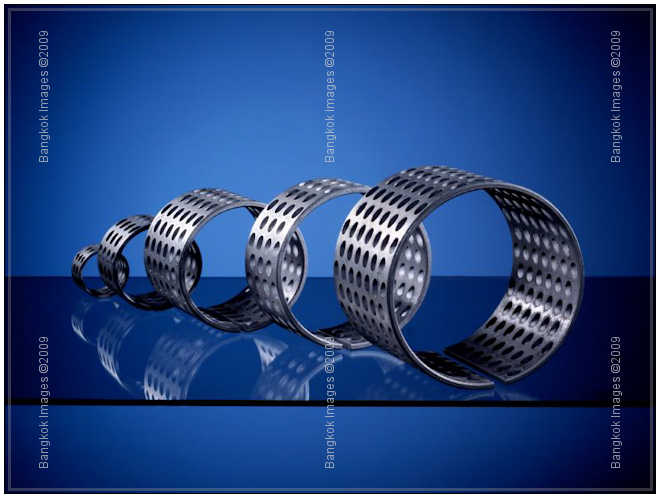
Small Metal Bearings. Horseman 4×5, Betterlight Digital Scan Back, 210mm Rodenstock
BKKSteve: I was drawn to your images initially not because they were mostly product shots, but because you have an way of turning something ordinary into an individual work of art in a way you rarely encounter.
Would you share with us how you got started in photography?
Craig: First of all, thanks for asking me to do this interview, I’m honored. I hope your readers will find it of value.
I was lucky to find photography. Or maybe more to the point I was lucky that photography found me. I was young, married and wandering somewhat aimlessly. On a vacation to California in the mid 70's I took a bunch of photos with a pocket 126 Kodak
and when I returned I was disappointed with the quality of my photos. I decided then and there to buy a better camera and I did, a Minolta SRT102 SLR. That camera lead to a basic darkroom and I was hooked.
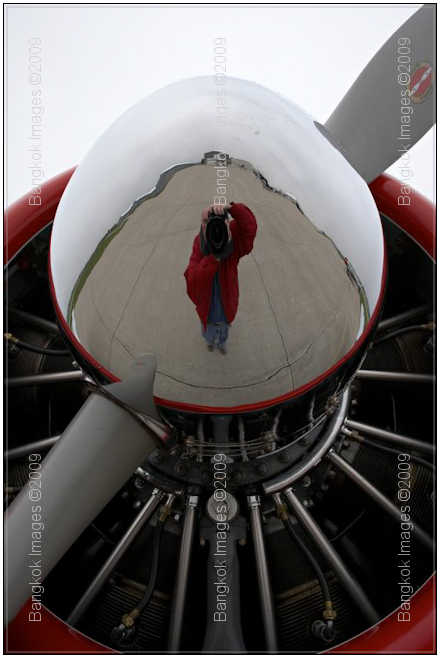
Spinner Self Portrait. Canon 1ds Mark II, Sigma 12-24mm
BKKSteve: A large percentage of our readers are just starting out and forming their own styles and methods. For myself, when I see something I like, I try to draw the relevant elements into my own style.
I think our readers can realize great value by doing the same with your work. Can you describe your first commercial/professional employment?
Craig: As I mentioned I was wandering aimlessly at the time, working in a factory and not really thinking about a career… after all the money was decent and I was young…
But after a few years of shooting for fun I found I had a real passion for photography and decided that perhaps I could earn a living at it. In the end I did, but the road was tougher than I could have ever imagined.
My first job was as a lab tech printing b/w prints for a local portrait/ commercial photographer. He had been in the business for many years and was a PPA (Professional Photographers of America) Master. I worked for him for almost two years and made barely
subsistence wages. But the experience was extremely valuable and he was very patient.
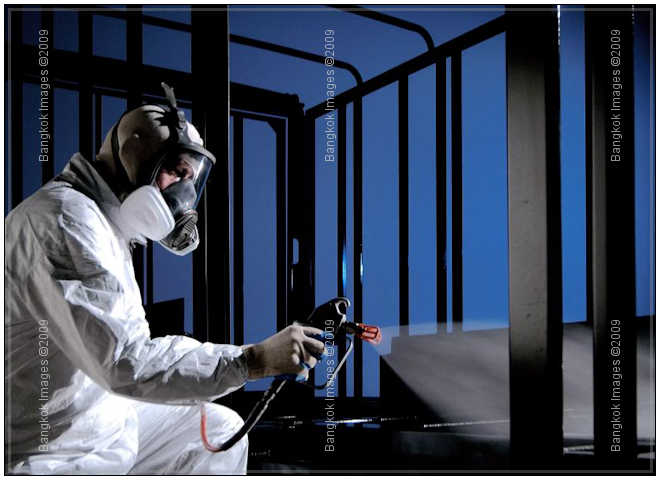
Power Painter. Nikon D100, 105mm Nikkor
BKKSteve: I've seen your portraits, or rather when you bring models into the scene. Do the techniques in portraiture you learned in this position still reflect in your work today? Specifically the lighting
styles, poses, and general feeling of the image?
Craig: Yes to a degree. I learned a lot about formal posing and portrait lighting on that job, even though I went on to become more of a product specialist.
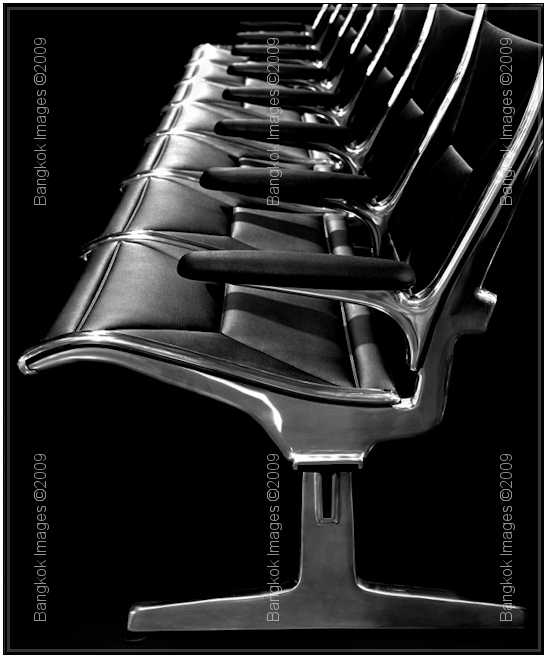
Airport Chair. Hasselblad 500 C/M, 150mm, Kodak Plus-X Film
BKKSteve: This was over 30 years ago? Where did you go from this first position?
Craig: I used my b/w darkroom experience to move to a high volume commercial studio. I was a b/w and color printer, processed negatives and slide film and produced graphic slides for business slide presentations.
I learned photography from the back end.
All the while I studied the work of the photographers whose work I was printing very closely and put the lessons learned into my own photography. At the time I was also studying the works of the masters like Weston and Adams and it was in these formative
years that started my lifelong passion for light.
After a few more years as a lab rat I was fortunate to find employment as a junior photographer/lab manager at yet another busy commercial studio where I shot, among other things, thousands of products for the sale brochures you see in your Sunday papers.
What a training ground that was!
But the best part was that the studio was also doing cutting edge advertising illustration photography and the photographers were top notch. It was simply amazing to watch them take nothing but a product in a box and create a stunning advertising illustration.
I was hooked …again.
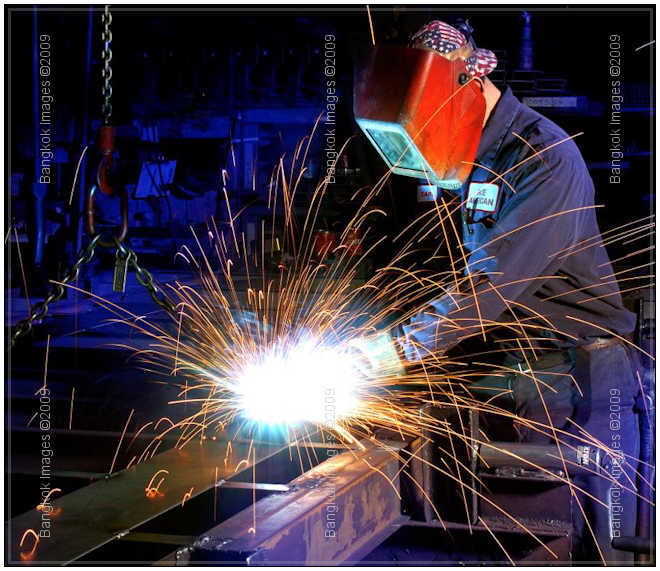
Sparks. Canon 1ds. 70-200mm F4
BKKSteve: Wow! Looking at your experience(s) in your career path I can't help but wonder how many of those jobs are still available today and in today’s world what education/experience prerequisites
would be required. Do you think it's possible for someone keen for photography and no formal training to follow the same path you did today?
Craig: That’s a good question. Today the photography schools churn out far more graduates than there are jobs available, so the market is quite crowded. But talent stands out and yes, I think a person
of talent will find a place, formal training or not. That said this is not a profession for the weak. In addition to the large number of people seeking a career in photography, the pay is mostly average or below except for a select few. In my
own career I worked many years for little pay while learning my craft.. And I must thank my wife for being patient and putting up with the meager pay and my obsession for all those years.
Tequila Sunrise. Horseman 4×5, Nikon 300mm, Fuji RTP Film
BKKSteve: Yes, today it seems like formal education is available and mostly required for just about every profession, and even trades which traditionally required no formal education. It's good to know
someone can still break into the photography field through hard work and perseverance. I get 4-5 clients a year going through my workshops who tell me they're thinking of going through an art or photography school. Once you were hooked on
products, did you immediately go into your own business, or did you continue your career path with agencies?
Craig: I ran a small business of my own for about three years shooting mostly architectural photography after working at that commercial studio. It was hit or miss at best but I learned a lot about running
a business. In fact it was a real eye opener! Sadly the income was not nearly enough to keep my household afloat.
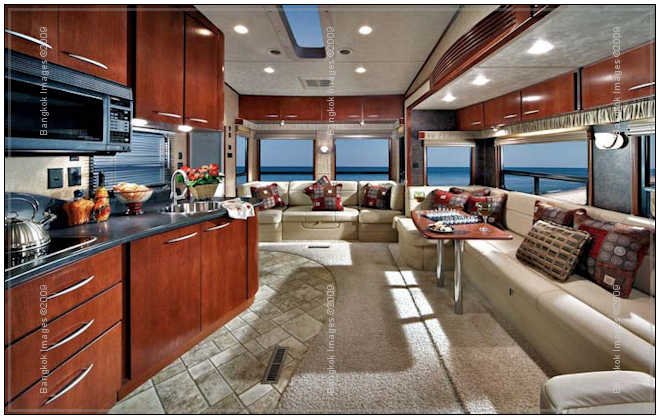
Then the job that would shape my career found me. I was hired to be the in-house photographer for a company that produced boats, recreational vehicles and custom conversion vans. I now had my own studio. The president of the company was quite thrilled
with the quality of work I was producing and gave me a mostly blank check to build the equipment and studio to my taste. I did!
The important thing was that this job unleashed my creative potential. The art director was in-house also and together we took the work as far to the edge as we could. Being in-house also eliminated the need to meet a clients photography budget.. we could
experiment until we got it right. It was during this period that I refined my lighting and studio skills. These were wonderful years. Today this same art director owns his own advertising agency and we still work together often.

Motoring. Canon 1ds Mark III, Canon 24-70mm F2.8
BKKSteve: And this brings you into the more current part of your career which is photographing boats, trailers, and other recreational vehicles?
Craig: Yes, after a brief stint as the marketing director for a trailer company I opened a new business providing photography to the RV and Marine industries. The irony is I started my own business by purchasing
the assets of the photo studio from the company where I had been the in-house photographer. Another plus is that this new business allowed me to bring my wife into the mix and she joined me as my stylist and office manager.
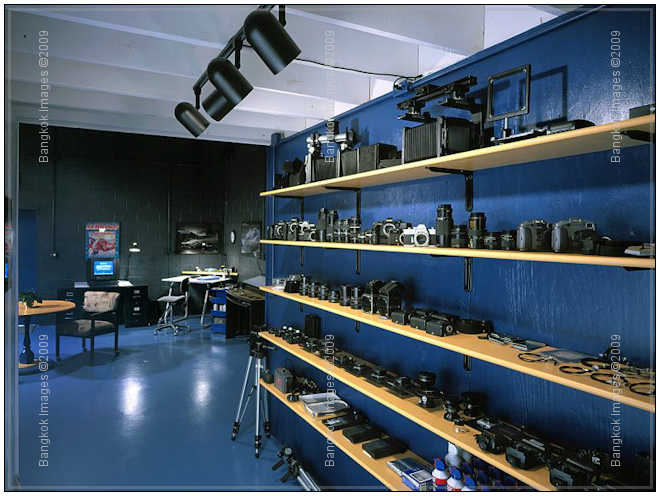
Equipment Room. Horseman 4×5, Nikkor 75mm, Fuji RTP film
BKKSteve: I remember an image you had of your equipment and remember thinking it looked like a camera store! It must take a lot of equipment and a huge studio for your work, but at the same time I was surprised
to find that as far as actual camera equipment goes you were using just a few pieces from your collection?
Craig: Yes I had a huge collection of stuff and we were still shooting film. The largest part of my work was shot with a 4×5 view camera. It was slow and exacting photography but it suited the subjects well
and in those days everyone wanted BIG film! We shot cases of 4×5 transparency film and boxes upon boxes of b/w Polaroid film as a proofing medium. The Hasselblad 500 c/m was another workhorse and it was used for almost all of the shots that were
being reproduced 3"x5" or smaller. I had a decent collection of 35mm gear but it did not see much service other that running shots of boats or event photography. The format was considered too small.. imagine that in today's world
of the 20+ mega pixel 35mm DSLR.
Camera Room. Horseman 4×5, Nikkor 90mm, Fuji RTP film
BKKSteve: I can't help but think that for my own work at least, in the last 7 years or so DSLRs have advanced to a point where for many purposes they've replaced 4×5's and most film use altogether.
Has the transition to digital taken place in your world as well and what are your current cameras of choice?
Craig: Oh yea, digital is the standard for commercial photography. My experience dates back the Kodak DCS-200 a 1.5 mp black and white camera that cost many thousands of dollars and Photoshop 2.0. My how
things have changed.
Over the course of the last decade I've shot with a BetterLight digital scan back for a 4×5 camera, Nikon D100, Canon 10D, Canon 1Ds, Canon 1ds Mark II, Canon 5D, Canon 450D and my current bad boy, the Canon 1Ds Mark III. All of this represents tens
of thousands of dollars and many generations of computer hardware and software.
Fortunately I think we are fast reaching the phase in digital photography were the upgrade cycle is slowing rapidly.
Family Time. Horseman 4×5, Nikkor 210mm, Fuji RTP film
BKKSteve: And it couldn’t come too soon! Sometimes we have to be careful what we wish for. Okay, so far we've covered your growth as a photographer from the beginning to basically the pinnacle
of commercial photography where you're now sitting. We've discussed your cameras and software. Now for the good part. When I look at your images I see a delicate balance of every pertinent element in such a way I've never seen before.
Attention to the smallest details, light in hundreds of places at once, all combined to create a visually stimulating image. The sort of image that makes us buy expensive boats and RV's.
Can you tell us what’s involved in making one of those images? What lighting equipment, studio, time required, and prep work?
Craig: Well, that’s a tough question because every image is different and I employ a number of different methods to get the final result.
But generally speaking a major interior for a boat or RV is 5-8 hours of work, both in the studio and later in post production. I can use from as many to 20 lights and 5-6 hours in the studio to create an image or as few as 2 or 3 lights and1-2 hours
in the studio with an additional 3 to 5 hours in post production.
If it’s a highly crafted and sharply lit interior the standard is about 5 to 8 hours of studio time.
When it comes to the details of the image I am lucky to work with some very talented stylists who craft the ambience of a given trailer or boat.
Fine tuning the image is one of the strengths of digital imaging. It’s not uncommon to shoot 20 or 30 frames as tests to finalize the selection and placement of props, composition and lighting before taking the final exposure.
Purple Haze. Horseman 4×5, Nikkor 300mm, Fuji RTP film
BKKSteve: It's probably important to realize that when you give an estimate of 3-5 hours of post production, for the readers to realize you have decades of Photoshop and post-processing experience. With
this expertise you can fashion an image in post to levels most can never achieve, and faster than us mere mortals can imagine. Some of your images have in excess of 10-15 layers? I remember an image you had of a hot rod which was lighted and presented
in a way rarely seen. Can you tell us what was involved in shooting that one?
Craig: Nothing has unleashed my creative potential and my desire to fine tune images like digital capture and Photoshop. I'm somewhat of a perfectionist and back in the days of shooting and delivering
film, I was often disappointed with the printed results of my images in catalogs. Even though in the later years of shooting film, and digital scans were done, it was uncommon for the agencies to spend much time working on images. And there was
always something I wanted fixed that I just could not do when shooting the image. Now every image is tweaked to my satisfaction before delivery.
That hot rod shot is an interesting case. It was shot on 4×5 film and scanned. I did some retouching on that photo like cleaning up the reflections on the side windows and fixing a few bad spots on the car body, but for the most part it was all done in
camera. The light from the side came from reflecting spotlights on 60 foot section of cyc wall. There was also a large 15'x30' white reflector in the ceiling with spotlights bounced and a 10' x 16' rolling white reflector with
spotlight bounce to light the grill and front of the car. The floor and back wall were painted purple and the pattern on the back wall was created by shining a spotlight through a piece of cardboard with the pattern cut out of it. This is the
essence of commercial photography, taking a product and creating an illustration by using light and set building.
Fantasy Composite. Canon 1ds Mark II, 24-105mm F4 (trailer), Canon 5D, 24-105mm F4 (background)
BKKSteve: A beautiful shot! I find with many of your images that I can study them for an extended period and never lose interest. Detail after detail reveals itself in such a way that I can learn much just
from observation. I think it's especially interesting with this image that you combined film with digital processing.
Unfortunately the global economy is on a down turn and it's affecting everyone I know. Boats and RVs are often purchased as luxury goods so I'm guessing it's affected your business. Has the economy and perhaps other factors affected your
business model?
Craig: Oh yes, the economy has had a huge impact. We were shooting RVs and boats in a 10,000sqft studio until a year ago. At that time $4.00 gas and the housing implosion simply killed the RV and Marine industries.
We were forced to close the studio. I'm currently shooting only location photography now. However all segments of the advertising photography market have taken a huge hit. Work is very hard to find at this point in time. I can only hope the
situation improves soon, not only for my sake but for all of the other advertising photographers being hurt by this down turn.
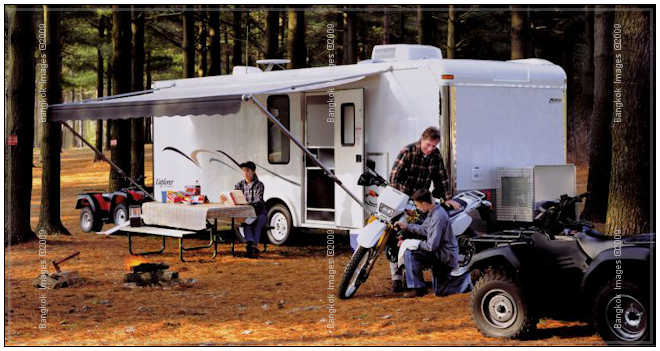
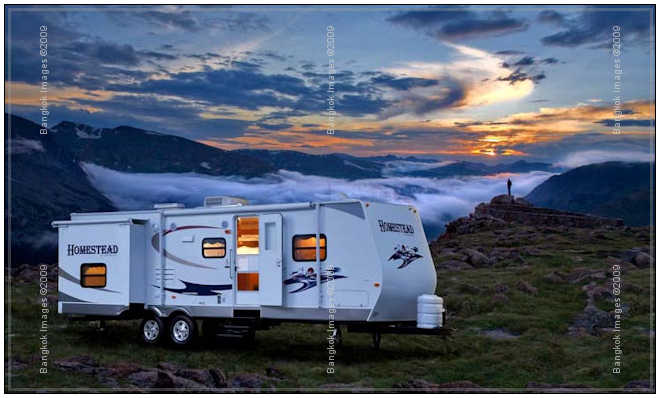
Mobile Resort. Canon 1ds Mark III, Sigma 12-24mm
BKKSteve: Every time we have an economy downturn of this nature we lose businesses, only the strong survive. And as we lose businesses we lose the photographers who ran the businesses. I'm looking at
the skills you've acquired over 3+ decades in the industry and I can't help but feel what a shame to the industry it would be to lose you as a resource. Have you noticed many losses of talent because of our current economy?
Craig: The talent is still there, its just being refocused. In my old marketplace I'm seeing the big studios like my old one close. It’s sad to see them go. But the photographers will continue
to create images, just in a new environment. Change can sometimes be painful but it can be a growth opportunity.
Dusk Running, Nikkor 50mm F4, Kodak Kodachrome 64 film
BKKSteve: Yes.. change often forces growth and opportunity, often in unexpected places. Craig, I think your career has been fascinating. Anyone looking at your images can see the you've become a master
of your art and I dare say a master of light. Using light to create your masterpieces in a way that creates/displays your signature look. Have you given any thought to publishing a book or even video series that can help those just entering the
business or even well along in their careers?
Craig: Thanks, it’s been quite a ride. I'm doing some teaching now, on a individual level, and I'm hoping to use that for as a template for bringing that information to others. I've
also been trying my hand at writing software reviews which is very interesting. It’s a challenge. I had never really given any thought to the teaching aspect of photography so all of this is quite new to me. But it has been interesting
and enlightening.
I’m also shooting more for personal pleasure than ever before. It’s almost like the old days with my first Minolta. I’m finding my eye again and simply enjoying the time spent looking for images in the world around me. Sadly that
was an element of photography that went by the wayside when I was shooting so much studio work for commerce.

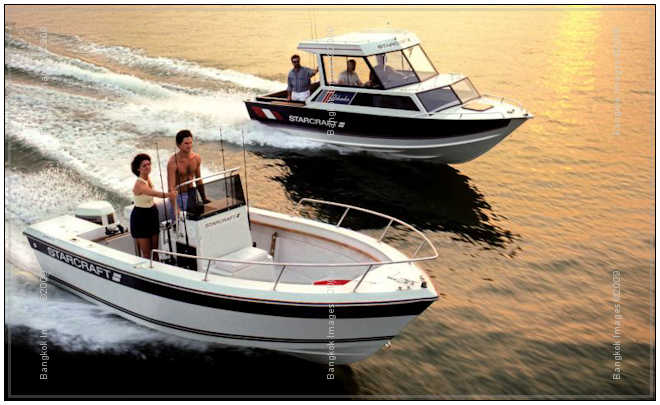
Rinker Boat. Canon 1ds, Canon 17-40mm F4
BKKSteve: I know that personally I get great satisfaction from teaching my workshops. Perhaps you'll feel the same as you get more into it. Your reviews have been really well received on this site and
I know the software developers love them too. Now that you've reached the 'master' stage of your career you have much to offer those of us lacking your experience. I hope you continue in
this direction and we see some books and maybe even a video training series from you in time.
I want to thank you for sharing your career with us in this interview. Hopefully it will provide valuable insight to what it takes to produce images at your level and will encourage anyone thinking of photography as a career. If I could impose on you
for one last question, what would be your advice and direction to someone just starting out in the field who wants to be a commercial advertising photographer? How should they prepare themselves and what kind of work experiences should they look
for?
Craig: My advice…be a lawyer instead! Just kidding!
This is a very tough business and you really need to want it badly to succeed. Despite of the impression this is all glamour and fun, the reality is it’s lots of hard work and long hours. Sometimes it can be downright boring.
You need to have a real passion and you need to keep learning. Study the world around you. Light is your paintbrush and there is no greater school for the quality of light than nature. Look, learn and recreate what you see.
If you can work as an assistant for a commercial photographer and study everything. It’s not as easy as it can sometimes look. As a pro shooting for commerce you will be expected to deliver every time you shoot, regardless of the situation.
Your goal is to put as many tools in your toolbox as possible before you step out on your own. I can't begin to count the lessons I learned by just watching and assisting. Those became the very backbone of my career. Be humble and remember even the
very best school can't teach you everything.
The Domani. Canon 1ds Mark III, Sigma 12-24mm
BKKSteve: This is really great advice Craig. I hope we can get you back in the future to write a learning topic or two, I'm sure there are a lot more tips and tricks than we've discussed here tonight.
Thank you! I'll give you the last word and say goodnight to you at the same time.
Craig: Thanks so much for inviting me for this interview. I hope your readers will find it entertaining, and maybe informative.
My last piece of advice is to keep shooting. Given the nature of digital photography it’s now possible of be more creative and experimental than ever before. Use that to your advantage and make images.
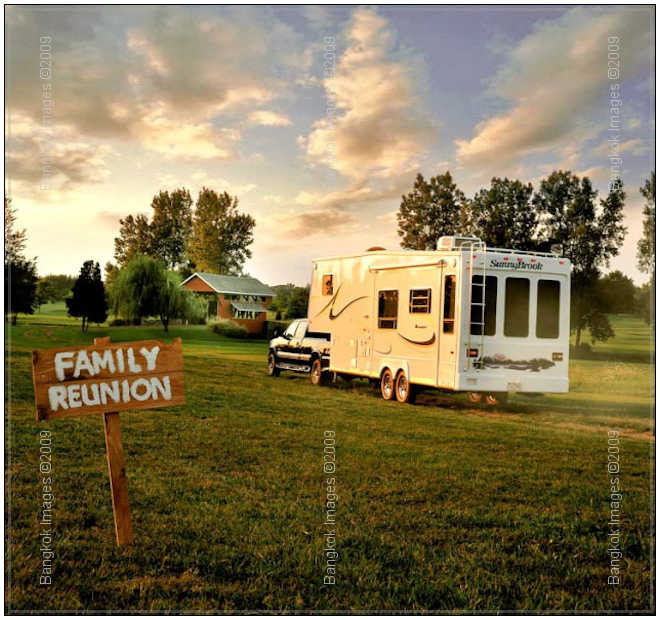
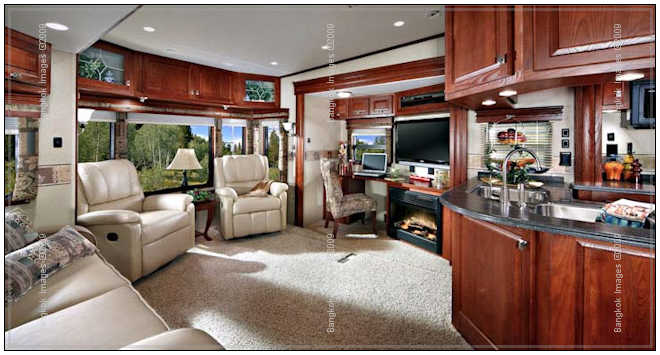
Family Reunion. Horseman 4×5, Nikkor 210mm, Fuji RTP film
You Can Self Publish!
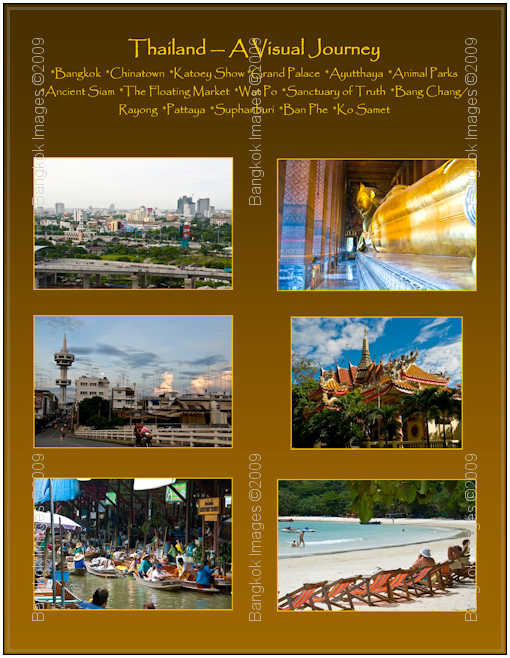
Tom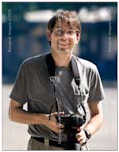 Tweedel is a good friend with significant experience in China and has self-published several interesting volumes of his travels in China complete with many great images and informative narrative. Last year he visited Thailand for the first time and I had a great time showing him around the area. Somehow he found time to put together a like 340 page book of his travels around Thailand and you can get your copy here! I've got a copy of this book and I can tell you it's well worth it, especially for first time travelers or if you haven't seen more of Thailand than downtown Bangkok.
When Tom agreed to become part of our small select product review team I was both excited and grateful. I hope you enjoy this and future reviews by Tom. For those whose plans include extended travel in Thailand and China I’d recommend contacting Tom and inquiring into obtaining copies of his books. Tom Tweedel is an Austin, TX based photographer and can be reached at: tomsds@austin.rr.com
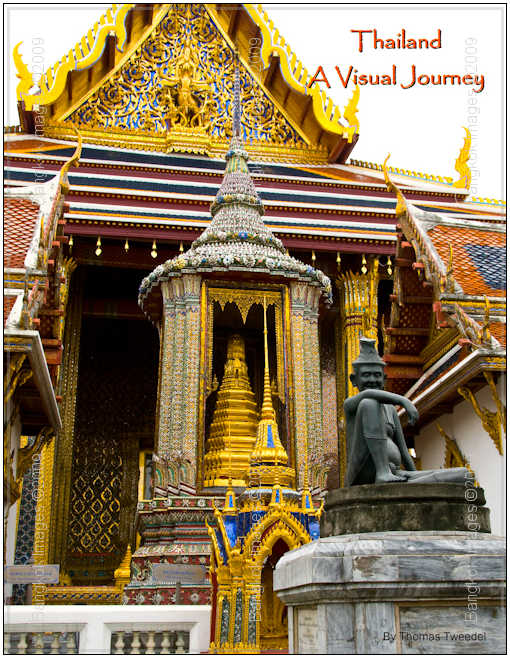
340 Page Book on Thailand, Front Cover
Self Publishing
I got into self publishing many years ago as a way to share my experiences and observations traveling around China. Since then I have discovered it works pretty well for making photo books and albums. You can fit hundreds of pictures into a book that
is an inch thick at a fraction of the cost (and bookshelf space) of traditional prints stuck into photo album pages.
Previously getting something published (even for your own use) was a daunting and expensive task that involved print shops, binders, learning an entire new industry and people laughing at you when you told them you only wanted one copy.
Publishing on demand has changed all of that. You no longer need a small army of skilled people to get your book. You just need a computer, the internet, some software and a bit of determination.
There are many different vendors and options when it comes to getting your books published. Which one to choose can often be an intimidating task. When trying to figure out which one to use you can ask yourself a few questions to narrow the field.
How many pages is the book going to be?
Is it going to be mainly text or photos?
How important is print quality?
How many copies am I going to want?
How important is price?
Once you have answers to these questions you can narrow the choices down.
There are two main types of publishers that you’ll find. Photo book publishers and regular book publishers.
Photo book publishers is a broad description of publishers that want to let you take your photos, load it into their templates and send you an attractive printed and bound book. The books are available in variety of sizes and bindings. They usually range
in size from 5-50 pages and cost around $1 a page or more. It’s usually pretty tough to get something done for under $30/copy. These books have the advantage in that they are easy to create. Many consumer level photo management programs
(like I-photo) have the ability to create these books built in. Others have free software you can download. Many photo sharing/printing sites (Smugmug, Snapfish, Ofoto etc) have this functionality built in. You can create a photo book and use
pictures from your collections using templates. Some even have a single click solution where it will take an entire gallery and put it in a canned format.
This type of book has several advantages. It relatively easy, usually has close to if not true photo quality prints (quality does vary by vendor) and it’s probably integrated with something your already familiar with using. Some may even give volume
discounts. They are excellent for small projects like short vacations, parties or holiday pictures.
The disadvantage is that you are usually limited to their templates, which may not be what you’re looking for. Personally I found limited ability to work with text to be very limited. They also have a maximum page length of around 50 pages which
may not be enough for your larger projects. Finally they can be quite pricey. They usually have a binding + per page fee that can add up to $30-60 a copy. Even with a discount on 12 or more you’re talking a good chunk of change.
The second type of publisher is more a traditional book publisher. They offer a wide variety of products but at their core they allow you to create books in a wide variety of sizes and up to hundreds of pages in length. You can order as many or as few
as you need and you can even sell your book through their online store. Their pricing is also a binding + per page fee and varies depending on the type of book you publish (size, paper, color, hardbound etc). While they are really geared towards
conventional text type books (novels, reports, works of fiction etc) they have enough flexibility that you can use them for photo books as well.
They have the advantage of being significantly cheaper for larger books, especially if multiple copies are involved. They also give you options beyond their canned formats which lets you decide how things should be laid out an annotated. Also the fact
that you can “sell” your books online makes them easier to distribute to friends and family at their expense. You can sell it with no markup and they can order all the copies they want at printing cost.
The disadvantage is that you have to know a bit more and have a bit more skill to put the book together. You’re more likely to run into technical difficulties until you understand their quirks. It might take a bit longer for the order to be filled
(2-3 weeks from order to arrival is common) and the print quality even on the color products is not quite as good as what is available from the photo book publishers.
I’ve used both types of publishers in the past, but given the volume and type of work that I do with my pictures the book publishers are the way to go.
There are two publishers that I have used, lulu and Blurb. They both have their advantages and disadvantages and both will get the job done.
Lulu
Lulu is probably the bigger of the two and the one I have done the most work with. They have expanded their product selection over the years to the point where it can be quite confusing. For those
looking to do books they have two options. You can use the “Lulu Studio” which you upload your pictures directly and place them in pre-formatted templates (much like a photo book) or you can create a “regular” book
where you upload the finished files. The Lulu Studio method is more expensive as it uses a higher grade of paper, but it’s still around half the price of most photo book sites.

Lulu Publishing Menu
To get a regular book printed you will first need to assemble your book in one of the supported formats. They support Word documents (Word 97-2003), Text documents, JPGs, GIFs or PDF’s. One advantage is that you can upload multiple smaller files
and have them combine them all into one large file. For example each chapter could be a separate word document. Or a photo book could even be 150 8.5×11 JPGS. One thing they regrettably don’t support is multiple PDF files. So if your going
to use PDF (which I recommend) you’ll need to get it all wrapped up into one file first.
Their books come in a wide variety of sizes, which you will get to select when you are starting your project. You also have the option of printing in black and white (for $.02/page) or color (for $15/page). I often will order a B&W “proof”
copy of my work to check for errors before committing to color. The binding fee for soft covered books is around $5/book.
The wizard will take you through the different steps of selecting your size, binding, paper and uploading your files. They can accommodate books up to 700 pages long and files up to 700mb. To upload individual files more than 300mb in size you will need
to use FTP. If you use multiple files or any file that is not a PDF you have to go through a conversion process where Lulu takes your file and converts it to a PDF for free (you can even download it afterward).
This process is where I have had the most trouble, with close to half of my conversions failing. The conversion can take a couple of hours and the failure and subsequent troubleshooting can take days to resolve. I HIGHLY recommend that you go ahead and
get your files all converted into a single PDF before starting your project. There are a number of inexpensive solutions for this problem. Ever since I started doing this my failure rate on projects has gone from near 50% to zero.
After you have gotten the meat of your project up there you can create the cover. You have the option of using the cover wizard which gives you a variety of pre-defined templates to choose from or you can upload your own cover. I skip the wizard lay my
cover out, put all the text I want in it and then save it as a JPG to upload it. Either way will produce satisfactory results.
After creating your front and back covers and spine your ready to go. You fill in some information about your book for marketing purposes and then your project is done. If you want to sell your book you can set the purchase price. The revenue you get
is 80% of the net profit after production cost. If you want to market your book they have a variety of marketing kits and programs you can purchase and they will even list your book on Amazon.
Lulu doesn’t do just books, you can sell your products via CD, DVD, electronic downloads and other media. They are really a one shop does all publishing/distribution operation.
Support
Lulu used to have live chat support. The agents were prompt, consistent, and for technical problems generally useless. They have switched to an email based model and do generally get back to you within a day.
If you have printing problems (something misprinted, mangled pages etc) they generally ask for a picture as evidence and then will reprint your order. They may or may not ask you to ship the books back to them. If they do you get emailed a link for a
UPS label.
Some tips for dealing with Lulu
– If you use the “Lulu Studio” to create your projects or you have them do the conversion for you expect problems. Their email based support is fairly responsive, though the usual solution is delete your project and start over.
– As impressive as the hardcover products may feel I wouldn’t recommend them for photo intensive project. The press they use is different and it’s not as sharp or saturated. The paper has more of a matte finish. Stick with the soft cover
as the print quality is a bit more saturated and glossy.
– Understand that this is not true photo quality chemical print quality output. You may experience some color shifts, loss of dynamic range and other technical “flaws”. But remember your paying $.15/page and not $3.
Blurb
Blurb is Lulu’s biggest competitor as far as I know. They don’t offer quite the same range of products as lulu but there is enough overlap that your will find something that will fit the bill. They
are also unique in that they offer oversized printing (12”x12”) that Lulu does not, at a price.
In terms of price they are pretty comparable. Rather than break their costs into a binding + per page fee they have a flat fee for a certain number of pages. The fee is a sliding scale that means the higher the page count the cheaper the per page cost.
Lulu tends to be cheaper for lower page count books, at the higher page count the prices are pretty similar.
Blurb Style Menu
Blurb takes a different approach to book creation. You download proprietary software (for free) from their site and use that to assemble your book. It is a page layout application with a variety of templates. You will need to find the template that closest
suits your need and go from there. The templates can be modified by the user if needed. Still if you have put your book together in Word it’s going to take some effort to get it into their product before you can upload it. Depending on
your layout this effort might be significant.
The upside of this is that you know the book is formatted like THEY want it. This eliminates problems with conversions you might experience at lulu.
They also have added the ability to accept a PDF file. This possibly eliminates any issues you might have with the flexibility of their templates as you can do your layout in whatever form you like as long as you can get it to PDF.
You can also sell your book on blurb for a percentage of the net profits.
There are a few notable product differences between Blurb and Lulu. In my option the color printing quality is a bit better at blurb than lulu. However the biggest “normal” size book Blurb offers is a 8×10, not 8.5×11. For someone who is
trying to maximize their picture real estate per page this was a bit of a disadvantage. However Blurb does offer 12×12 books but the cost is significantly higher.
Support
If you have a problem Blurb has email based support. They usually get back to you within a day. If there is a printing problem (something misprinted, book cut wrong etc) they ask for photographic evidence and then will send you a re-print. They will ask
for the book back and email you a UPS Label.
Tips for Dealing with Blurb
– Before starting your project email them asking what the true printed size of the book you are contemplating is. I found out the hard way that 8×10 was the “marketing size” and the actual printed size was a bit smaller.
– Blurb also has good email based support
– If your project doesn’t fit one of their templates select the “blank book” template and modify it so there is no formatting or restrictions and print your pages out as JPG’s, then place those in the book. Or use PDF.
– Like Lulu these are not going to be chemical print quality pages, but then your not paying chemical print quality prices.
Conclusion
If you’re looking to do a quick one off photo book with a few pages you’re probably better off going with one of the photo book makers.
For larger or more extensive projects lulu or Blurb is much more practical. Which one to use is largely an issue of what output you want and which one you become comfortable using. Lulu has a slight price advantage while Blurb has slightly better print
quality. I mainly use lulu because I’m more familiar with them and they allow a full 8.5×11 output vs. slightly less than 8×10. But aside from that I wouldn’t hesitate to use Blurb.
Back Cover of Thailand Book
Photography News of Interest
Warning labels on digitally enhanced images? This headline certainly caught my eye! In France there seems to be a drive to have all digitally enhanced images used in advertisements, product
labels, and even campaign posters carry a warning that the image has been digitally enhanced. What about politicians who have been 'surgically' enhanced? Will Jacques Chirac and other obviously plastic politicians need to wear a warning
around their neck? You can read more about this here.
Do you live in fear of someone stealing your home WI-FI signal and you're not computer savvy enough to set a simple security password? This new WI-FI blocking paint product from Japan
might be for you. Paint it on your outside walls (on the inside) and it will block your WI-FI signal from WI-FI thieves waiting outside your window. Or, if someone in your family wears tinfoil hats to thwart aliens you could paint the outside
of your house with it and create a sort of safe zone for them inside. Seriously, there is such a product and someone thinks it's marketable. Read about it here.
I'm not a Madonna fan but I'm certainly glad to see this ruling. Some creep being paid good money to be her interior designer went into her computer, stole her wedding pictures,
and then attempted to sell them to a gossip rag. At first the gossip rag refused.. but when news of her divorce to Guy Ritchie became known they did buy and publish them. She won damages against the gossip rag and she well should have. You can
read more about it here.
No, I'm not going to talk about how the Nobel Peace Prize committee embarrassed themselves this last week, but we should mention that the Nobel Prize in Physics for 2009 went to the two physicists who invented the CCD image sensor, the prelude to the modern sensors you use in your cameras today. They invented the CCD sensor in 1969. Why did they wait so long to put them in consumer cameras! Read more about it
here.
This is good. You're in Las Vegas and decide to get married so you hire a wedding photographer for about $4000,00 USD. You get the pictures back and you think "this looks like
two people had been out drinking, got sunburned, and then decided to get married." I have a question… They also had to share the getaway care with an Elvis impersonator. You can read about it here.
Oh My. This is priceless and you've probably seen it in the news already. The Ralph Lauren model who was photoshopped to look so skinny that her head was bigger around than her waist!
People are screaming over this one. Check out the link in the article that takes you to the website Photoshop Disasters. Fun stuff! See it here.
Readers' Submissions
Steve,
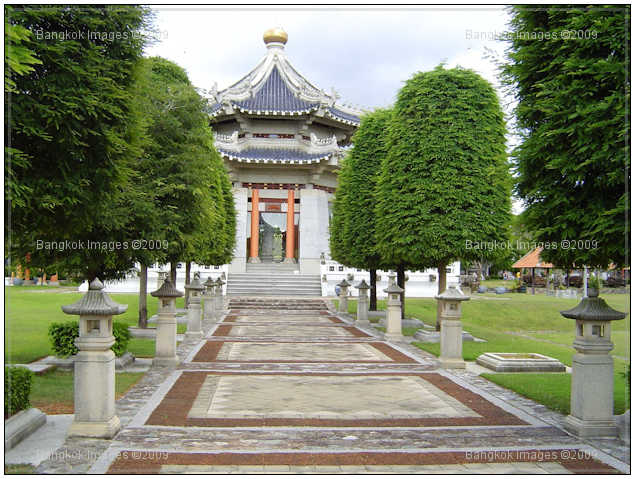
Greetings! I mentioned in and earlier e-mail that Nittaya and I had made a day trip to 3 Kingdoms Historical Park just East of Pattaya. GPS coordinates are N12 54.253 / E100 58.587.
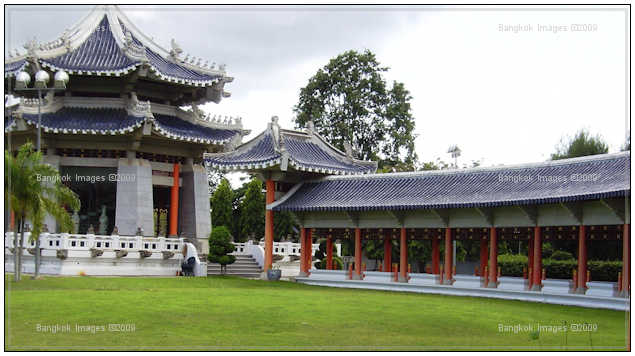
The 3 Kingdoms Historical Park is a testament of final piety of the 6 children to their father, Mr. Kiarti Srifuengfung, a successful Chinese-Thai businessman. The 3 Kingdoms Historical/Theme Park is a unique one of its kind. The renowned
historical Chinese epic 'Romance of the Three Kings' forms the central theme of the park.
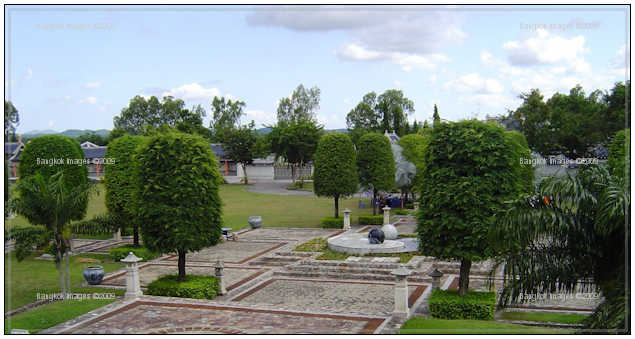
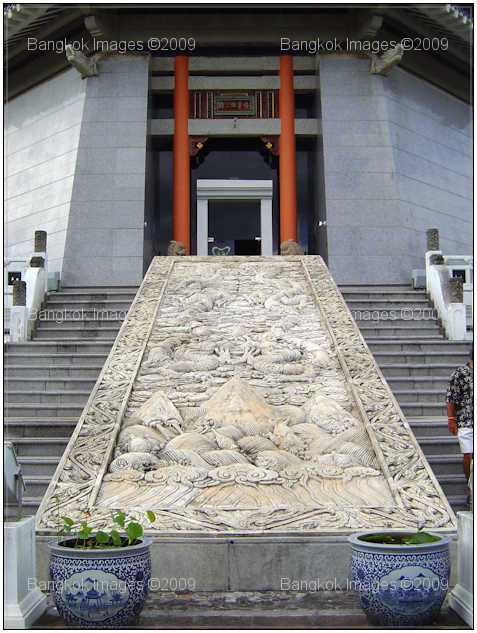
Three Kingdoms Theme Park is situated on a vast piece of land with huge wall paintings all over. Inside the park, the architectural style establishes the fact that even a park can look beautiful primarily because of perfect architecture. The constructive
pattern is a blend of Chinese and Thai influences. There are other forms of art and sculpture depicting scenes, chapters and characters from the novel, as well as a Buddha relic.
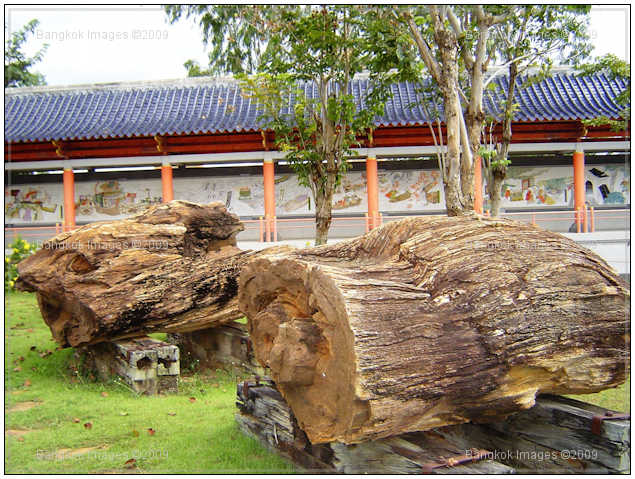
The Three Kingdoms Theme Park in Pattaya is location at 100 Mu 9, Pong sub-district, Banglamung. This theme park was established with an intention to gift the world new means of creativity and has been used to entertain the tourists as well as the native
travelers. The elegant simplicity of the architecture of the park is in perfect harmony with the environment. Three Kingdoms Theme Park Thailand stands out in its architecture, beauty and serene ambience.
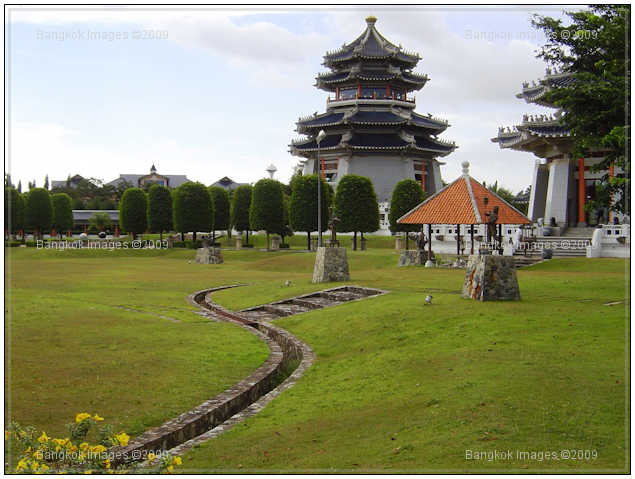
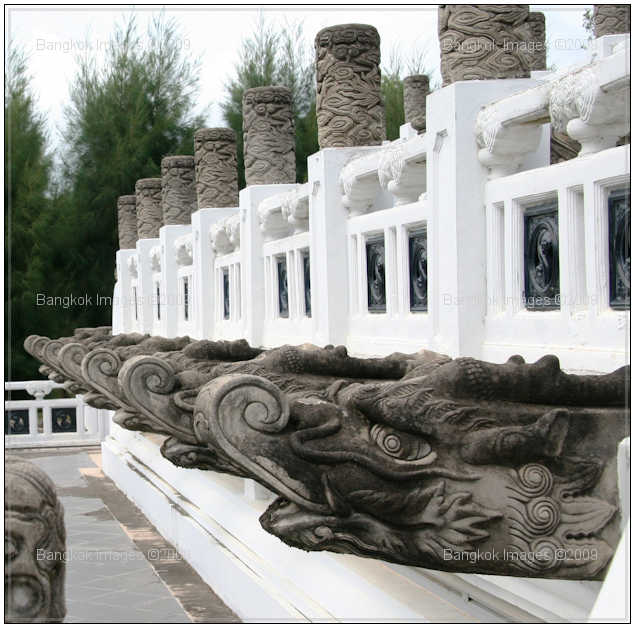
Entrance fee was 80 baht for Thais and something slightly more for non-Thais. With my Thai driver's license, they charged me only the 80 baht. For the hour and a half that we were there, only on other couple was walking within the grounds.
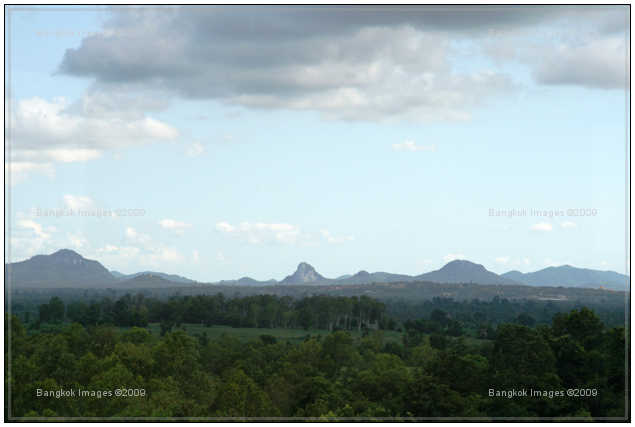
That made it nice for a great photo shoot with no pedestrians to get in the way. Here are a few shots taken with a combo of my point and shoot Sony as well as my Canon EOS/XTI with 17-85mm lens. Again, nothing fancy with the shots, just interesting from
my perspective. Enjoy!
MTS
MTS –
More great images! You're doing quite a lot with a single lens. The new Canon 500d is doing very well. As always, we look forward to more from you.
Steve
I suspect the readers' submissions will be a highly anticipated section of this column and I encourage anyone with photographs and travel accounts they'd like to share to please send them to me at: QandA@Bkkimages.com
Readers' Questions
Steve I have to re-calibrate my monitor since I've just re-installed windows XP and when I do so it shows that the red is way up, but the colors on screen look good. I use the profile I'd created in early September and set the windows color
management to this. Can you tell me what luminance level I should aim for?
I know we talked about this in the past but I cannot find the email that relates to this topic.
Charles
Hi Charles –
It probably isn't a good idea to use your old color profile unless you can be 100% certain you're using the same hardware and the same video card drivers as before. If anything is different in this mix the old profile will be out of whack.
The values, Luminance/Gamma/Whitepoint, are paired in such a way that they should be selected together as a set. And each one depends on your monitor, its type (desktop/LCD/CRT), your ambient light temperatures, and ambient light levels. Either one of
these variables might dictate a different value.
And.. there is the consideration of your end use whether it be prints at your local print shop, display on your computer monitor, or perhaps CMYK for print in magazines and brochures.
So.. there is no "right" values. There are only values that fit your individual needs best.
What I can do is give you some values and conditions that I've used over the year sand you can decide if they're close enough to your needs.
Desktop LCD: 6500k/2.2/120
Notebook LCD: 6500k/2.2/90
CRT: 6500k/2.2/100
2. CMYK pre-press, brochures, magazines, controlled 'dim' light levels.
Desktop LCD: 5000k/2/100
Notebook LCD: 5000k/2/80
CRT : 5000k/2/90
3. Professional prints, pro-level inkjet, controlled 'dim' light levels.
Desktop LCD: 5500k/2.2/110
Notebook LCD: 5500k//2.2/90
CRT : 5500k/2.2/90
Remember, these are personal preferences. Your calibration software might 'recommend' values.. but these are just values taken from an average of personal preferences.. and adjusted to work best under average conditions.
As you can see.. you'll probably need to experiment with your settings and see which suits your needs the best. For instance, if you're main use is prints at the local print house then your measure of success would be if what you saw on your
monitor matched the prints made from your files. Remember, there are two reasons/uses of being color profiled.
a. So your files are close to a standard for sharing on-line, with customers who do their own printing, or any other type of sharing with anyone who will be viewing your files on a display.
b. So what you see on your monitor is what you're getting from your prints.
As far as your Spyder and its reading the red.. I don't know as I don't use this particular colorimeter or software. I'd say if it looks good, matches your intended use (a&b above), and isn't clipping any of your color channels
(red specifically in this case) then you're doing fine.
Also know that when you say it looks good to your eyes.. you're now trusting that your eyes have enough experience to act as a sort of colorimeter. I know guys who can do this.. they'll instantly recognize a profile that's off.. and really
it depends on how far off it is.. when sorting how much skill it takes from the "eyes" to recognize. It took me a decade of color profile use, tens of thousands of hours sitting in front of color profiled monitors, et.. to reach a certain
level of competence where I could judge by looking. Probably there are some gifted individuals who can do this in much less time.
I hope this helps.
Steve
Steve
I had made a mistake when trying to calibrate my monitor, I had forgotten to add the LCD adapter to the puc and was getting a false reading. Now I have been able to get a proper reading but I have found that my monitor is not good. The readings are 27
for red, 27 for green and 100 for blue (100 is max). Luninace is 106. I think in the near future I am going to have to invest in a better monitor.
Charles
Charles –
I'm glad you're making progress.
Consider that the "balance" of the channels might be making the need for the blue channel to be pumped up. Try backing off the blue channel and then adjusting the red and green channels. It's a tricky balance sometimes.
Also.. once you find a balance.. then you can jockey your channels up a bit each while maintaining the balance, and making your luminance higher.
I hope this helps.
Steve
Please submit your questions to QandA@Bkkimages.com All questions will be answered and most will show up in the weekly column.
A Snapshot of Bangkok Images Week in Review
A slow but steady week. As you might have noticed in addition to adding great software reviews we've also decided to publish interviews from accomplished photographers. These interviews will give you some insight into what it takes for different
levels and types of photography. You'll get to read about their lives and what makes photography special for them. We'll start off with 4-5 of the personalities you already know, and then try to bring you a new interview once per month.
Infocus Blog
Sky Train BTS Airport Link
I've lived in this location for almost five years. In that time I've watched the landscape below turn from no sign of the new BTS Airport link, to a loosely defined area as they cleared each side of the existing railroad tracks, to cement and
concrete piers, to a defined track, and finally the finished track and skytrain station. The heavy lifting has been completed for over a year, so what's holding up activating the link?
Canon G9 point and shoot
Four years ago the cement and concrete piers started to form. The original image is of very high resolution and zooming in the original you can see the shanty town of small metal shacks the immigrant workers and their families lived in. This spawned an
entire community within an existing community and was very interesting to observe. We had the food venders, shack cleaners, babysitters, loan sharks, and even prostitutes.
Fuji F30 point and shoot
From 20 stories up the scene looks like a model railroad set under construction so I'd often walk down and through the shanty down and take a look at the construction close up. The piers rise up in the sky approximately 30-40 meters and dwarf the
structures beneath them. You don't realize how big the piers are even from this close, or that if they were hollow you could park several cars side by side.
Fuji F30 point and shoot
Eventually they started building permanent quarters for the Thai workers who would live there when they finally opened. It was more than a bit ironic that the immigrant workers living in cardboard and steel shacks were constructing only marginal better
quarters for those who would come after them. Temporary power poles, cement foundations, wood shacks, metal shelters, and dozens of cooking fires blended together in a sort or warped order.
Canon G9 point and shoot
Soon the landscape showed a steel and cement track 'growing' out of the downtown area, only ending at the site of the new BTS station which was taking considerably more time. Everyday immigrant workers from the shanty town were loaded in trucks
or rail cars and transported to the desired construction site to continue the scheduled progress.
Canon 1ds Mark II, 25mm, F5.6 1/60th, ISO 100, handheld
And one day nearly five years later you peer off the balcony and a shiny new BTS station with neat orderly rows of employee housing and marked parking spaces surprises you. All of a sudden there is more definition, more color, as this important link from
the city center to the airport takes its final shape.
A few weeks later mostly empty sky trains glide up and down the track almost silently save for their two tone horns designed to catch your attention, yet not disturb. We've been told the link will open last year, then early this year, then on the
Queen's Birthday, and then the King's birthday. Finally we hear it won't open until next Spring. Why?
We've heard all sorts of stories ranging from funding issues to a soon to retire employee being afraid to make the decision to purchase signaling gear. The real truth is the powers in charge have been fighting over who will run and operate the link.
This is a political power play of the highest order and the winner will realize riches far beyond reason. Finally we have word. For the first six months of operation Thai's won't be running it at all, the foreign company who built it
will. During which they'll train the Thai staff who will eventually take over as the new rail links care takers for decades to come.
This vital new link from the city center to the international airport didn't take so long to construct because the Thai government was incapable of meeting a strict time line. It took this long because they were fighting over who would have control,
and the rewards that control will bring.
Until next time..
