Whale Watching With Rod C./Intel 320 Series SSD Review

Quick Click Links
Feature Photograph Whale Watching With Rod C. Intel 320 Series 160gb SSD Review Photography News of Interest
Readers Submissions Readers Questions A Snapshot of Bangkok Images Week in Review Infocus Blog, Thai-Falang Board T
Feature Photograph *menu

Fuji x100 @F8 1/75th ISO 200
This is the third part in our “Pointing Your Camera” series which is designed to help you filter the scene your eyes are seeing, and find that memorable scene your camera can see. Part One and Part Two before this are worthwhile reading.
“BkkSteve, once I find what I want to photograph, does it really matter what settings I use?” This is a wide open question so I’d have to say of course, the settings control your composition just as much as any other factor, so knowing how to change your settings for best effect can be very useful. You’ll often hear people say “modern cameras are so good that if you just concentrate on pointing your camera you’ll end up with good pictures.”
This is true. But it’s also a bit like closing your eyes and pointing to something on the menu, some dishes you’ll order will taste good, others will be disappointing. Learning how to control your camera is like learning a foreign language, it opens up possibilities and compositions you didn’t previously think were possible. And it’s also the difference between an amateur and a professional. A professional is paid to get the shot every time, there can be no excuses, so you must know how to control the camera. An amateur isn’t under the same pressure.
Let me ask you this: You’ve already paid a lot of money for your gear, you’ve already put a lot of time/effort/expense into being on the scene, don’t you want the best photos possible for all your work? Of course you do, and learning to control your camera through its settings isn’t difficult at all. And like any language, the more you practice, the more proficient you’ll become to the point of fluency.
Let’s look at the scene above. A beautiful sunset backing up a lonely car on the highway. My choices when taking this picture included shooting straight up or down the road, straight across the side of the road, or the oblique angle I chose. I chose this angle so the car would enter the frame on the right, and the road would then capture your eyes all the way off the frame on the left.
In this scene exposure was key. If I’d left the camera is automatic I’d have ended up with this scene below:

Fuji x100 @f8 1/300th ISO 200
As you can see the automatic sensor on the camera used the brightest part of the sky to set the exposure making the bottom half of the frame so dark that it was unusable. My eyes could see the road, why couldn’t the camera? The camera could see the road, I just needed to explain to the camera how. I did this through the exposure settings, my simply dialing in 2 stops of positive exposure compensation my shutter speed dropped from 1/300th to 1/75th with several results.
The sky now looked much brighter than before, more similar to what my eyes were seeing, and now I could make out the road. I waited a moment for a car to pass and I snapped another frame hoping to capture it’s headlight beams on the road surface. I was somewhat successful. A much better photograph that I’ll keep, vs. a frame which disappointed and would be discarded. All because I changed the one setting. A profound difference.
Night shots, such as subjects on the street, left to the cameras control, will often go the other way and picking up on more dark areas will overexpose the image. And that’s not to mention ending up with a heavily color cast image (overly pink/red is very common in such cases) because the white balance is off.
Probably 90% of a casual photographers exposure settings can be accomplished while using an automatic mode, by just using the exposure compensation control. You can learn more about Ev in a tutorial I posted back in 2008 here. Give it a read.
Whale Watching With Rod C. *menu
 Rod C was one of my most fun workshop students. It was all in his attitude which I quickly found infectious. You can tell he loves photography and he didn’t object to working hard to meet his personal goals. Smart as a whip he listened well and quickly incorporated the course material into his own style. Yet, photography takes more than being intelligent, it takes a good eye for composition and a strong work ethic, two traits Rod C has in abundance. I remember thinking “with work he could go pro..” Since then Rod’s work has continued to improve and impress. I hope you enjoy his latest outing. You can contact Rod at this link.
The whales migrate up the east coast of Australia in June to the tropical waters of the Whitsunday Islands where they calve before heading back to the Antarctic.
These photos were taken off Coffs Harbour about 500km north of Sydney in October. I think late September & October are definitely the best months for seeing them as they head south again. Firstly there is a good chance of seeing the calves breaching and if you’re very lucky you’ll see the bulls breaching as they try to impress the in season mothers who have recently calved.
We decided to take a 2 hour boat ride with one of the many whale watching tour operators dotted up the east coast of Australia. You can get lucky and get some good shots from the shore, but have a better chance with one of the tours.
In the photos below are 2 mothers and 2 calves which I think are Humpbacks. I took a total of 330 photos of which 20 were worth keeping. It’s really hard to predict when & where the calves will breach. I have more than 200 photos of nothing but a water splash or part of the tail.
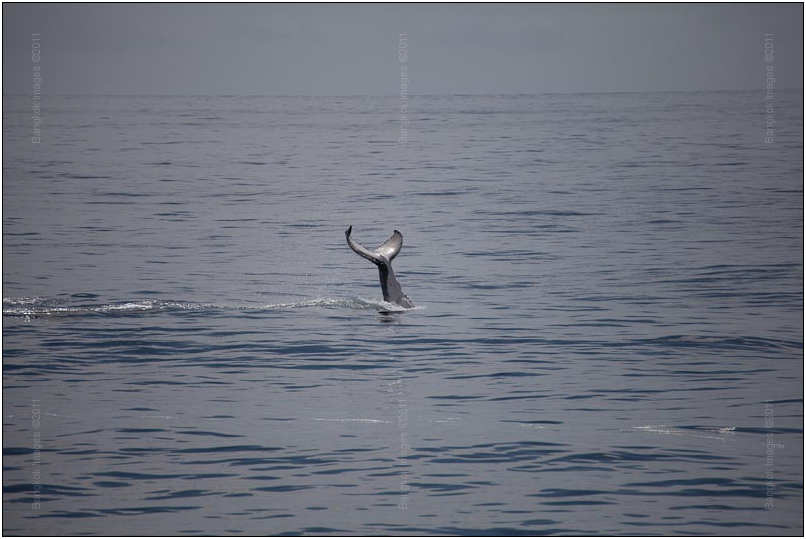
Canon 5d Mark II, 70- 300mm F4.5-5.6 @ 300mm F5.6 1/2500 ISO 100
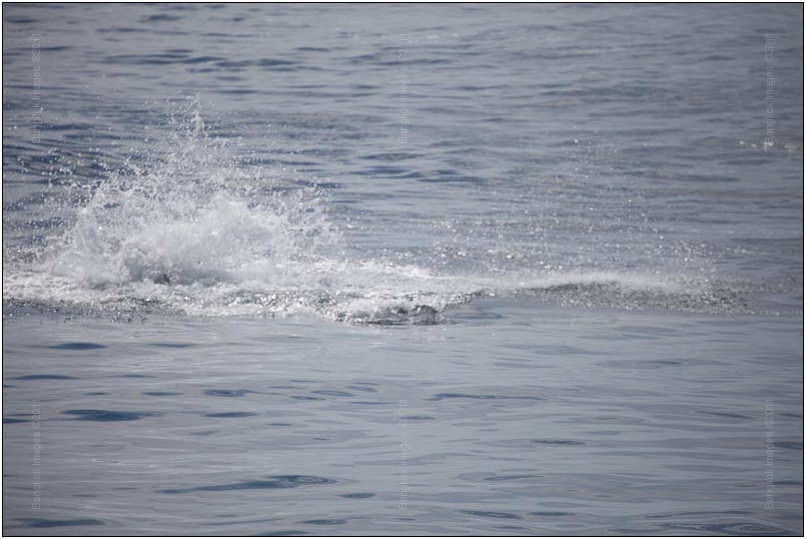
Canon 5d Mark II, 70- 300mm F4.5-5.6 @ 300mm F5.6 1/1250 ISO 100
The mothers then turned and swam directly under the boat and even I couldn’t miss a couple of good shots with this opportunity. The boats are meant to keep 200m away from the whales. If the whales then decide to swim towards you then you’re very lucky.
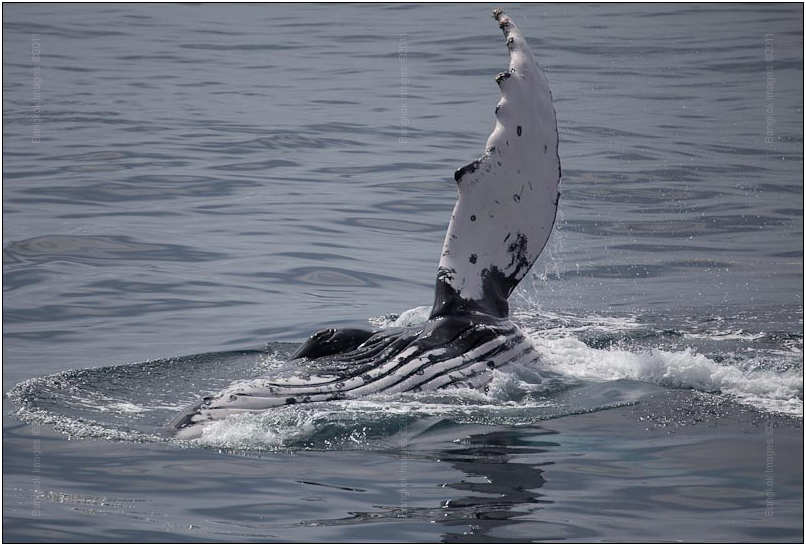
Canon 5d Mark II, 70- 300mm F4.5-5.6 @ 300mm F5.6 1/1600 ISO 100
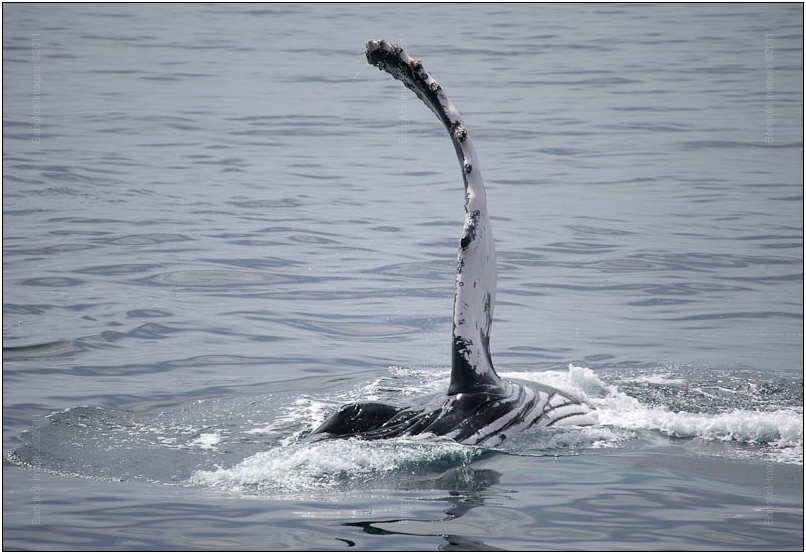
Canon 5d Mark II,70- 300mm F4.5-5.6 @ 300mm F5.6 1/1000 ISO 100
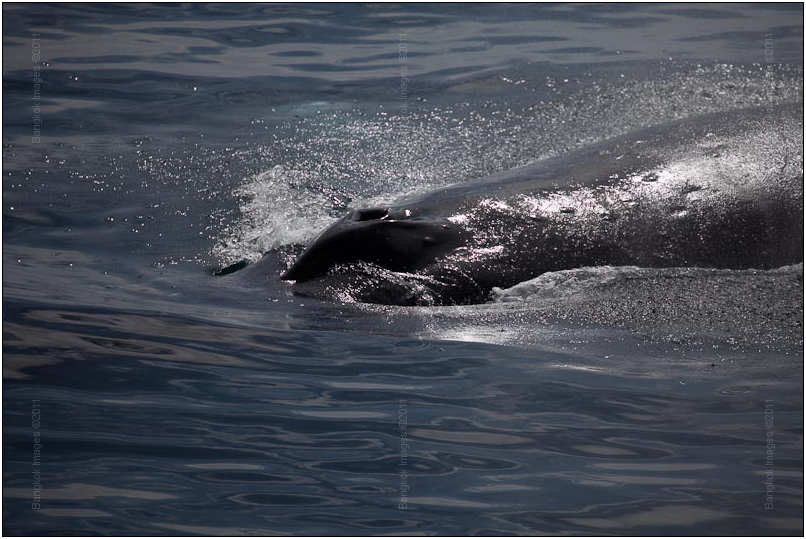
Canon 5d Mark II,70- 300mm F4.5-5.6 @ 300mm F5.6 1/2500 ISO 100
The calves were in a playful mood breaching everywhere but I just couldn’t get the good shot. The mothers where a little easier with some good tail & fin slapping
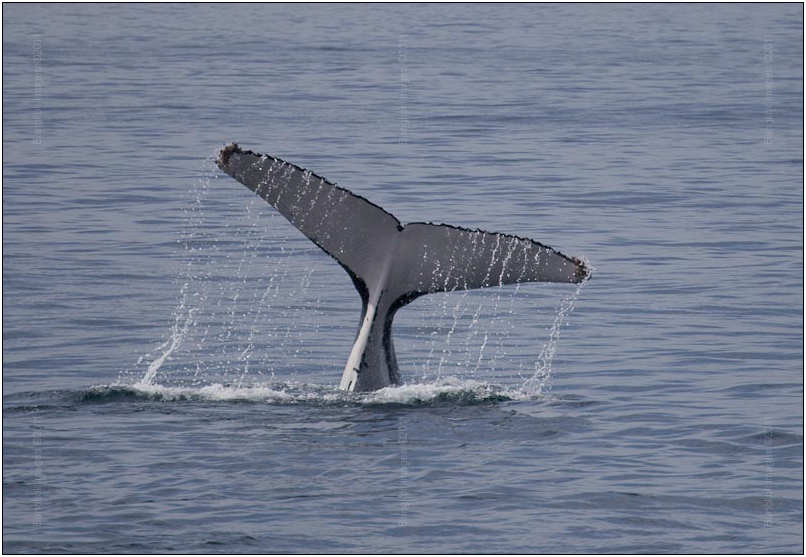
Canon 5d Mark II,70- 300mm F4.5-5.6 @ 300mm F5.6 1/2000 ISO 100
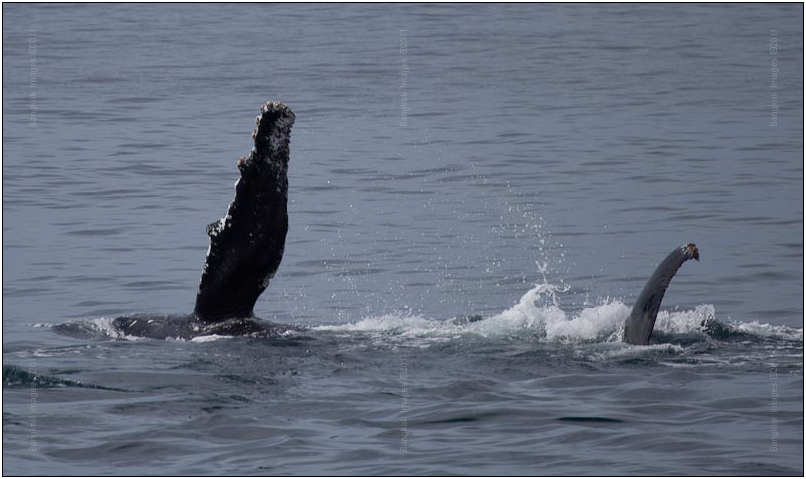
Canon 5d Mark II,70- 300mm F4.5-5.6 @ 300mm F5.6 1/1250 ISO 100
The calves where still going crazy & I just kept missing the good shot
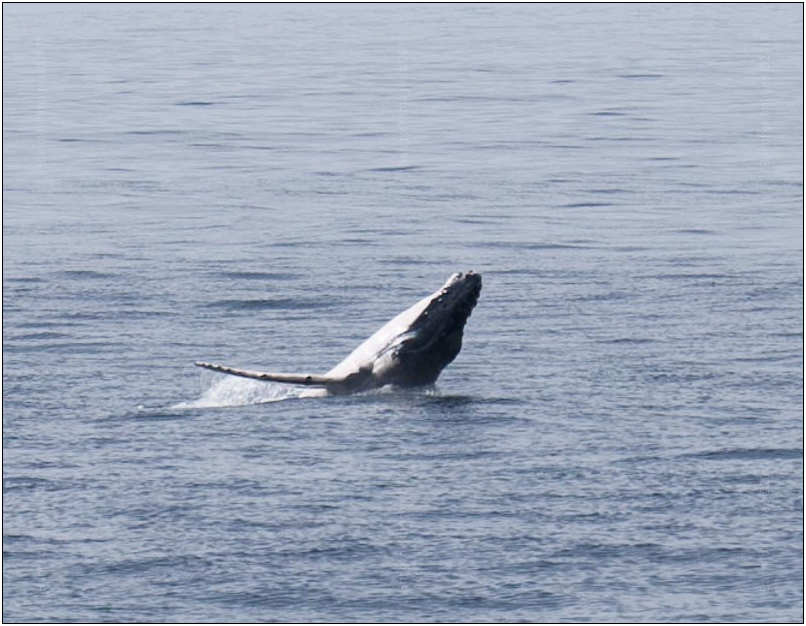
Canon 5d Mark II,70- 300mm F4.5-5.6 @ 140mm F5 1/1000 ISO 100
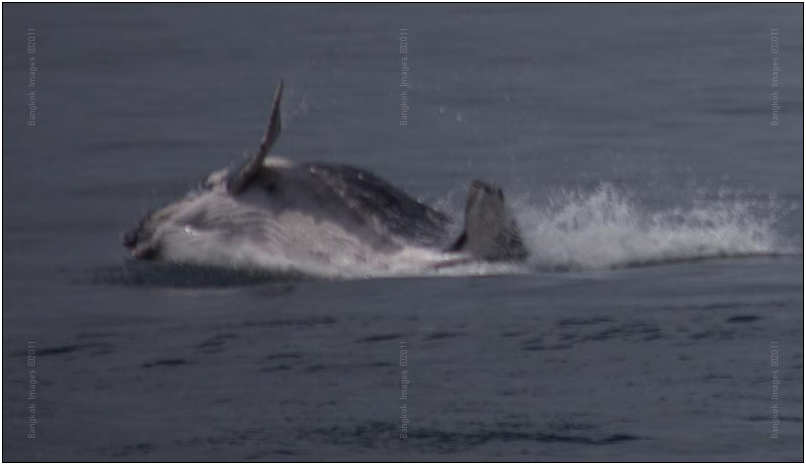
(Out of focus) by now I was getting seriously frustrated.
Canon 5d Mark II,70- 300mm F4.5-5.6 @ 300mm F5.6 1/2500 ISO 100
But then I captured this, I think it was more luck or the law of averages then anything to with good technique. You have to get 1 good shot when you shoot more than 300 of the same subject.
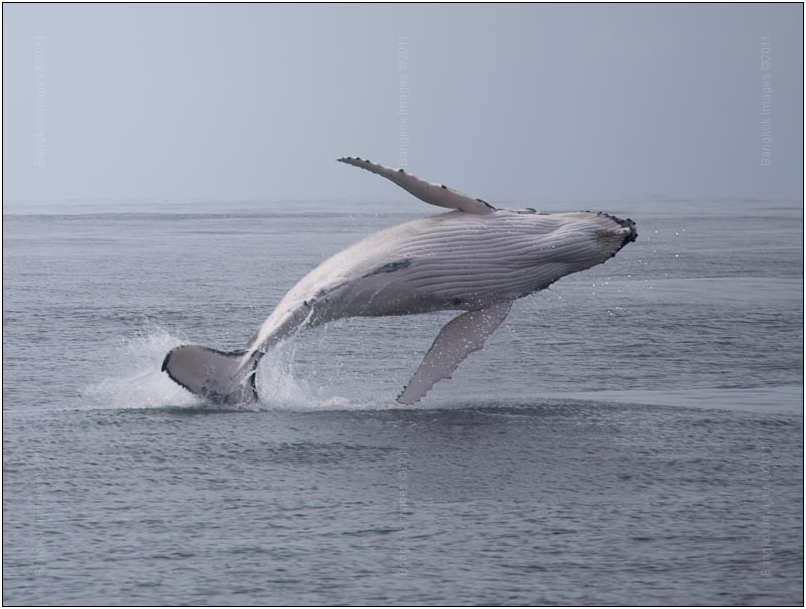
Canon 5d Mark II,70- 300mm F4.5-5.6 @ 300mm F5.6 1/640 ISO 100
In closing I have a serious amount of respect for those wildlife photographers that capture those beautiful whale photos. It’s a lot harder than it looks.
One warning that applies to Bangkok Images readers is regarding your “assistant”. If she happens to be Thai and tells you that she doesn’t get sea sick, DON’T BELIEVE HER!!!! Get a bottle of motion sickness tablets & make her take the lot!!! As you can see from the above photo it was as calm as calm can be when heading out to sea & my assistant was trying to feed the whales her breakfast within 15mins of leaving the harbour.
After we got back to dry land I found out she gained her sea legs taking the ferry to Koh Samet. She went out on the boat with me very keen to take her own photos with my Sony NEX-5. She took one photo before deciding survival was more important.


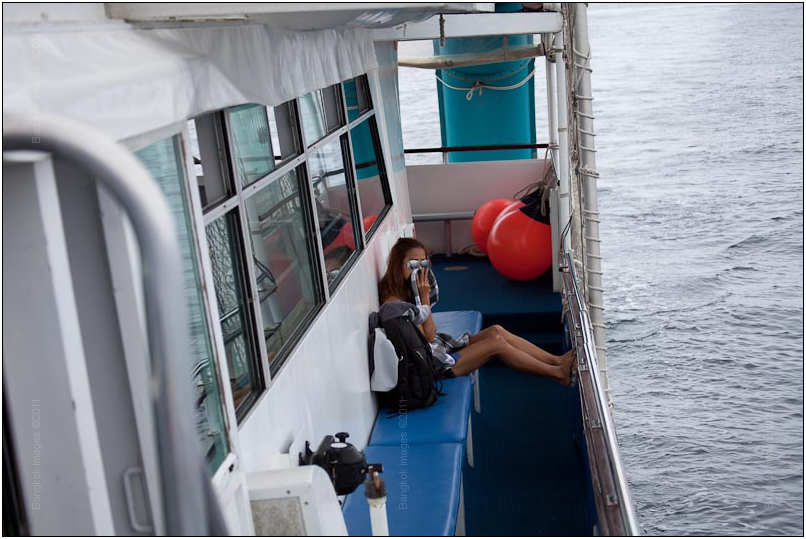
Let me tell you it is very hard to wipe the excitement from your face after taking a good photo, so when turning around you have the appropriate look of concern when asking your loved one if she is alright.
That’s it from me. This amateur would appreciate any tips on shooting and editing photos from out to sea.
Intel 320 Series 160gb SSD Review *menu

Introduction
By now regular readers know Bangkok Images has been caught up in the SSD wave in a big way. We’re firm believers in this new technology and I’d go so far as to say we’ll never build another workstation without at least tasking an SSD as the system drive, and most likely adding a second SSD as a cache and work drive. In the past we’ve reviewed the Intel X25-V SSD , the Crucial C300 SSD, and OCZ’s Revodrive SSD . We’ve even reviewed the Seagate Momentus XT Hybrid drive.
Perhaps the single most effective improvement to a PC or laptop of any vintage, is the addition of an SSD. This was the question posed to me by a good friend looking to update his fairly recent PC desktop. “Will an SSD make a big difference in performance?” The answer is yes, without a doubt. An SSD, properly selected, will make the biggest single item performance difference.

Selection
We now have a choice of dozens of top quality SSD’s, so how do we select the best one for our needs? It depends on your needs. My friend’s priority was reliability and ease of use. He also has a few years old motherboard without SATA III ports, so he’ll realize no immediate gain from a more costly SATA III SSD. He wanted to work within a budget of under $300 USD’s, but he needed enough capacity to easily handle his current system drives 80gb of files.
We all know hard drives start to experience a drop off in performance at the 50% capacity mark. SSD’s raise this to 80%. When you consider his system and programs take up 80gb, he’ll want to reserve at least 20gb for his system’s page file (temporary disk), and possibly another 10-20gb for his Lightroom and/or Photoshop’s cache, then 160gb becomes the bare minimum for optimum performance.
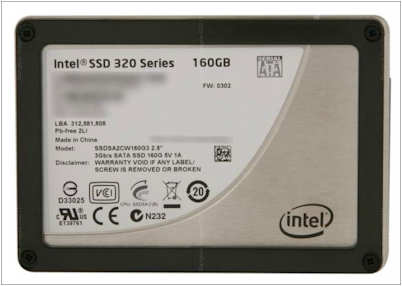
Branding is important with SSD’s. With SSD’s still being a fairly recent technology companies are still concentrating on specific markets, or in other words tailoring their products to appeal to specific segments of the market. OCZ for instance tries to appeal to gamers and enthusiasts and builds perhaps the fastest SSD’s available. Intel markets to its business clients by emphasizing reliability and compatibility. Intel more closely fit my friend’s needs.
Looking at the Intel lineup we wanted an SSD with the newer more modern 25 nanometer NAND chips, TRIM support (garbage collection), and a large enough NAND reserve to map out any errors occurring within a reasonable lifetime, SMART support (very few SSD’s have this, more will in the future), and Intels own controller which has proven to be a rock solid performer.

Some of Intels products feature a third party controller and have increased speeds, but they haven’t yet earned the desired reputation for reliability. Intel also includes it’s SSD toolbox with several handy utilities.
When all factors were considered, Intel’s new 320 Series SSD’s stood out as a solid choice. The 160gb model came in right under his budget so he placed the order. A few days later he had his newIntel 320 Series SSD in hand and he loaned it to me for testing so I could complete this review.
Installation
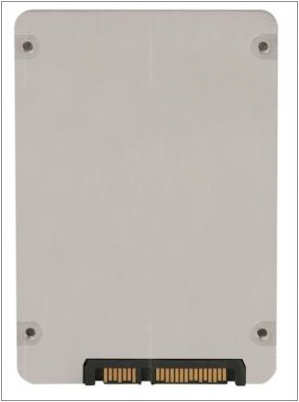
Installing an SATA interface SSD is the same as installing any mechanical hard drive with a few exceptions. The Intel 320 Series SSD is a 2.5 inch 9mm high format which will fit directly in any laptop. Mounting in a desktop will usually require a 3.5 inch to 2.5 inch adapter, unless your desktop has accommodations for 2.5 inch drives.
Adapters are the most common way of installing an SSD, but keep in mind they generate very little heat, zero vibration and they’re very light in weight. Almost any quality double stick mounting tape will allow you to locate your new SSD anywhere in your case. This is fast becoming a popular method of install where users are mounting their SSD’s in better cooled areas of their case and close to power and data cabling.
Once physically mounted you’ll only need to connect a SATA power connector from your power supply, and a SATA data cable to a SATA port on your motherboard.

Keep in mind that you want to match interfaces as much as possible. Modern motherboards often have all three SATA interface ports on the board, SATA, SATA II, and SATA III. Pull your motherboard manual and ensure you pick a port that matches your version or higher. In this case our SATA II drive was connected to a SATA II port.
In your laptop and desktop motherboard’s BIOS you’ll want to set this drive to ACHI for best performance. If you fail to do this, and keep it at its IDE default, then you’ll be giving up a big chunk of its performance.
Once your cables are connected and your BIOS set to ACHI, place a Windows installation disk in your optical drive and install Windows exactly how you would with any drive.
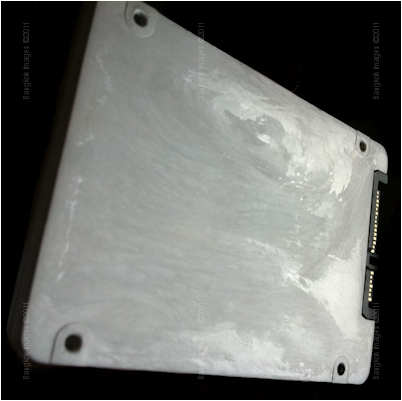
Note: Our sample had discoloration on its surfaces which made us wonder if it had been contaminated or was perhaps refurbished. A call to Intel confirms this is a manufacturing issue and there was nothing wrong with the drive in any way.
Performance
Performance is the reason you purchased an SSD, both in speed and reliability. Some bargain rate SSD’s are barely faster than their mechanical drive counterparts, while the better drives such as the Intel 320 Series are significantly faster. Let’s measure the speed and provide some comparisons.
I use the AS SSD benchmark because it simulates the type of load an average desktop workstation will be using, and the ATTO benchmark because it measures the best case speed. Both are widely accepted in the community and both are free. For this test we’ll only be using the AS SSD benchmark which you can download here.
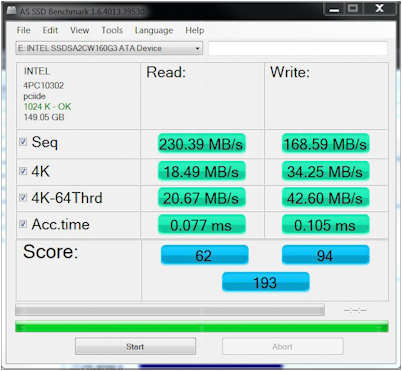
After we installed a fresh copy of Windows 7 ultimate I connected the SSD to a SATA I port and ran AS SSD. Notice the rather low combined 193 score? This is what you should expect if you connect to a first generation SATA I port.
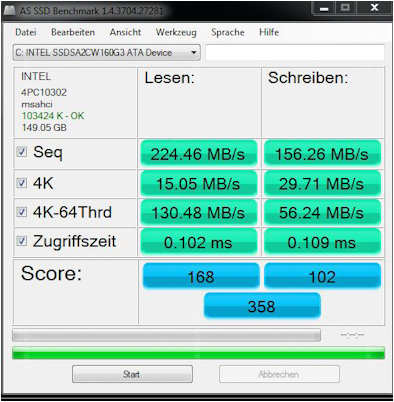
But what if you connect to a more appropriate SATA II port? A much better combined score of 358. This is more like it. You can see connection to an appropriate SATA port is vital for best performance. Out of curiosity I connected the Intel 320 Series SSD to a SATA III port and received exactly the same combined score of 358.
But how does it compare to last generations ultra speedy Crucial C300 (a SATA III devices connected to a SATA III port) which until today gives the fastest drives a run for their money. The Crucial C300 returns an impressive combined score of 643, made all the more impressive when you realize the drive is at 80% capacity and a few years old.
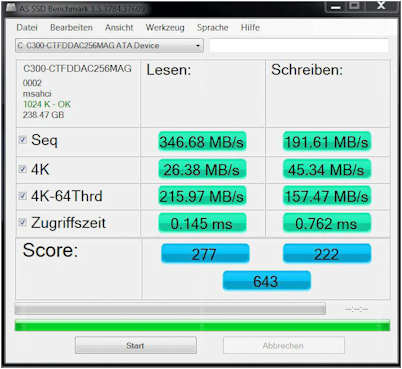
Obviously the Intel 320 Series SSD’s aren’t the fastest SSD’s available, a price you pay for using their proven reliability. Still, 348 is a respectable score and much faster than any mechanical hard drive.
Allow me to explain the difference:
AS SSD runs a series of reads and writes to a drive. It runs the same number/size of reads and writes to any drive you test. A WD Raptor, the fastest SATA HDD available takes over an hour to run this test. The Intel 320 Series SSD completes the test in under 2 minutes. This should give you an excellent perspective. The C300 which scores a combined score of almost twice that of the Intel 320 Series SSD runs the AS SSD test in roughly 1 minute. So yes, there is a difference between the Intel 320 Series SSD and the fastest available SSD’s, but it’s still light years faster than a mechanical hard drive. Reliability and speed, a tough combination to beat.
TRIM performance: I loaded this drive up using multiple AS SSD runs, as many as I could run in an hour, and the TRIM garbage collection kept up completely. This is impressive. In my experience you’ll often see a drop in performance under such conditions which takes a few hours of idle operation for the TRIM to correct. Intel has really optimized their TRIM routine.
Summary

The Intel 320 Series 160gb SSD is a tough act to follow if reliability is your primary goal. If you want better performance go with a drive like OCZ’s Vertex 3. But if you want the a reliable SSD with a great reputation and good performance, especially if you only have a SATA II port available, then the Intel 320 Series 160gb SSD is an ideal choice.
Intel continues to improve their SSD’s and remain the choice of Enterprise and business customers. If you’re looking for this combination of performance factors I don’t know of a better SSD currently on the market.
Photography News of Interest *menu
Stick sent this site in. A lot of good photography can be viewed here. Check it out.

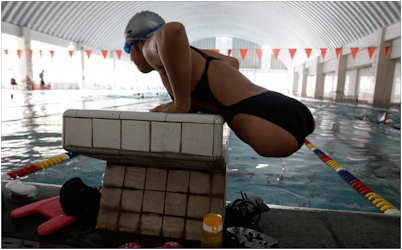
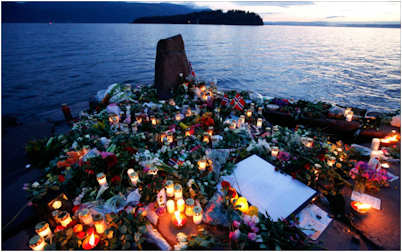
Another contribution from Stick, which shows Thai protest photos which have earned a Capa Medal. Some of these are very good.


An award winning photography Jost Franko shares how he knew he wanted to be a photographer when he was 16 and living with his grandmother, using her as a subject.

Who’s kissing Elvis! Has been a mystery for decades. Recently his kissing partner came forward and identified herself.

Readers Submissions *menu
BkkSteve
Glad you made it to USA… Sounds like a nice plan you have. When I grow up I want to be like you . 5555555
Perhaps the pictures might help you with your project…. Another great place you told me about.
Rickster


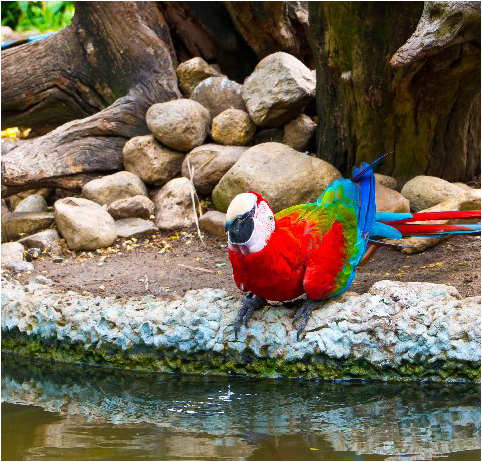




Rickster –
What great timing, right after my special on Suanpalm Farmnok! Nice images! Thank you.
Steve
I’d like to mention that everyone, myself included, is really enjoying the current trend of readers submissions. Everyone loves them, but remember we can really use more. I have only another week’s worth in my queue, so please take the time to put together a few images and words if you can and send them in. Thank you. info@BangkokImages.com
Readers Questions *menu
Hello Steve
I'd like to know if you can help me with this!
Before I upgrade to Lightroom 3.4 64bit when I was in Library Mode and I clicked on 'saved preset' it only showed the ones I had created.
Now it shown a whole lot of preset that I don't use or want.
is there a way of getting rid of them.
Charles
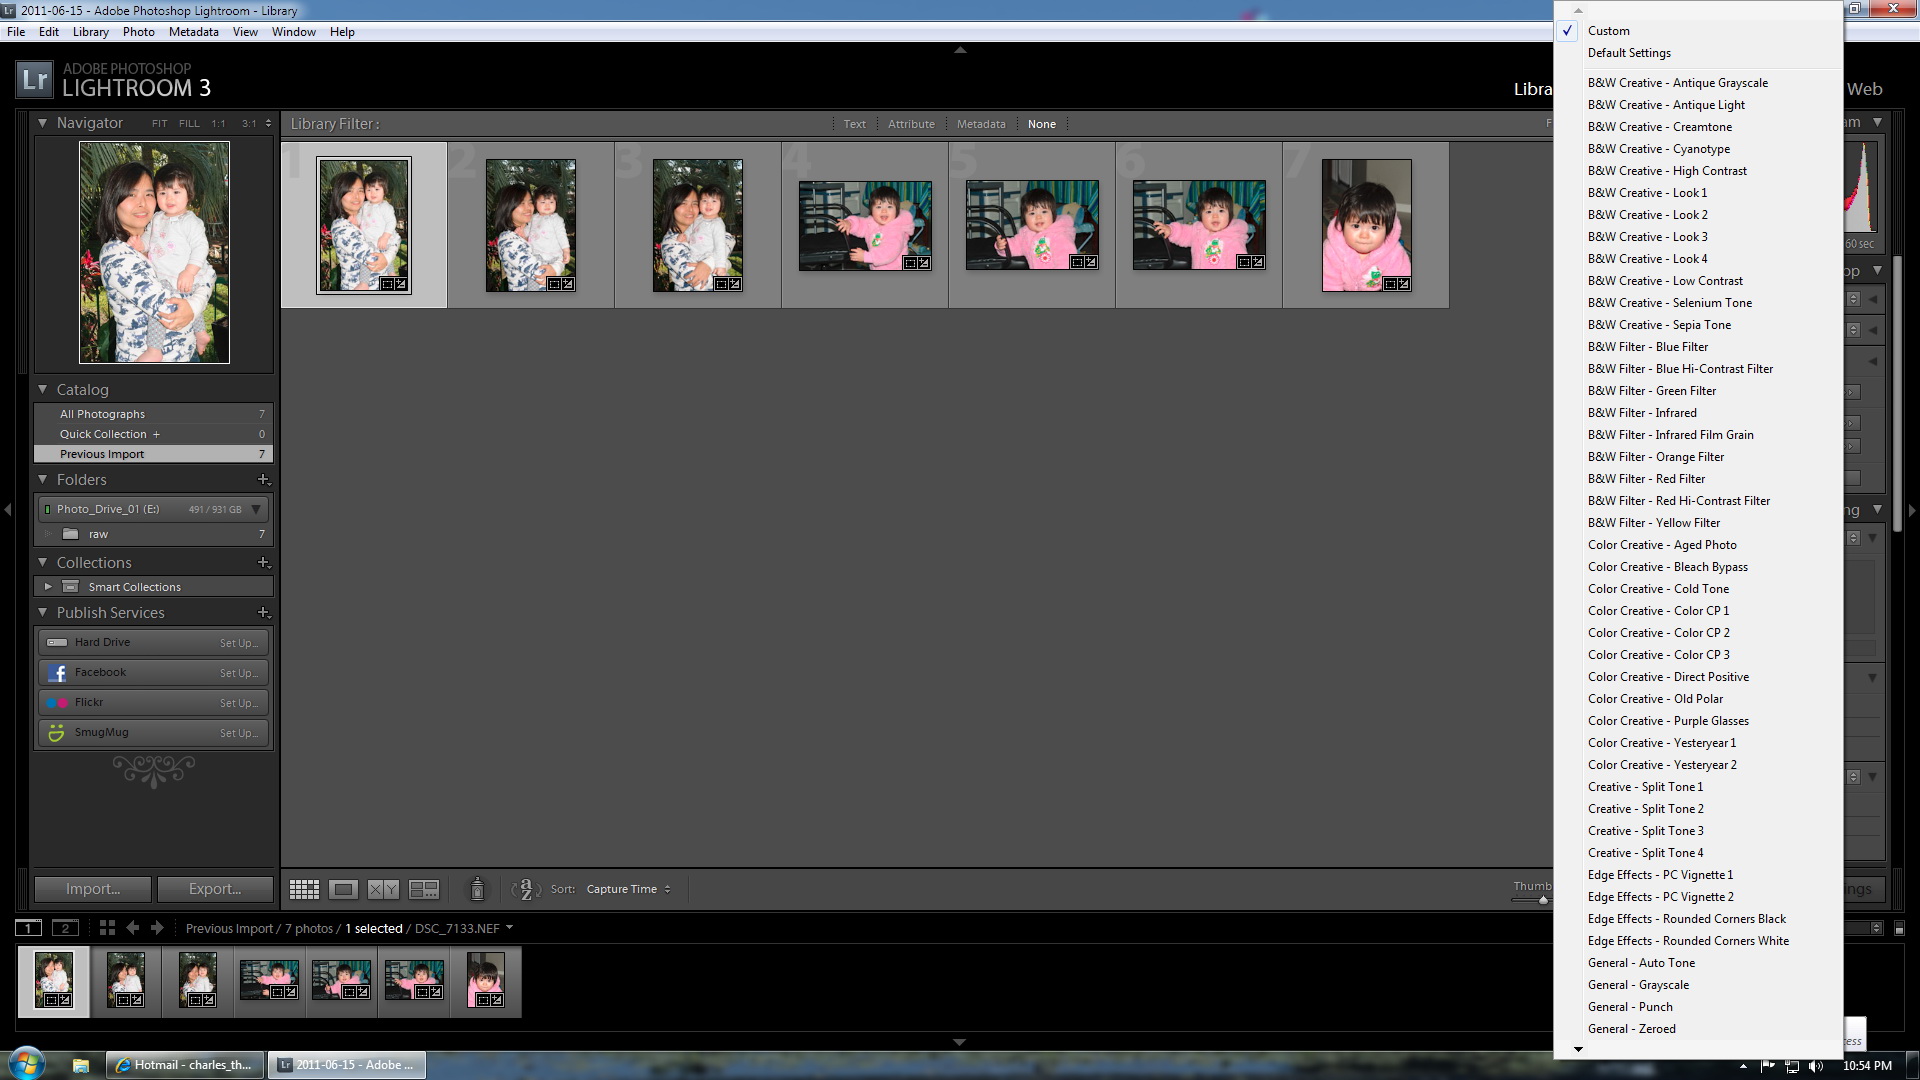
Hi Charles –
Presets are stored either in your catalog, or in your Lightroom folder off your User folders. I can’t tell you exactly which one until I get my workstation set back up in 3-4 weeks and can go look.. but I’m sure you can find them yourself with a bit of searching.
If they’re in the catalog you’ll need to change where they’re stored (back to LR folder) and start over after deleting the default presets.
Hope this helps.
Steve
Steve
Thank you for that, I've tried to delete them from their folder, but they still show up in lightroom.
Anyway, for the moment it's not that important!
I have just noticed that all my photos from my trip to ko Mak with Goi are missing!
I don't know how it happened, I may have deleted them by accident!
I didn't back them up!, Yeah I know Stupid!!!!!!!!!!
I've used data recovery software before, about 3 years ago, is there one that you could recommend?
Charles
Charles –
Did you look at the hard drive structure to see if they were still there, but only deleted from LR? This is the first thing you should do.. if they’re on the hard drive but not in LR.. then just import them from their current location to where you want them to be.
About recovery software:
a. Nothing will recover what you’ve already written over. So, if you’ve lost these files and have continued to use the drive then there’s a good chance you’ve at least written over the files partially.
b. For memory cards I prefer Sandisks Rescue Pro. It will even work with hard drives, but it’s time consuming. If you search the web you’ll find a few free ones, but most are tied to some way to get money from you.
c. Don’t forget to check your recycle bin..
Good luck Charles.
Steve
Please submit your questions to info@BangkokImages.com All questions will be answered and most will show up in the weekly column.
A Snapshot of Bangkok Images Week in Review *menu

After a week break to visit with a guest from overseas we’re back with this weeks column. Each weeks brings me closer to being fully settled, a week closer to exploring my local area, and a week closer to January when I’ll return to Thailand to hold workshops.
If you’re interested in taking a workshop this January please let me know and we’ll get you scheduled. As you’d expect, there’s a fair amount of planning required on my end so the further in advance the better.
You’ve probably noticed I’ve been heavy on reviews. The equipment/software reviews are popular, and we have more coming. But in the future months I’ll try to mix in more photography tutorials as well.
Infocus Blog, Thai-Falang Board *menu
Thailand based forums are most often a waste of time. I can’t think of more than 2-3 which are worth a minute of my time. Worse, reading some of the posts in these forums can leave you questioning your fellow man. I’m about to tell you about one Thailand centric forum many have found priceless, and most have found comfortable. The Thai-Falang Board.

The Thai-Falang Board has been on-line over ten years. “Hono” started it back in 1999 if I remember correctly, and yours truly has been a co-host of this forum nearly as long, with a couple others serving as moderators. And it is well moderated.
The focus of the Thai-Falang Board is to provide community and assistance to those in serious relationships. Usually this means western men in a relationship with a Thai women, but we’ve seen it the other way around as well. Most of our members are American, but we welcome and help anyone.

There are sections to help members network, and in fact there have been several member get togethers over the years where the members have met up in a desirable location over a long weekend. We have another coming up soon.
Other sections discuss relationships, culture, news, language, and perhaps the most useful to the most people is the visa sections. In the visa sections you’ll find many personal accounts of visa processes from the start through the finish and all the process entailed.
You can learn what forms you’ll need, the timelines of the different service centers, and you’ll find a lot of discussion on the many issues we face depending on our partners circumstances, to the choices we make because of them. Several of the members are very knowledgeable on these processes and gladly offer what help they can.
The Thai-Falang Board is a small community, a board where everyone knows your name. Yet, they welcome newcomers with enthusiasm. What you won’t find is flaming, foul language, or heavy animosity of any kind. Hono is adamant about these policies and he’d rather close down the board than have it lapse into the chaos and rude decorum of so many others.
Hono and crew invite you to stop by and check out the Thai-Falang Board. Maybe you can get some of your questions answered, or maybe you can help answer a few yourself. If you’ve been disappointed with other Thai-centric forums because of their hostile nature, you’ll love the Thai-Falang Board. We’ll leave the light on..
Until next time..


