Photographing Primates / Watermarking Images In Lightroom
![]()
|
• Kvikne’s Hotel • Radisson SAS Resort Beitostolen • Thon Hotel Bronnoysund • Dombas Hotel |
Thank you for your generous contributions. We've been making some great headway over the last few weeks and soon I'll be running some test images. These test images take a considerable amount of time and computer processing power
so once we start we won't be accepting any new images. Please send in your images now so you can be sure to be included in this great project. I have big plans for these mosaics.
We are still accepting (and pleading for) images of children from SEA. No matter how terrible you think they are, please send them in anyway. These images will be used to complete a set of 3 high quality mosaics which will be sold to benefit the Karen and Burmese Orphans living in the orphanages and refugee camps. The more images the better, I can use all you have. Please take the time to go through your images for anything you think might help. If you missed the "No Place to Call Home" special, you can click on the link and read more about this. Thank you! QandA@Bkkimages.com

Quick Click Links
Feature Photograph
Photographing Primates!

Watermarking Your Images in Lightroom
Photography News of Interest
Readers Submissions
Readers Questions A Snapshot of Bangkok Images Week in Review

Infocus Blog, My Pre-Flight Checklist…
Feature Photograph *menu
Canon 5d Mark II, 16-35mm F2.8L @F8 1/250th 35mm ISO 100
Have you seen Avatar yet? It's a movie that stays in your thoughts longer than most. Forget all the political hype, Avatar will never be a legitimate political movie so why spoil the experience just because the director's obvious politics polluted
the storyline? Why not just sit back, accept it's only entertainment, and be entertained.. and I mean entertained like we haven't been in quite some time. Avatar makes you think, it makes you feel, and especially in 3D it helps you experience.
I'll admit it, I very much would like a big red flying thing that's bonded only to me and would take me on wild rides through the sky swooping and diving and thrilling me every minute. Any parrot owner will tell you those flying things closely
mimic the body language of parrots in their initial interaction with the Na'vi before the bonding. For over two hours I forgot about the world we live in, and experienced a world someone else imagined and in this world they flew on big flying
creatures and I loved it! Isn't that the ultimate test on if a movie is worth the ticket price or not?
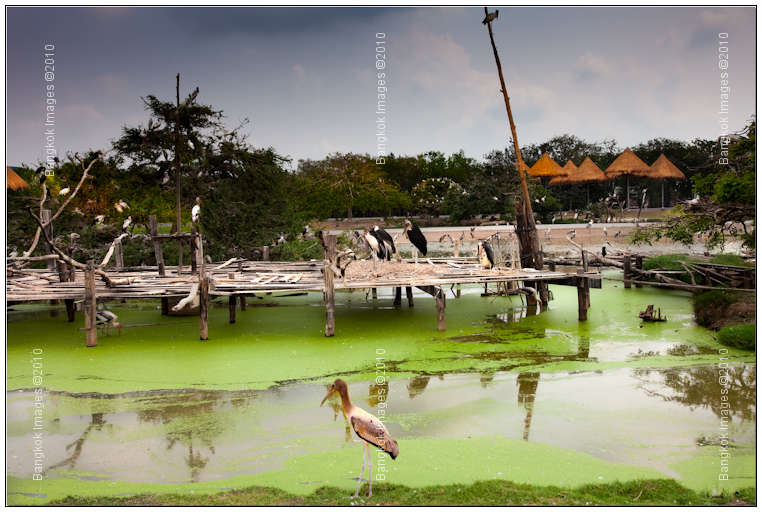
Last Friday I was with a client in Safari World. He'd read about the pleasure I derive from my morning visits to the park and I wanted him to experience it for himself. We weren't even on the clock. Just two guys with cameras taking in all this
little oasis in the middle of Bangkok has to offer.
To me, having been there many times before, I commented there weren't that many birds in the wetlands area. You see, these aren't caged birds, this is a manmade wetlands and the birds come and go as they migrate. But to my client he thought
there were many birds. Our frames of reference were a bit different. Anyway, we're sitting there in the wetlands area and I ask him "do you notice all the birds in the trees?" Most
don't notice, the birds are in the trees in the tens of thousands but they mostly blend in and go unnoticed. He said he'd noticed and I nodded in approval, perhaps we have a budding wildlife photographer in the making.
I'd noticed for years, yet this day I was really drawn to the trees as I looked through my long telephoto using it as a sort of powerful telescope to spy on the community of birds in the trees. As I watched the different species interact in this
big tree my thoughts ran to the movie Avatar and the "Home Tree." These birds had their own home tree and I was observing it in real life and as they flew and swooped and dived I was thrilled
almost as much as if I had my own big red flying thing parked in the garage.
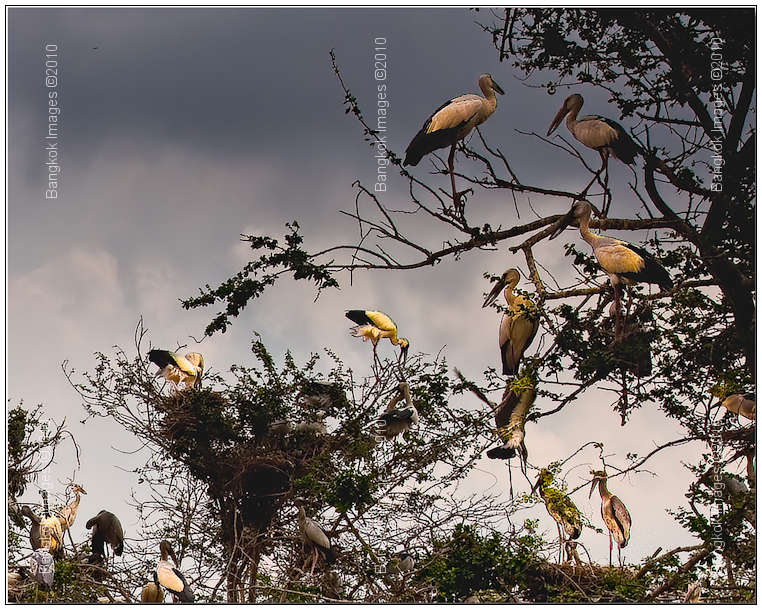
This image is significant because I wanted to show you a small slice of the community in the 'Home Tree' that I was experiencing, and I think this is a good representation. Actually it's a
small crop of the entire frame, perhaps less than 5% of the entire image. I carefully went over many frames looking for the perfect scene and was happy when I found this one. Birds, mostly in pairs, living in their Home Tree and interacting with
each other in their community. I processed the image a bit to enhance the edges of the birds to help them stand out from the tree.
Canon 5d Mark II, 16-35mm F2.8L @F8 1/250th 35mm ISO 100
This is the type of scene I was looking at and drew the crop from. Beautiful in its own right, it still doesn't allow the viewer to notice the tens of thousands of large bird species hidden among the branches of this scene. I individually enhanced
a good 100 of these birds so you'd get a feeling for their placement, but only by making this print a good 30×40 inches could you start to pick out all of them.
How many trees to we drive by every day that are 'Home Trees' of entire communities? How many have we cut down and destroyed? I'm a firm believer in doing what benefits our species the most,
but are we always benefitting our species or are we sometimes acting without full consideration of what we're losing.. just to gain the space the tree occupied, or the lumber it provides. Full consideration. It's something to think about.
Photographing Primates *menu
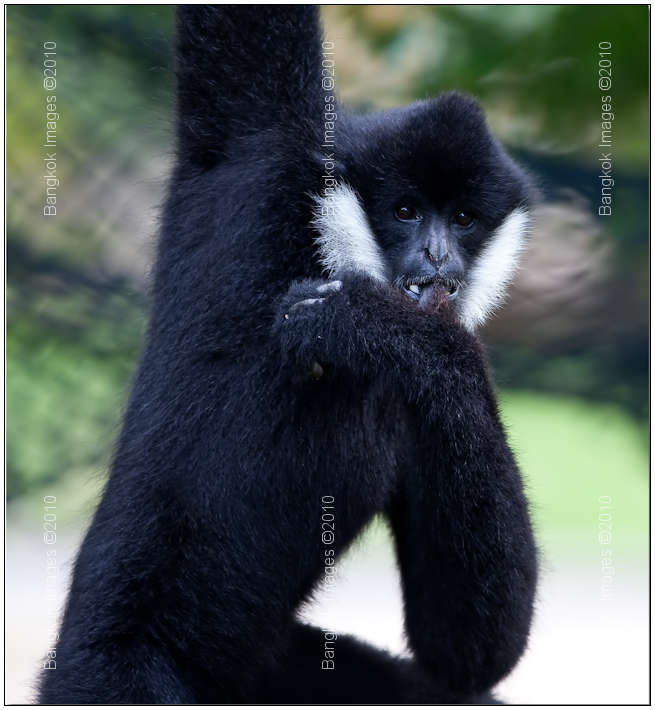
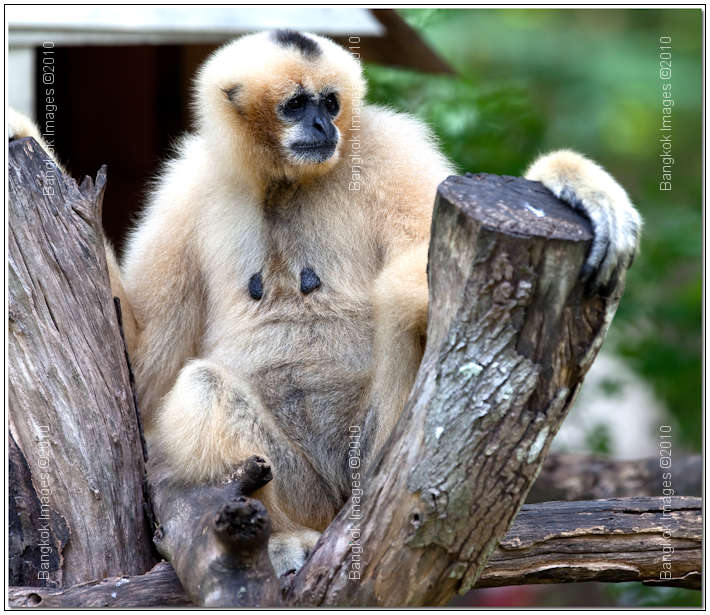
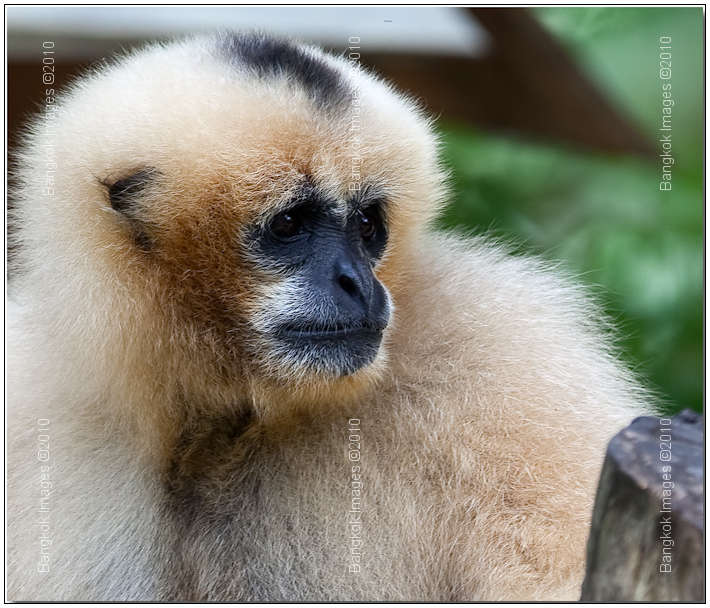
Canon 5d Mark II, 300mm F2.8L IS @F4 1/250th ISO 640
How many of you looked to see if a picture of your MIL was here? Just joking, but photographing primates is very much like photographing humans. The differences are few, but the number of similarities are startling.
Last week I had a client who wanted to learn more about photographing humans, using models, lighting, and basically learning to turn out something better than average. The first place I took him was the zoo!
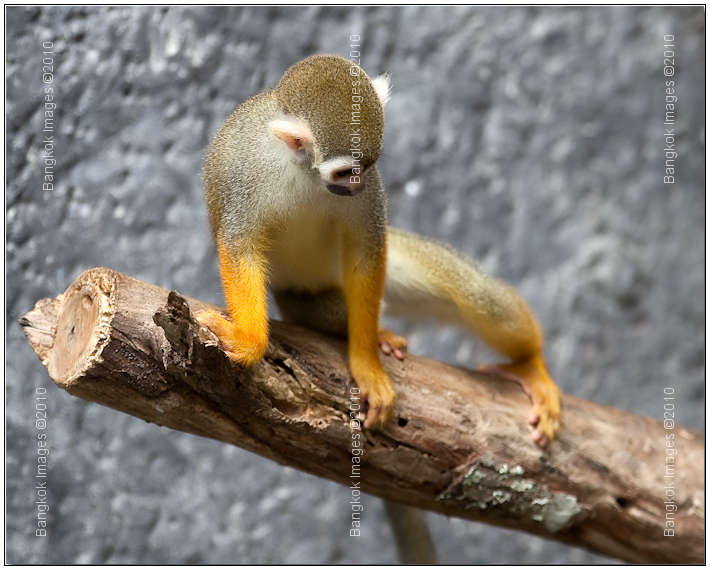
Canon 5d Mark II, 300mm F2.8L IS @F2.8 1/80th ISO 200
It probably felt a bit weird to him at first but the reasons quickly because apparent. Some primates have the expressions, habits, and body language of adult humans, and some of children. The good part about primates is that they model for free and the
resulting pictures are usually a lot more interesting.
Canon 5d Mark II, 300mm F2.8L IS @F4 1/320th ISO 200
I never kid about such things, photography is a serious business.. ;o) Let's go through some of the images I captured that day and talk a bit about what I was looking for that would help us learn to photography humans.
Canon 5d Mark II, 300mm F2.8L IS @F5.6 1/320th ISO 1250
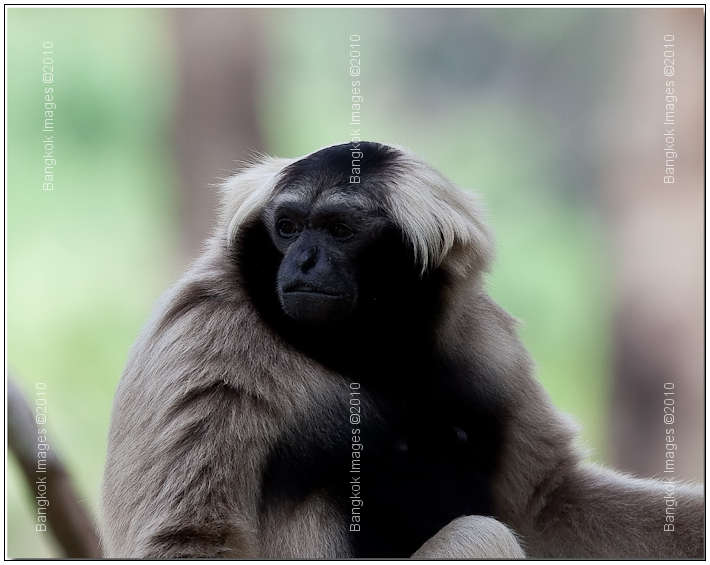
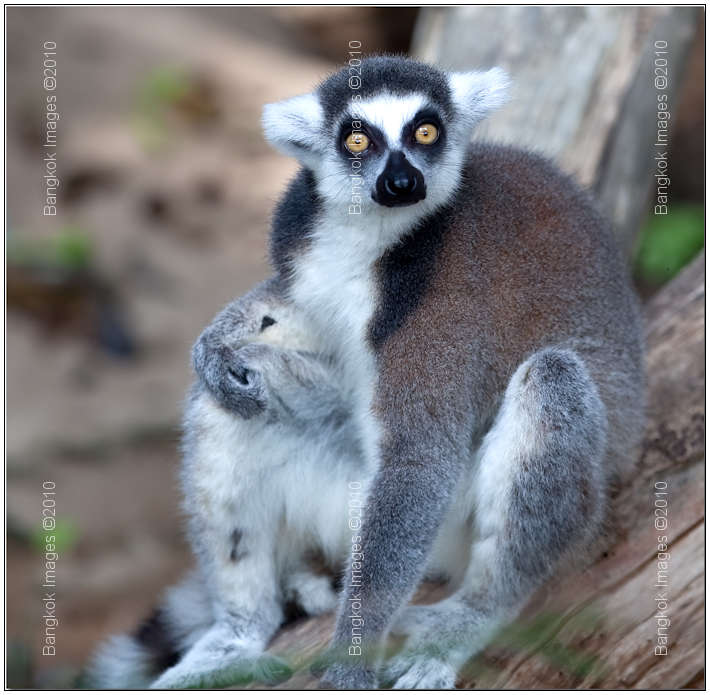
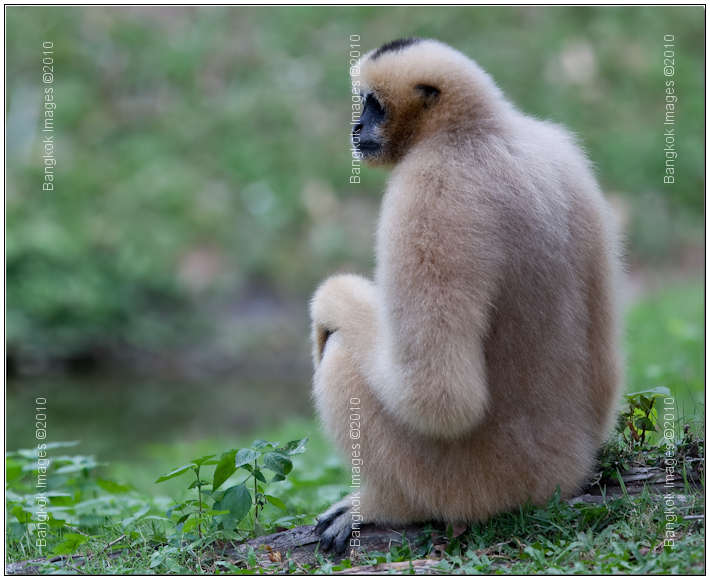
Primates can be shy and interestingly enough the same techniques used to hold the interest of humans works with primates. Simply talking to them, holding their eye, and even smiling helps them relax and loosen up a bit.
Canon 5d Mark II, 300mm F2.8L IS @F5.6 1/250th ISO 1000
Getting a primate to pose is easy, they do it themselves. So does an experienced model. You simply make the captures you want of the most interesting poses. I've tried directing primates into a pose and it works about as well as using an inexperienced
human model.
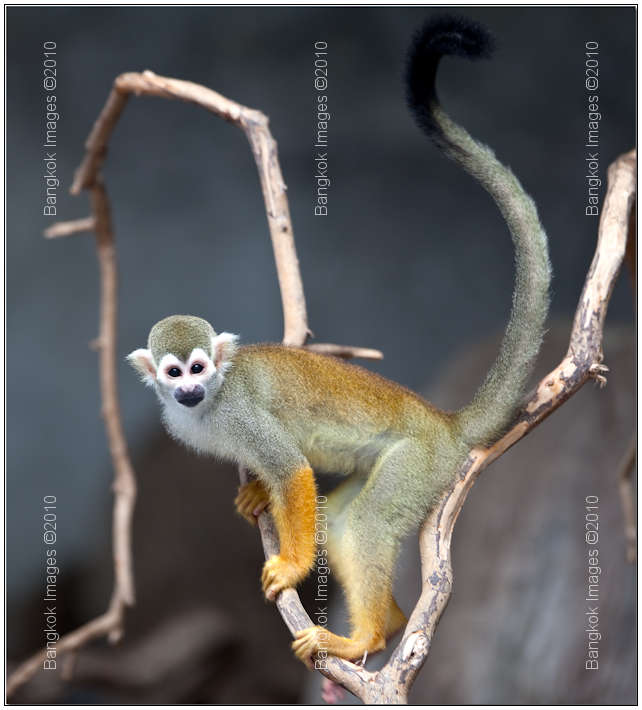
Canon 5d Mark II, 300mm F2.8L IS @F4 1/250th ISO 200
Watch their eyes and facial expressions. When you see an expression that captures you interest, then you capture the image. Place the Autofocus (AF) indicator over their closest eye and choose the DOF
(depth of field) most appropriate for the scene.
Canon 5d Mark II, 300mm F2.8L IS @F2.8 1/160th ISO 200
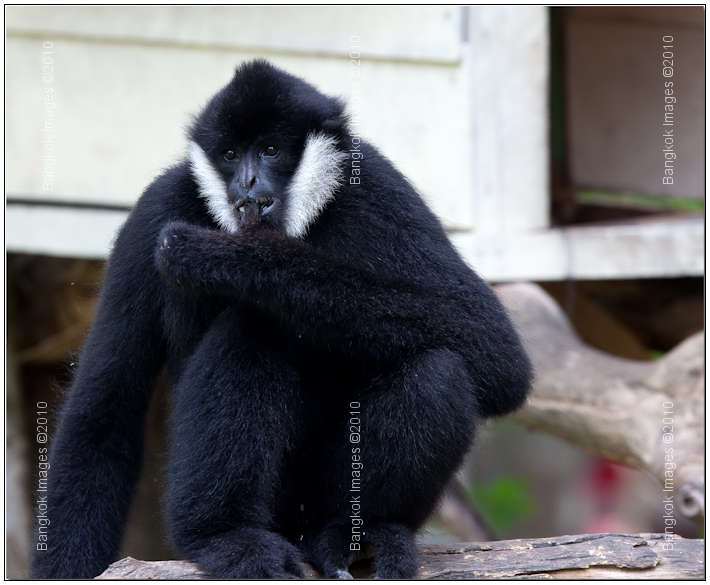
It's never good to have the model stare at the camera. The 'deer in the headlights' look doesn't work well for anything but showing off those big bright eyes.
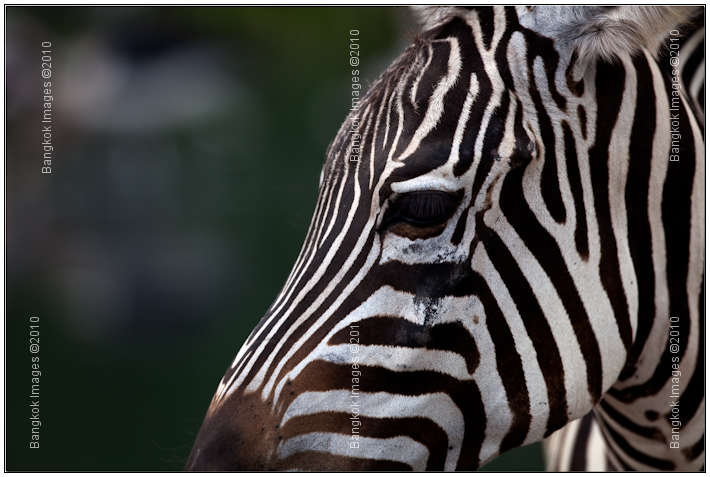
Canon 5d Mark II, 300mm F2.8L IS @F4 1/200th ISO 200
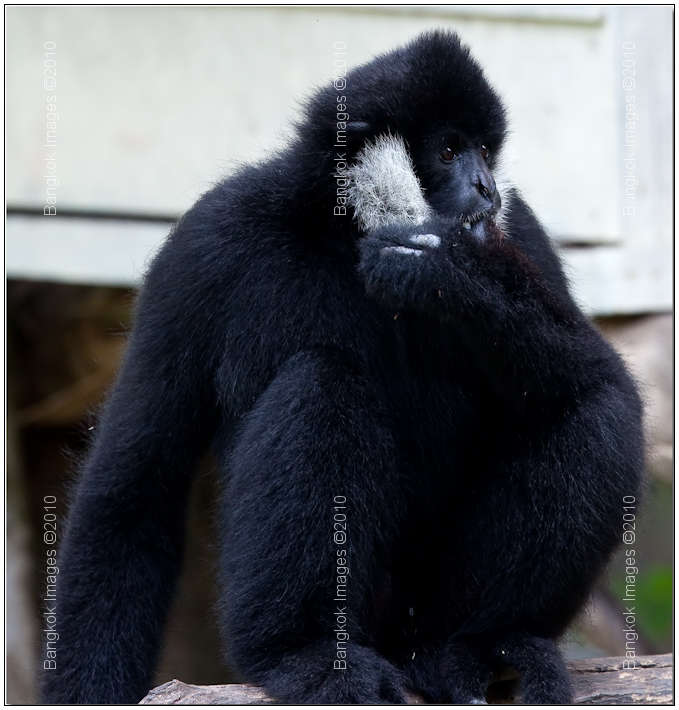
It works a lot better if you can get them to look away from the camera, yet still find an angle that captures the eyes and interesting facial features.
Canon 5d Mark II, 300mm F2.8L IS @F2.8 1/100th ISO 200
See, isn't that much better. Notice the hands and feet? They should always be doing something natural with them or they'll stand out as unusual, or worse lead the viewers eye when you're rather they didn't.
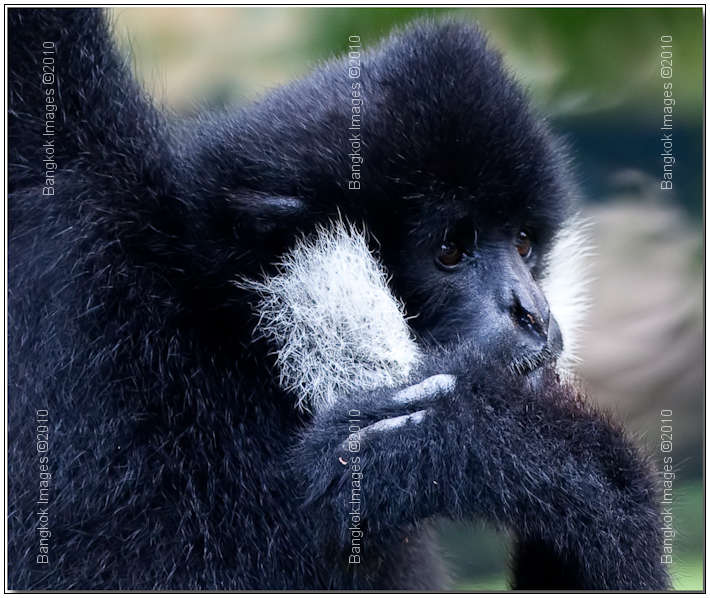
Canon 5d Mark II, 300mm F2.8L IS @F4 1/320th ISO 1000
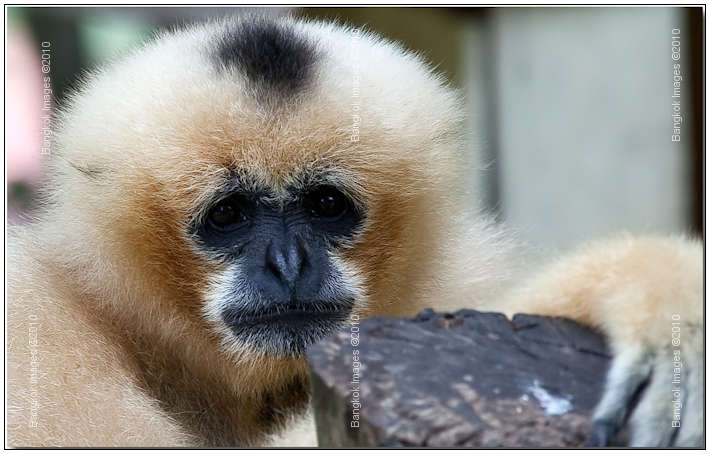
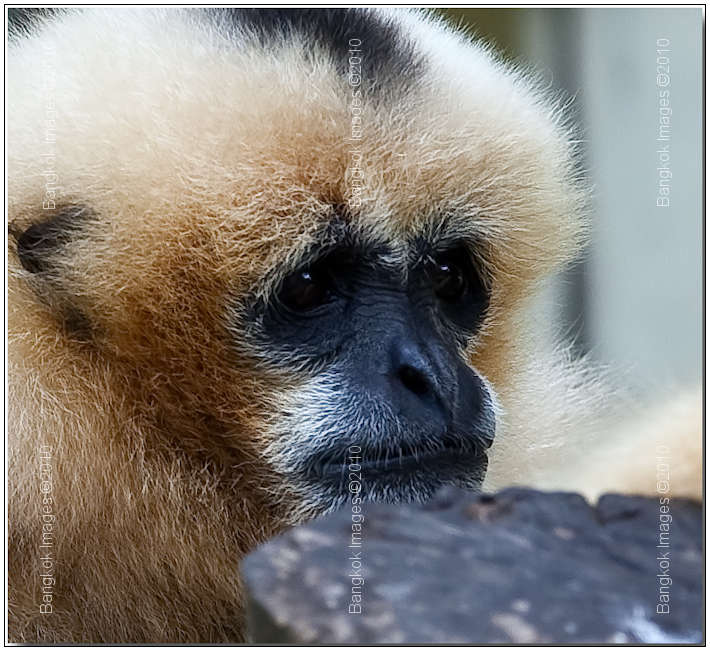
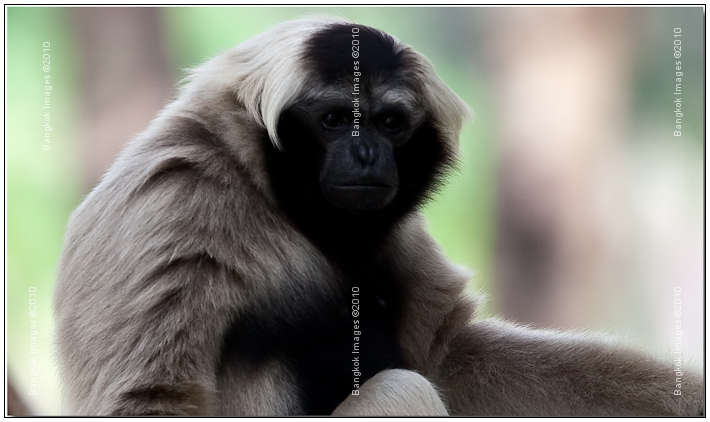
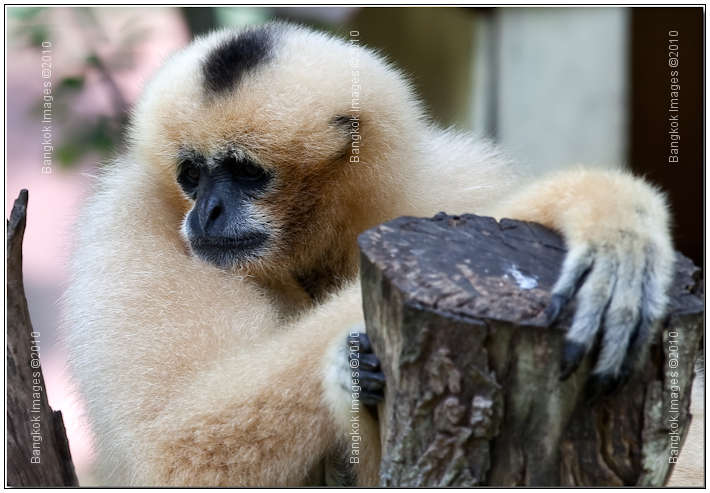
It's always nice when you catch them thinking about something else with that deep thoughtful expression that shows their true intelligence.
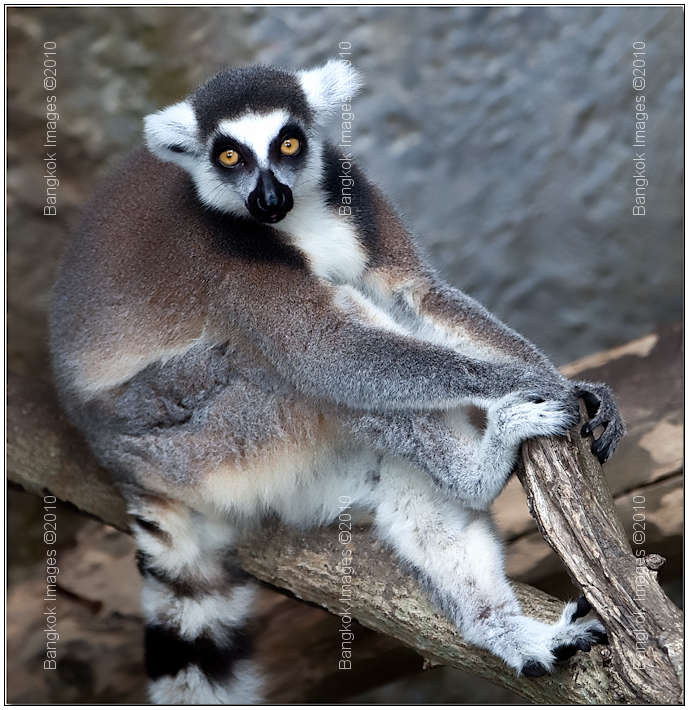
Canon 5d Mark II, 300mm F2.8L IS @F4 1/250th ISO 200
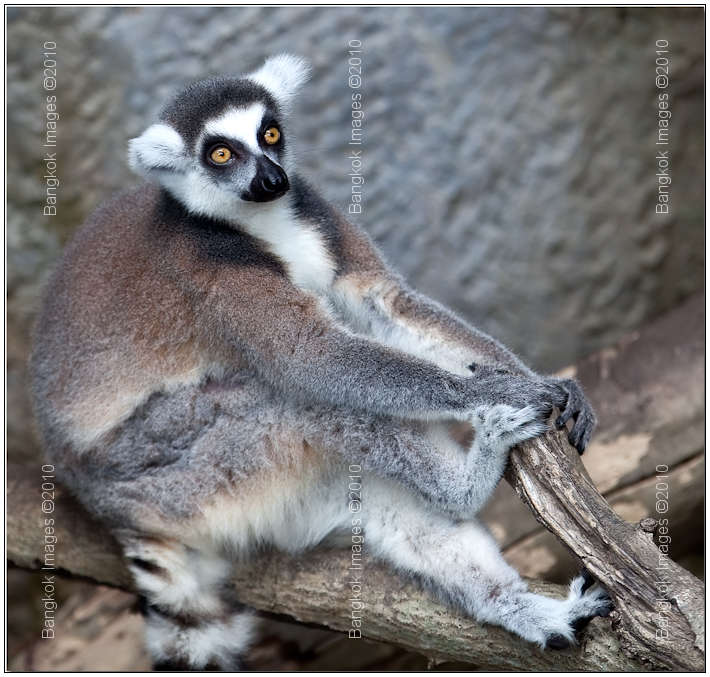
Many poses are just plain unflattering and your job as the photographer is to make them look their best. Ladies should generally have their legs crossed or together and it's always best if they're wearing appropriate support garments.
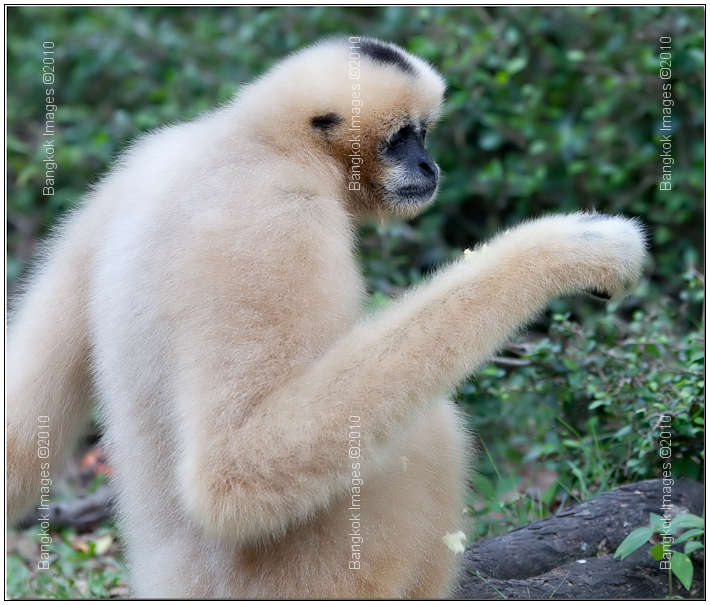
Canon 5d Mark II, 300mm F2.8L IS @F2.8 1/250th ISO 200
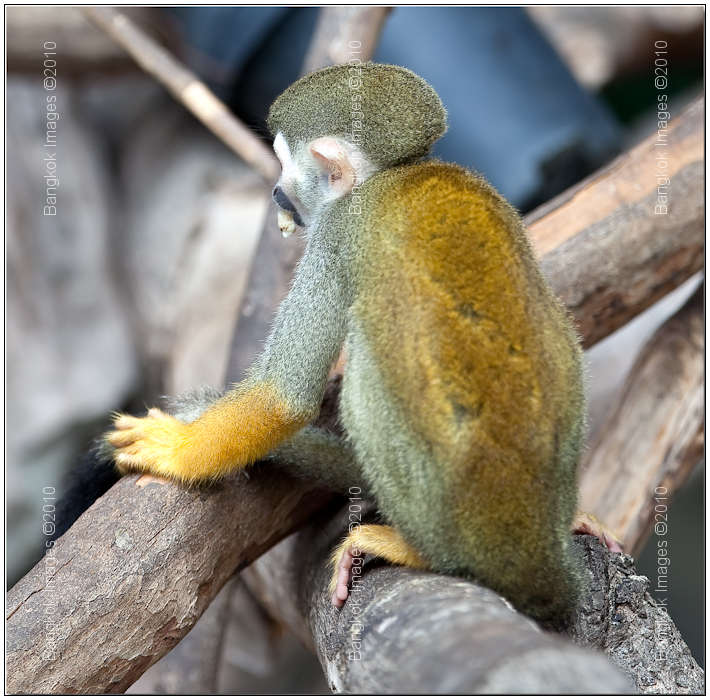
Everyone has a sport or hobby, and if we can capture them engaged in a sport such as spying on the ladies below it often makes for an interesting capture.
Canon 5d Mark II, 300mm F2.8L IS @F4 1/320th ISO 400
Sometimes the model gets agitated for no apparent reason and will express her displeasure with unseemly body movements. I try to avoid such incidents, but if they must take place I do my best to make the most of them.
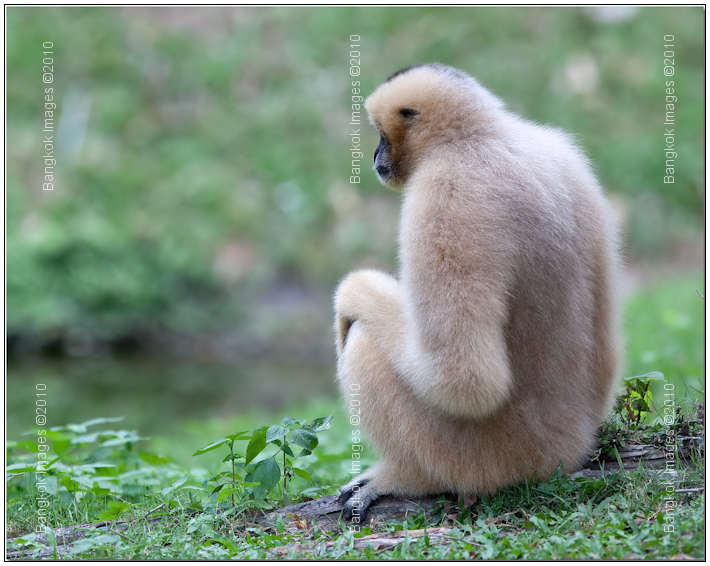
Canon 5d Mark II, 300mm F2.8L IS @F4 1/250th ISO 200
Emotional moments make great captures! In this image she's in quiet thought while watching the Jone's next door. She's watching them on their new porch and is wondering how she'll ever keep up.
Canon 5d Mark II, 300mm F2.8L IS @F4 1/250th ISO 200
Watch their thoughts, often they'll go from one thought to another. A food delivery truck just pulled up and she's wondering if there's enough cash left in her account to buy some of the nice fruit she sees.
Canon 5d Mark II, 300mm F2.8L IS @F2.8 1/80th ISO 200
The Jone's next door are wondering the same thing. Those bananas and kiwi fruits are looking awfully tasty and would go well with dinner tonight! Isn't in interesting when an entire neighborhood is on the same wavelength?

Canon 5d Mark II, 300mm F2.8L IS @F4 1/250th ISO 800
No matter which neighborhood you're in, there will always be one or two enjoying retirement and sitting around in their hammock or easy chair. This doesn't mean they've lost interest in life, they see the food delivery truck too.
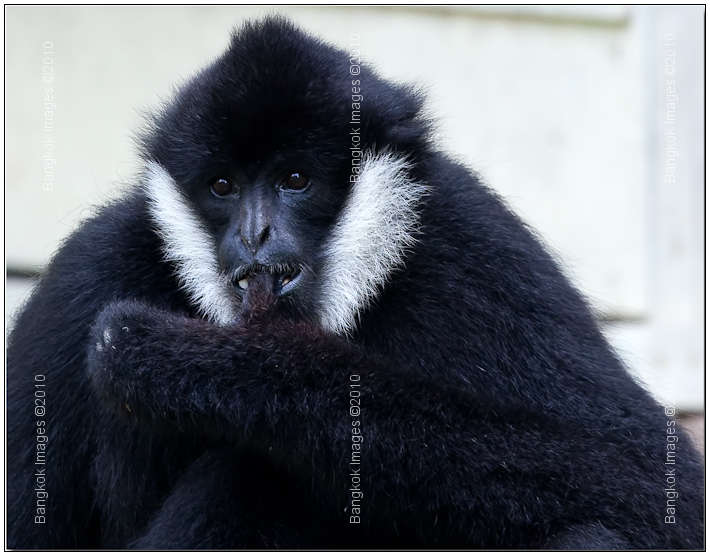
Canon 5d Mark II, 300mm F2.8L IS @F5.6 1/320th ISO 1250
Hunger has its own expression. Like Pavlov's dogs, the food delivery truck prompts certain responses from nearly everyone. If I told you, you could capture happy or sad you'd have agreed, but hunger? Yes, hunger is an expression you can't
miss. I've grown used to seeing it in many parts of SEA.
Canon 5d Mark II, 300mm F2.8L IS @F4 1/320th ISO 200
There's a handsome devil in every crowd. The guy who looks like he just stepped out of GQ magazine with his perfectly combed hair, attractive sweater, and perfectly groomed facial hair. Are their metrosexual primates? I'm not sure I want to
know..

Canon 5d Mark II, 300mm F2.8L IS @F4 1/250th ISO 800
Standard head shots for portfolios are a photographers mainstay. Don't hesitate to practice these. Show off their face on their best side, make sure the focus on the eyes is sharp, and their hair is properly combed. Remember to get them to look away
from the camera, but not so far so that you can't get both their eyes. Remember, eyes are the windows into their soul.
Canon 5d Mark II, 300mm F2.8L IS @F4 1/250th ISO 200
Remember the movie Dirty Dancing when 'Baby' had hungry eyes looking at Johnny? Lust makes for a powerful expression, use it to your advantage. Try to get both their eyes, an interesting angle,
and that unmistakable look of lust. It's magic!
Canon 5d Mark II, 300mm F2.8L IS @F4 1/250th ISO 200
Wherever you have lust and the battle of the sexes you'll also have rejection. Rejection is a valid facial expression and very powerful in its own right. Shame is often confused for rejection so be careful with this one.
Canon 5d Mark II, 300mm F2.8L IS @F4 1/100th ISO 200
A perfect family portrait to hang above the fireplace! If you work hard with your clients you'll soon capture that perfect portrait which will be timeless. A perfect moment and a great feeling of satisfaction when you put all the pieces together.
We had a great time at the Khao Kheow Open Zoo and the models work for peanuts. Literally. Seriously, primates are great models for learning portraiture, everything from camera settings to poses to facial expressions.
When you actually have a living breathing female human model you'll want to already be up to speed on the basics so you can concentrate on bringing out the best of your model.

Canon 5d Mark II, 24-70mm F2.8L @F2.8 1/50th ISO 100
Check back with us next week to see how the real live model shoot went!
WaterMarking Your Images In Lightroom *menu
Canon 5d Mark II, 300mm F2.8L IS @F4 1/1000th ISO 100
Why Watermark?
You've probably noticed that I started watermarking all the images in this column with my copyright. And not just in one place. I put it in six places which makes the image basically unusable to those who would use it without permission. At the same
time the image is perfectly usable for the purposes of this column or to view in my galleries.
The last time I took the time to check there were over 1000 of my images being used on websites (no way to tell in publications unless you get lucky) without authorization. That's money from my families
pocket. So, I decided to do my best to protect my images, and the images of any reader generous enough to share. I did this through watermarking.
Why Lightroom?
I process 'most' of my raw images in Lightroom, and then final process 'most' of them in CS4 before re-importing them back into Lightroom. I output
"ALL" of my images for any of my uses through Lightroom. If I need a jpeg, a slide show, an on-line gallery, a tiff, or even a PSD, I output it through Lightroom so Lightroom
was a natural candidate to watermark my images.
It's certainly possible to watermark them with dedicated programs, in CS4, or many other programs, but watermarking in Lightroom can be set up to automatically watermark images with a single click in the export box. This makes it integral to my existing
workflow without adding any other work but a single click of the mouse. Perfect!
Also remember, text does not resize well. If you output a 3000 pixel image with appropriate watermarks which are readable, and then resize the image to 600 pixels for web or email distribution, the text will be unreadable and unrecognizable as a watermark.
I wanted each and every size of image I exported to have the appropriately sized watermark clearly legible and easy to read. Lightroom can do that. Perfect!
How?
Lightroom currently uses two methods for watermarking, and the yet to be released Lightroom Version 3 adds another.
- You can add your image ownership data in the exfil data. This works great with honest people, but it won't do anything to stop someone from stripping out that data and using your image.
- You can use a "plug-in" that watermarks images.
- Lightroom 3 Beta at this time will allow you to place a physical watermark on your images, but only one line. This might change with the official release but we won't know that until the release.
Choice B, the use of a plug-in is hands down the best way to currently watermark images in Lightroom.
Which Plug-in?
There aren't many choices here. Ideally the program would do exactly what I want, do it easily, install easily, and be free. We can all dream, in real life there are usually compromises.
LR2/Mogrify from the Photographers Toolbox is my choice and once installed the compromises disappear. Its a freeware program that you can register for a low donation through
PayPal and I encourage you to do so.
LG2/Mogrify allows you to add borders, text annotations, graphic images, set the maximum file size (great for uploading to size restricted websites), and more. It's really feature packed and once installed
works both easily and flawlessly.
Installing LR2/Mogrify
If there is a 'problem area' with this plug-in then it's in the installation procedure and requirements. It's complicated for the novice computer user, but not insurmountable. If you
follow the directions in order you'll get it done.
LR2/Mogrify must be installed in two parts.
- The LR2/Mogrify plug-in itself
- ImageMagick, another freeware command line utility
Go here
to register and download LR2/Mogrify. The minimum donation to get a registration code is $5 USD. This will be the best money you spent, you might want to consider a larger donation.
Then go here to download the appropriate version of ImageMagick. Mac users can download from here.
And Unix usershere.
The most difficult part of this entire installation is choosing the right version of ImageMagick. IF after your installation LR2/Mogrify doesn't work as it should there is a 99% chance you've installed the wrong version of ImageMagick. Install
another version over the old and try again.
The other 1% of the time you might need to install the Windows C++ 2008 package which is free from Microsoft. You can get the x64 version here
or the x32 version here.
Install in this order:
- Visual C++
- ImageMagick
- LR2/Mogrify plug-in
Follow theinstallation details exactly. The last step detailed in the installation instructions is activating LR2/Mogrify in Lightrooms Plug-in Manager. Once
this is done you're installed and ready to use LR2/Mogrify!
Using LR2/Mogrify
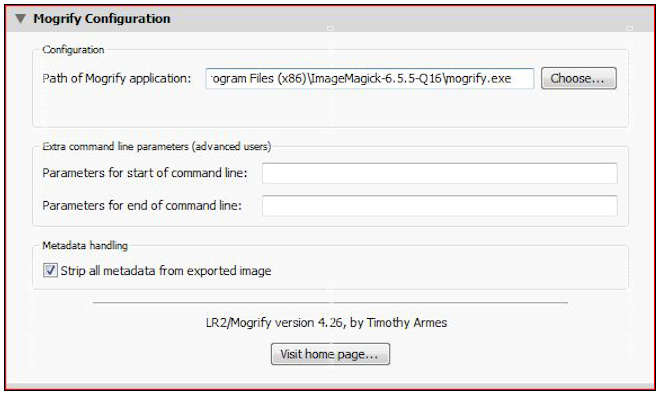
First you will need to set up the Mogrify configuration menu to include the location of ImageMagick on your system drive.
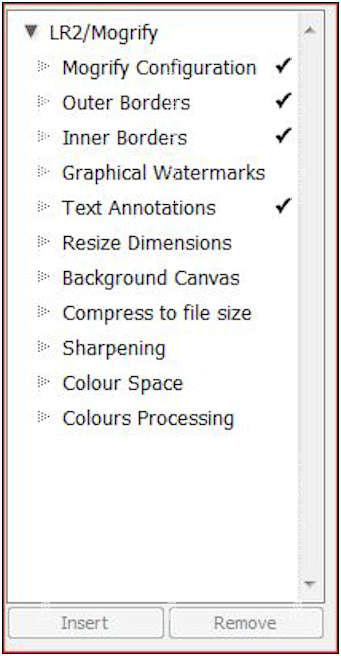
Next you will need to check and 'insert' the Morgrify modules you want to use.
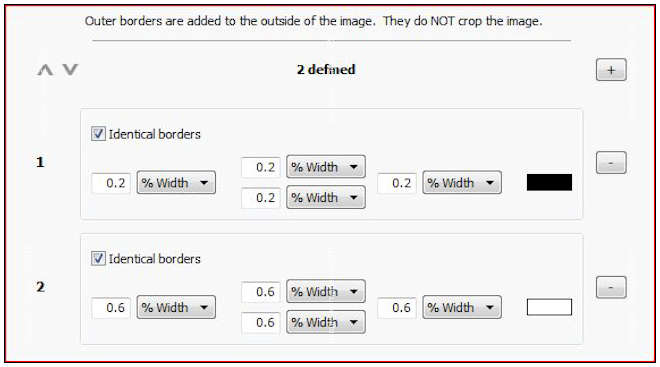
This is the outer border menu showing the values I use on all the images in this column for outer borders.
This is the inner border menu showing the values I use on all the images in this column for inner borders.

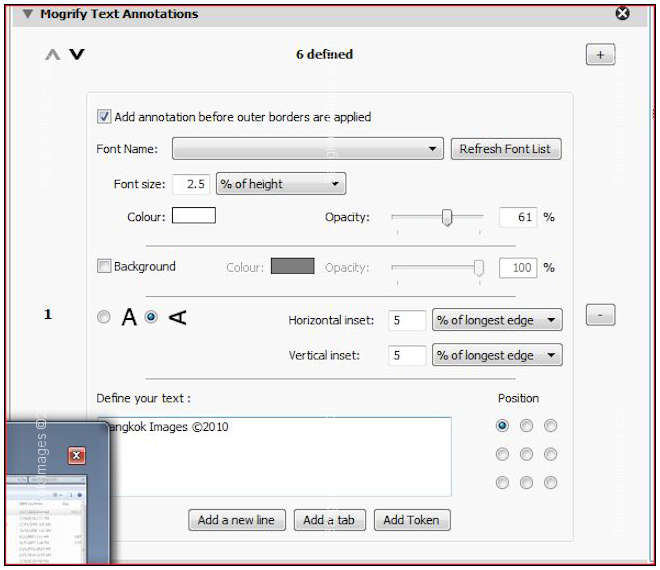
This is where I set my Text Annotations that show up on all the images I use in this column. Notice there are several adjustments. Depending on how you want the watermark to appear you'll need to adjust these accordingly. Also notice I have six individually
assigned annotations.
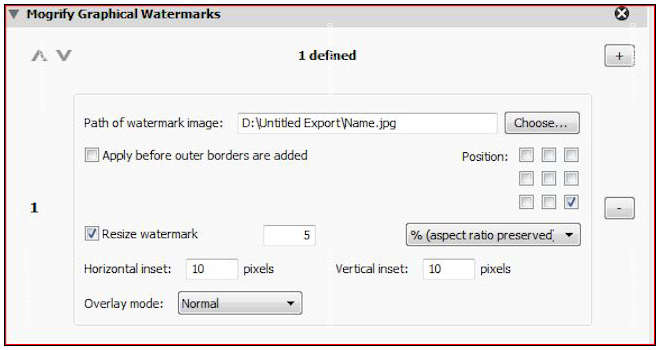
This is how I setup a graphical watermark when I use them.
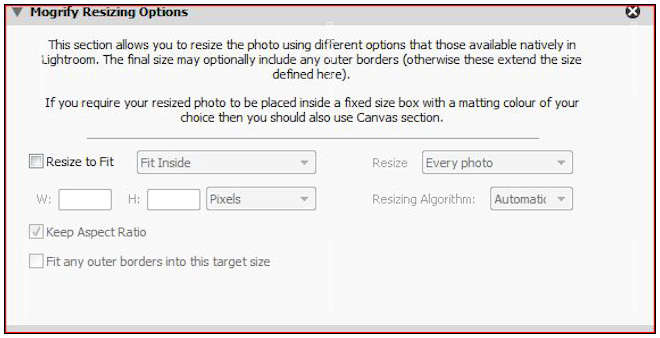
This is the resizing menu. This is very useful if you're outputting images for web use and want or need to stay within specific parameters.
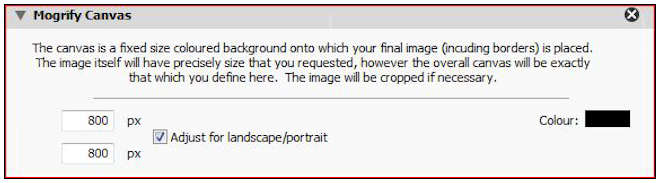
This is the canvas menu. You can put a background canvas on every image that will exceed your image size by a set amount. This gives a type of framing effect which is nice if set up properly.
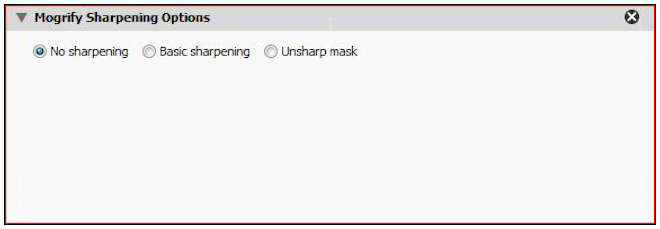
I always leave the sharpening options set to "no sharpening." Sharpening lends a distinct look to your images so you'll want maximum control.
This color space menu option comes in very handy when outputting images to color spaces not otherwise provided for in LR2.

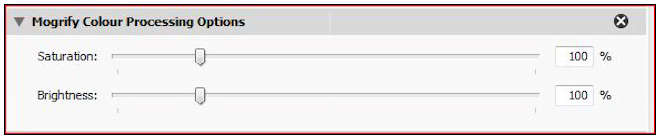
A simple to use method to adjust image saturation and brightness.
That's it! After selecting the modules you want, and filling in the values, you simply export your images. Keep in mind that the last value used "sticks" so you won't need to enter it
every time. Basically once you get things set up the way you like them you won't need to do anything else but export the images.
Summary
LR2/Mogrify is both dirt cheap and easy to use once properly installed. It works without error or issue. It's well worth the rather clumsy installation procedure which should take less than 20 minutes of your time.
I encourage everyone to watermark their images these days. Its common practice for less than honest web designers to cruise the image sites like Flickr, Pbase, and others and just take what they want without either permissions or compensation. This is
just plain wrong whether you're an amateur or a professional.
Photography News of Interest *menu
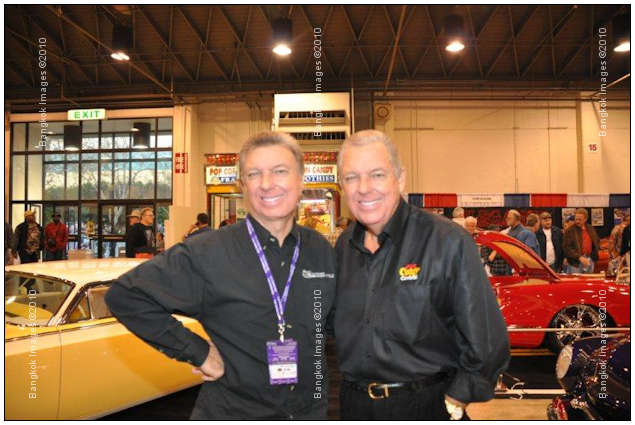
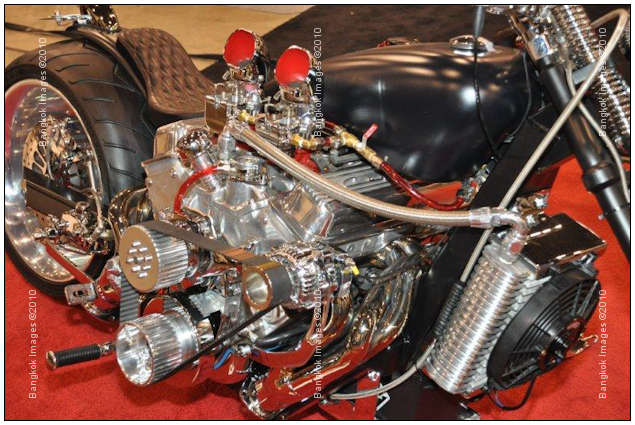
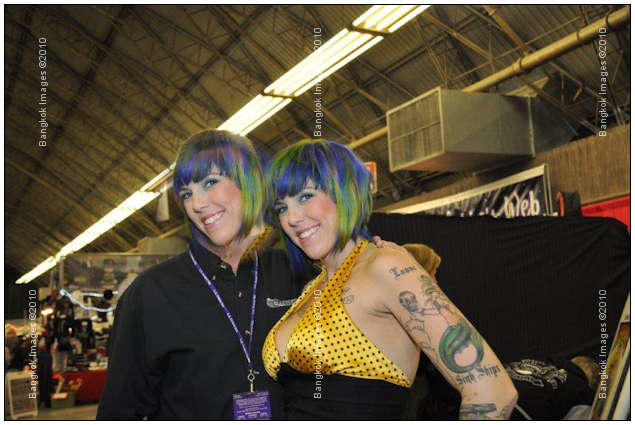
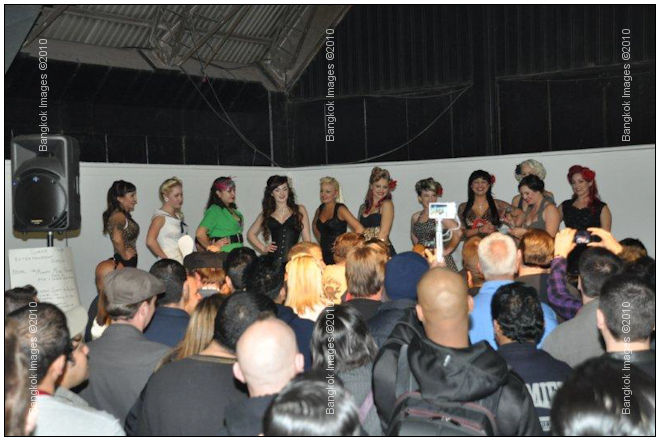
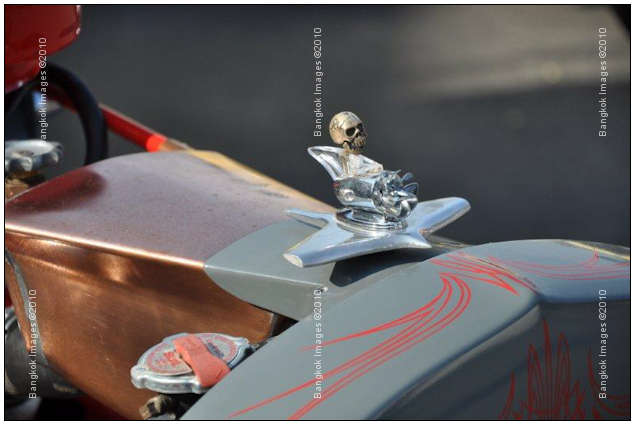
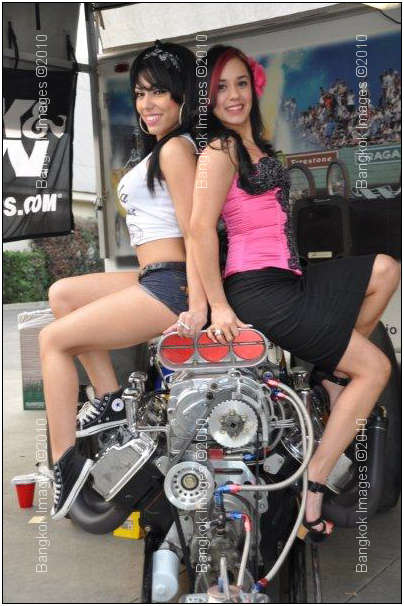
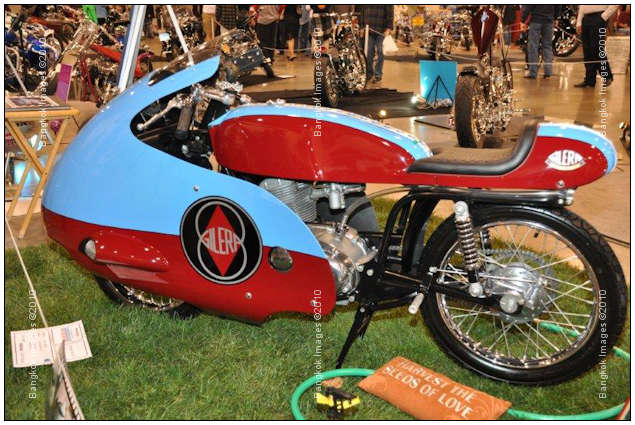
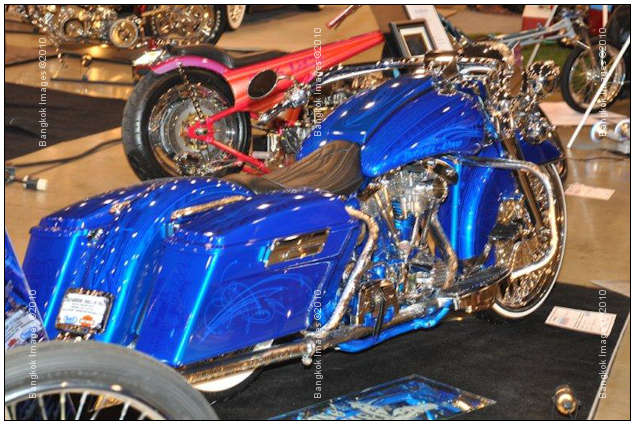
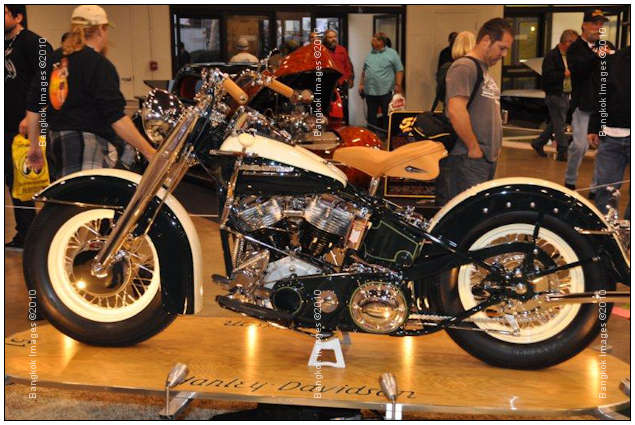
Biker Bart, or custom bike correspondent (not really, but he sends in enough cool pictures to share with us to have earned the title), took these pictures
which are published at www.pattayapeople.com and is talking about the Burpha Bike Club Party. If you love bikes this is a good read. If you like Biker Bart's images check out his great website here.
Adobe Photoshop turns 20 years old! Does that make Photoshop almost an adult? It's hard to believe Photoshop has been with us that long, but it certainly doesn't surprise me that
it's still the professionals choice of imaging software. Read a bit aboutthe history and evolution of this iconic product.
The Nikon D3s sets the industry standard in low light capability. The D3s produces the cleanest files at high ISOt than anything else out there and it's 12mp images are plenty big
enough for most journalism and event use. Digital Photography Review just released a comprehensive review which is really worth a close look if
you need such a camera.
Cosinareleases its Voigtlander Apo-Lanthar 90mm SL II close focus lens in Canon, Nikon, and Pentax mounts. It's 50cm minimum focusing distance allows for some exceptionally close looks at whatever tiny objects catch your interest. By attaching the included close up lens you can cut that distance to 32cm providing
a 1:1:8 ratio. Is an image of a grain of rice in your future?
The new Sony Cyber-shot H55 is being touted as the first compact "superzoom" and provides a 24-250mm equivalent focal range. If you need
this much focal length in a pocket size package there aren't many other choices so give this onea good look.
Pentax announces a firmware release that helps correct lens distortion, CA, and helps the K-7 recognize more lenses. Check out thePentax Website Firmware area for files and instructions.
Readers Submissions *menu
Morning Steve,
Great reading your article this AM. Makes me glad I’ve waited to purchase a new camera. Will still wait a while longer as my real need for a new camera comes from being in Thailand. The advantages of this new camera sure make it look like it will
be worth the extra $100 or so. I’ll start looking for prices after its release (which I expect will be fairly soon). Another great report. Enjoyed the pics of Vietnam very much. All the best,
Gary
Gary –
I was thinking of you when I read about the T2i.. subtle but significant differences.
I hope things are going well for you..
Steve
Hi Steve,
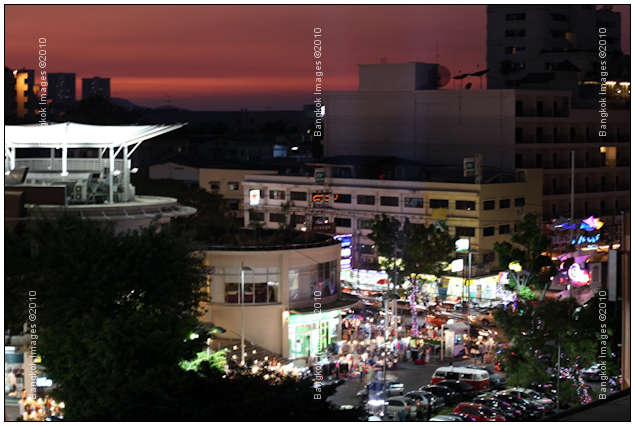
Here are some night shots taken in Pattaya with my first DSLR, a Canon 50D, purchased few weeks prior to my trip to Thailand, I'm still trying to work everything out.
The first was taken with a 50mm 1.4 lens at f/3.2 ISO 100 hand held from my hotel balcony, below is the second rd, on the corner is the cinema and villa supermarket, in the distance Pattaya bay.
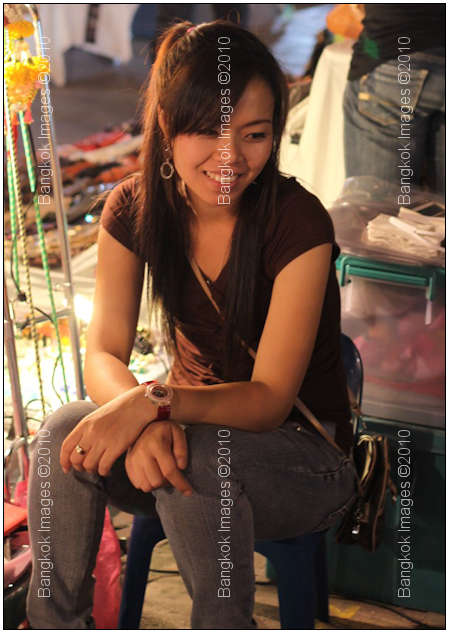
The second is of a pretty sales girl on the second rd, taken with a 50mm 1.4 at f/2.8.
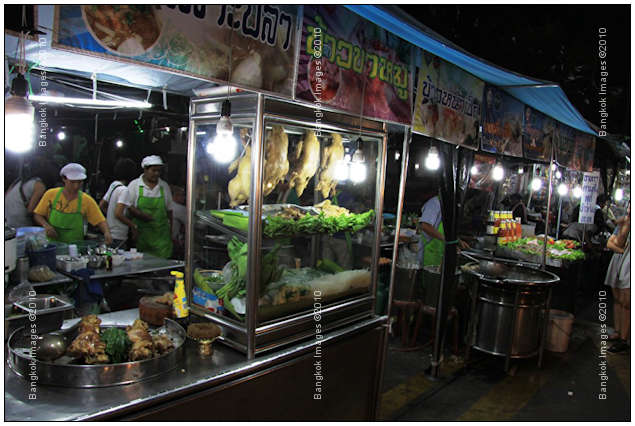
The third was taken with my kit lens a 17-85mm from the beer garden
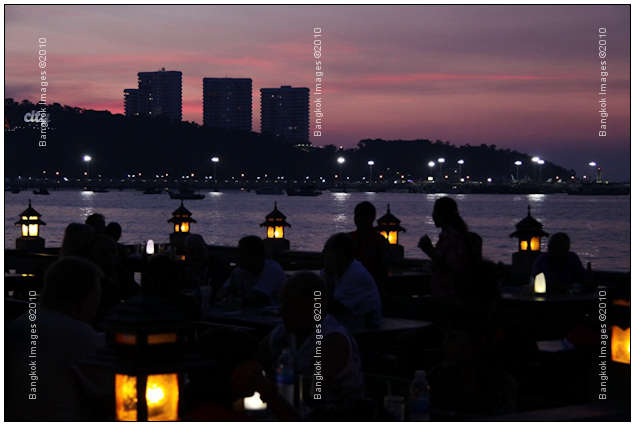
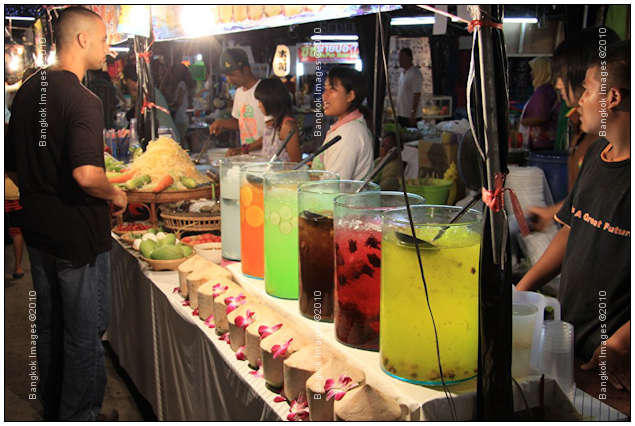
,the fourth at a market with a 50mm at f/2.8.
The fifth and sixth were taken at the end of walking street near the pier, just before the new year with my kit lens.
The last one was taken on walking street ,these are not real stewardesses.
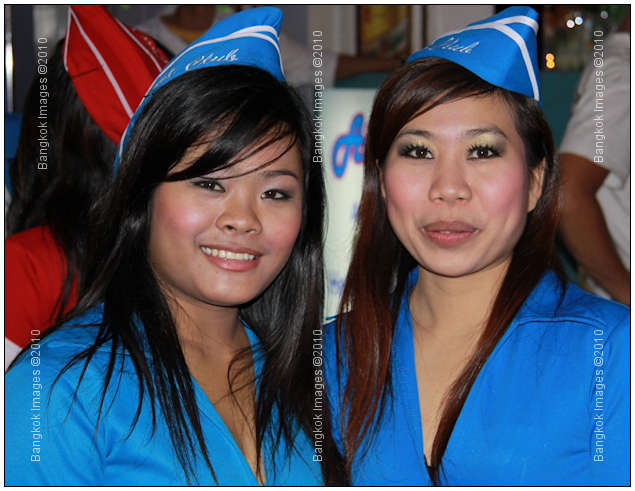
Regards Khunklit.
Khun Klit –
I love these kinds of shots showing real life in Thailand. These are the sorts of images tourists take everyday and the type people reading this site really enjoy viewing. I hope to see more soon!
Steve
Hi
Here are some miscellaneous shots with some bikes also.
Bart


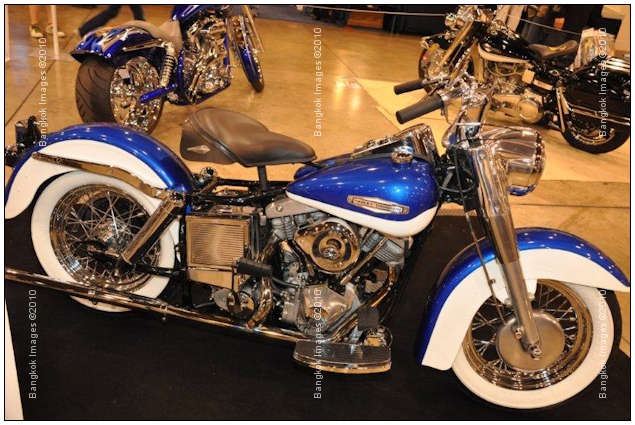
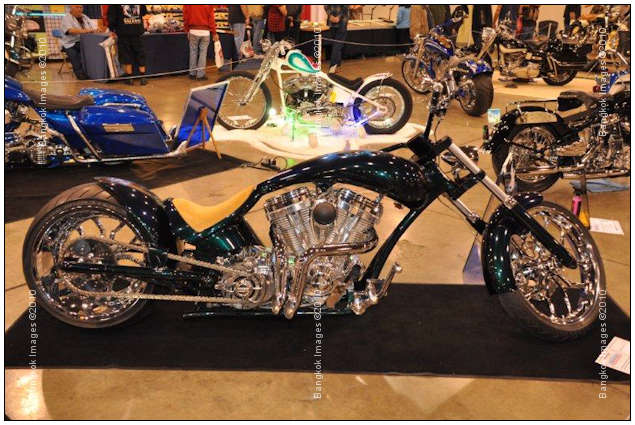
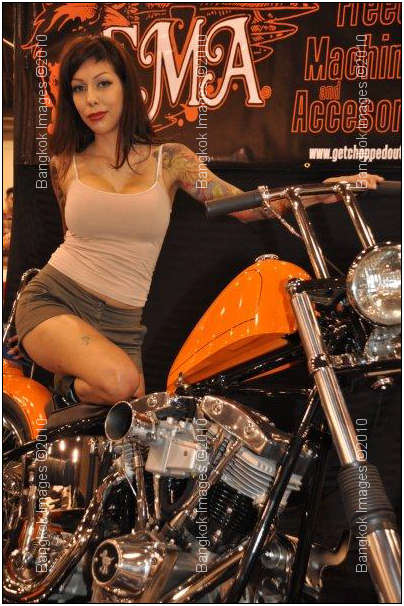
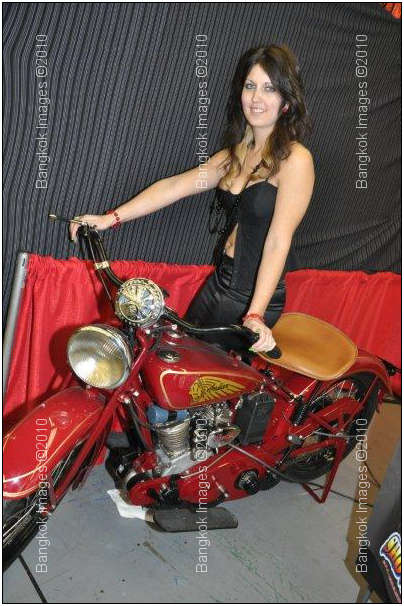


Bart –
I always enjoy your bike photos and the women are a lot of fun too! If anyone wants to see more of your work I encourage them to visityour website.
Steve
I suspect the readers submissions will be a highly anticipated section of this column and I encourage anyone with photographs and travel accounts they'd like to share to please send them to me at: QandA@Bkkimages.com
Readers Questions *menu
Kevin –
Do you have any advice to offer our readers about photography or possibly security if they're coming your way to Vietnam?
Steve
Hi Steve,
Having top quality camera gear is one thing, walking around with it safely is another matter altogether. Snatch and grab thieves in Saigon target high end camera users.
Camera theft is not high on the priority list for law enforcement agencies here because I think they assume, wrongly, that all foreigners are insured and they'll be reimbursed by their respective insurance providers. Not this little black duck! I
intend using security staff to accompany me when I go into areas I think are not safe.
I read about one guy in Saigon who hired 4 security guys to go around with him after losing a couple of high end cameras to the motorbike snatch and grabbers. I think 2 would be enough, just to keep a look out, but 4 or even 6 would not be that expensive
when you consider that these guys would be lucky to pull $4-$5 a day in their regular security jobs.
If you offered a couple of guys $10-$20 each to accompany you around the sights it would be money well spent and I'm sure much appreciated. Finding security guys would not be a problem. Your hotel could probably arrange it for you. Just a thought
for the newbies travelling this way.
Kevin J.
Hello Steve,
Just wanting to ask you how you go about watermarking your images for your column.
I have my own website and although my images mightn't rate as high as yours, or be seen by has many people, I've though of adding a watermark to them.
I already have many images on my website and was wondering if I could add the watermark to the web images all ready sized for the internet or do I have to make new ones.
All my photos on my website are 500 pixels in width or height, depending on their orientation.
So could I open my 500 pixel image up in Photoshop and add the watermark then flatten it and resave it?
Would this result in any loss of image quality that people could notice?
Charles
Charles –
These are some great questions and I decided to turn your answer into a learning topic for this week. Thanks for the idea!
Steve
Please submit your questions to QandA@Bkkimages.com All questions will be answered and most will show up in the weekly column.
A Snapshot of Bangkok Images Week in Review *menu
Another busy week, 4 workshop days, a portrait shoot, and lots and lots of processing of images from the last few weeks.
We've also added some more hard storage and have more on order. Soon we'll be going to SSD's (solid state hard drives) in all our computers and I'll be writing some reviews on these.
March is booking up fast, if you're going to visit in the coming months and would like to book one or more days for workshops please give shoot me an email and secure the days you want the most.
Infocus Blog, My Pre-Flight Checklist *menu
Purpose
A previous client previously told me he had trouble remembering to check his settings before shooting and this would get him into trouble. He mentioned he shot for hours at ISO 1000 when he should have been at ISO 100 before he noticed. I used to do that,
but not so much anymore. I thought it would make a good blog entry to talk about what I do to prevent this sort of issue.
The concept of pre-flight checklists has been around probably before the airplane existed, so it's a no brainer to apply the concept to photography. The first time I made up my checklist I wrote it down and then worked from that checklist each and
every time I had a professional gig until it was deeply ingrained. There are so many things which can go wrong, so many things to forget, a pre-flight checklist is a natural for photography!
These are the things I check and when:
Before Leaving Home
- Batteries are charged and packed
- Memory cards are emptied, formatted, and packed
- Lenses and other equipment for the shoot are packed (a separate checklist for each type of shoot helps)
- Passes, permits, licenses, and any sort of necessary paperwork is packed
- Maps, directions, invitations, or anything that helps me get there is printed and packed
Once There
- Check out security, notice where I can leave my bag safely
- Scope out electrical outlets if needed
- Unpack the gear for each access in the boat, car, event area
- Learn all I can about the shoot prior to the shoot
Actual Shooting
- Batteries installed, spare on person in pocket or vest
- Memory cards freshly formatted in camera, spares in pocket
- ISO, will I use Auto ISO or a set ISO, then I set it
- Make sure camera is set to RAW or Jpeg as needed
- Metering mode, evaluative, spot, average
- AF mode, one-shot or continuous
- Shooting mode, manual, aperture priority, shutter priority, program
- Custom buttons programmed for shoot, mirror lockup, bracketing, high-light priority, tonal priority, anything that I might be switching back and forth to should be set in a custom mode setting, custom menu, or even the programmable button
- Filters, polarizer, ND, protective
- Flash, wireless or wired, one or more strobes, shutter speed within the minimum sync speed?
- Lens settings, AF/M switch, IS 1/0 switch, memory focus points. On Canon lenses the AF/M switch is very easy to move to the M position so I'll often use gaffers tape so it stays where I put it
After the Shoot
- Location and security of memory cards. (in my pocket)
- Equipment packed back into cases the way it came out
- Cases back into the car/truck/boat
- Everything I touched, used, or moved is inspected to make sure it's as I found it
- Touch bases with client and make sure all areas were covered
- Don't drive off and leave your assistant behind
Summary
These are all simple things, yet they're things people often forget. Or we focus on one setting and forget another. A checklist is one of the surest ways to help you not miss anything. My checklist probably isn't perfect for you but it's
a start. As you gain experience with the types of shoots you do the most, make your own checklist and write it down. Better yet, turn it into a form your assistant can use, and if you ever get sick or can't make a shoot your replacement.
Until next time..
