Morning Light at the Damnoen Saduak Market / Equipment Care in SE Asia
![]()
Thank you for your generous contributions. We're slowly collecting enough images to make the mosaics. I realize I'm posting the same paragraph each week, but I assure you we're on top of this project and doing our best to collect enough of the proper type of images to make the best possible set of mosaics. This is proving difficult so please help if you can.
We are still accepting (and pleading for) images of children from SEA. No matter how terrible you think they are, please send them in anyway. These images will be used to complete a set of 3 high quality mosaics which will be sold to benefit the Karen and Burmese Orphans living in the orphanages and refugee camps. The more images the better, I can use all you have. Please take the time to go through your images for anything you think might help. If you missed the "No Place to Call Home" special, you can click on the link and read more about this. Thank you! QandA@Bkkimages.com

Quick Click Links
Feature Photograph Morning Light at the Damnoen Saduak Floating Market
Equipment Care in South East Asia

Photography News of Interest
Readers Submissions
Readers Questions A Snapshot of Bangkok Images Week in Review
Infocus Blog

Feature Photograph *menu
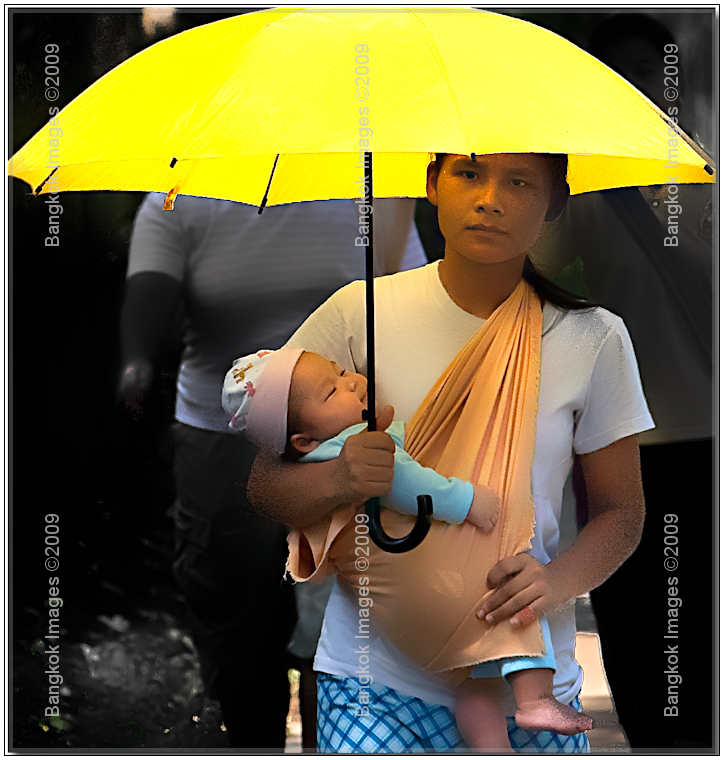
Canon 1ds Mark II, 70-200mm F2.8 IS @F8 1/160th 195mm 100 ISO
I've spent a lot of time in theMae Sot
area lately and visited the refugee camps
and orphanages
on many occasions. These places are always crowded with people, each with a unique story but lumped together with people where part of the story is the same. The tragedy of the genocide in Myanmar and resulting refugees, many of them orphans,
will be one of the most photographed and documented such stories of all time. I hope to do my part.
In an area teeming with the masses it's easy to forget the 'masses' consist of hundreds of thousands if not millions of individuals with their own unique stories. In the coming decades as
history sorts out these atrocities the most compelling accounts of the mass genocides will come as they always do, from individuals. From a photographic standpoint finding those individuals who 'stand out'
in some significant way becomes the norm.
But what about highlighting an 'individual' who really is blatantly average and represents the masses? How do we make that persons stand apart from the masses so we can take notice and think about
the events taking place? This is what I attempted to do with this feature photograph. This photograph is significant because it represents an average individual who represents the masses.
This young lady is only 17 years old. Karen's rapidly age in appearance due to a hard life lived mostly outdoors or in the open. Already a mother she carries the baby in the traditional Karen manner shielding it from the harsh sun with an umbrella.
The band-aid on her little finger was from a diabetes blood sugar test where she poked herself a bit too hard. One of the many NGO's was teaching her how to self-test and administer insulin as needed. Diabetes at any age in any society is
very rough, for a single 17 year old Karin mother it can quickly become a death sentence. The volunteers and NGO's do their best to make sure this doesn't happen.
From a photographic standpoint I loved how the yellowish light coming through the umbrella lit both the mother and baby's faces. The 'hot' yellow umbrella, the soft light on their faces, the
determined look of the mother and the peaceful sleep of the baby. I de-saturated the background for further effect.
Look at her gaze. How many 17 year olds have you seen with such a stoic look? Unmoved by emotion, uncomplaining, and at the same time fully understanding her fate as a single 17 year old Karen mother in a refugee camp on the Thai/Myanmar border. Will
she ever be able to return to her Burma? Will her child? I wonder who will be left if she does return..
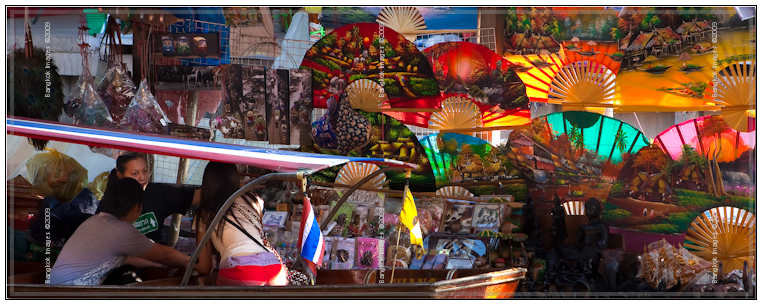
Morning Light at the Damnoen Saduak Floating Market *menu
This is the second time I've covered this floating market as a feature, though I've mentioned and shared images regularly. Myfirst piece
was a sort of compilation of shots and experiences from many visits. This feature is more direct. I went here for the specific purpose of catching the morning light on the faces and activities of the workers and market owners. I also wanted
to see how my new Canon 5d Mark II DSLR worked in this environment.
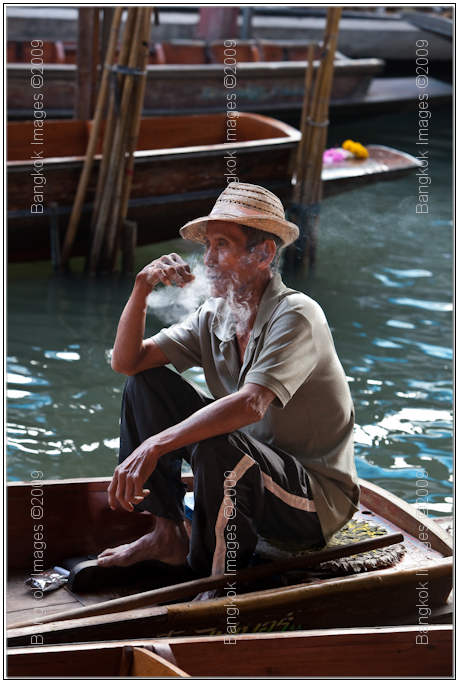
Canon 5d Mark II, 70-200mm F2.8 IS @F5.6 1/100th 125mm 1600 ISO
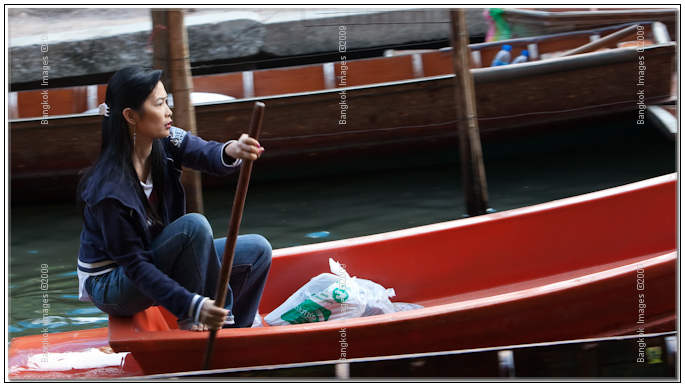
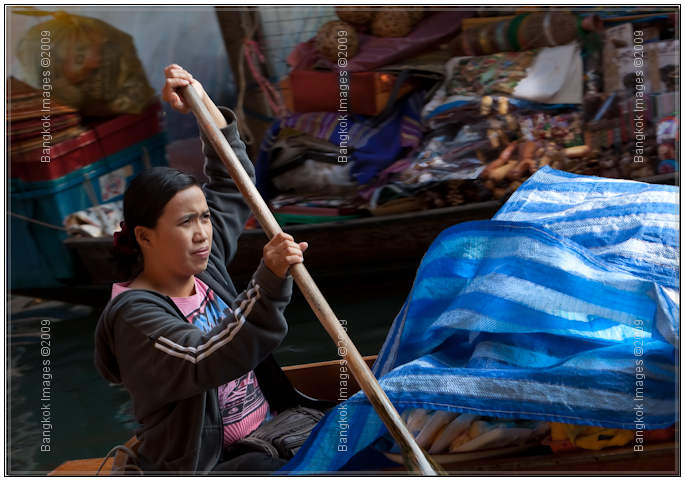
The sampan pilots gather in hope of catching an early customer. They often end up waiting. Many talk amongst themselves while others take this time for a smoke and reflection.
Canon 5d Mark II, 70-200mm F2.8 IS @F5.6 1/25th 153mm 3200 ISO
Others prepare foods in anticipation of the crowds which are certain to arrive with the huge tour buses.
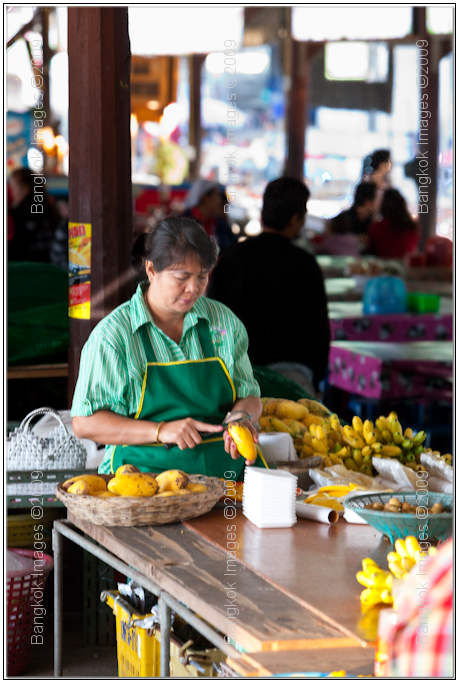
Canon 5d Mark II, 70-200mm F2.8 IS @F5.6 1/200th 200mm 1600 ISO
This lady is a permanent fixture at this market. I've seen her every time I've been here, and I've been here many times. She always notices me and waves. I wish her the best selling food to passing sampans full of tourists.
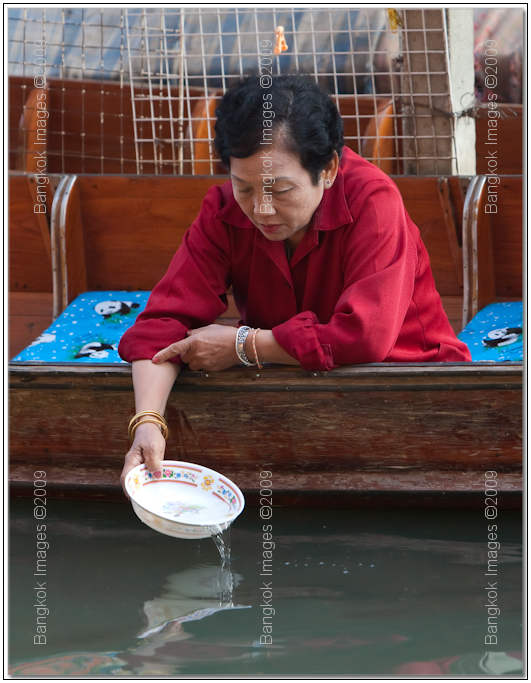
Canon 5d Mark II, 70-200mm F2.8 IS @F5.6 1/125th 155mm 1600 ISO
Have you ever wondered where these vendors wash their dishes and keep things clean? You do eat there don't you? Even so, I'm convinced these vendors are far more clean and sanitary than your average Bangkok street vendor.
Canon 5d Mark II, 70-200mm F2.8 IS @F5.6 1/160th 170mm 640 ISO
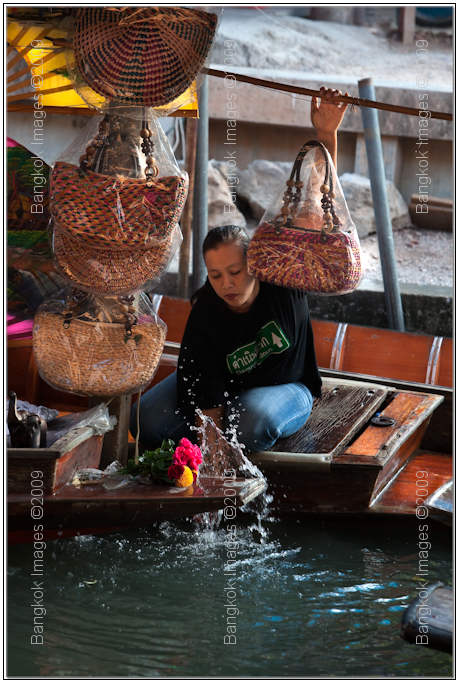
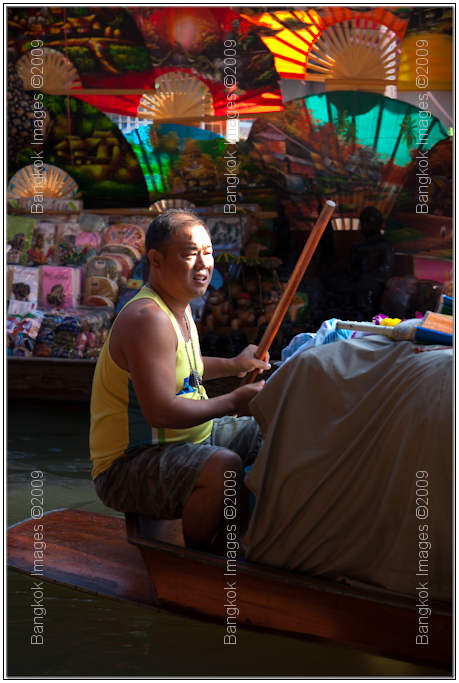
If you arrive early in the morning you'll see the boat owners/pilots splashing water over the stern of their sampans as if its some sort of maritime ritual.. which indeed it might be. Sailors are a superstitious bunch.
Canon 5d Mark II, 70-200mm F2.8 IS @F5.6 1/100th 105mm 400 ISO
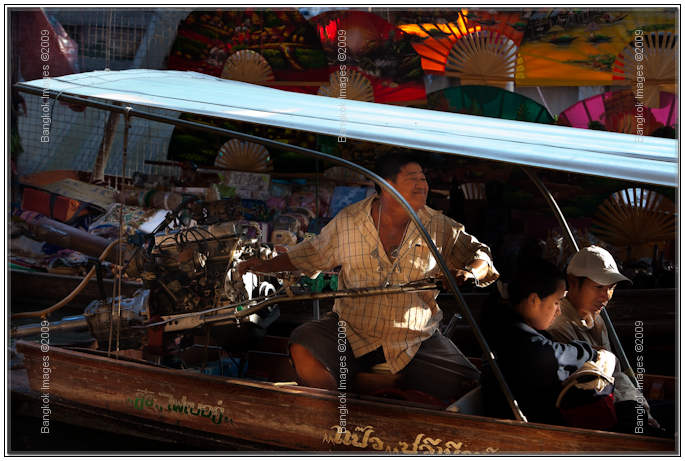
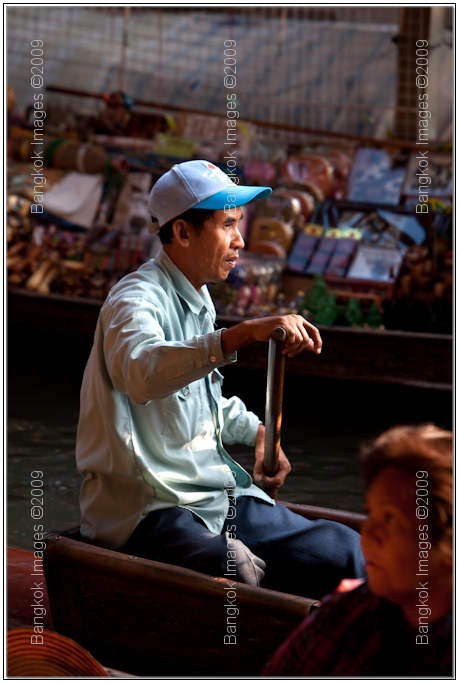
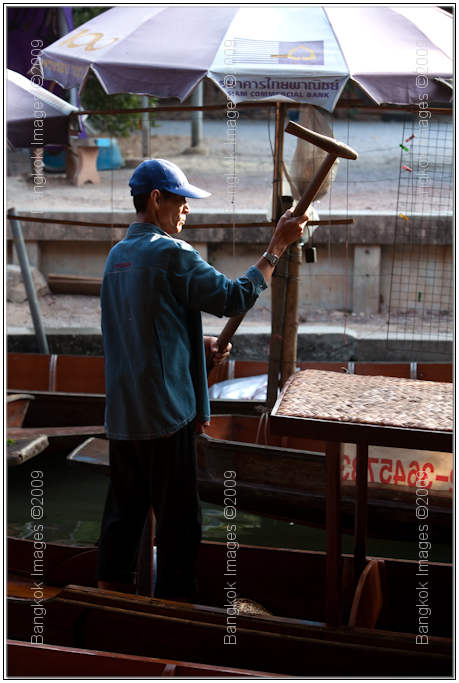
Why have a nice green electric trolling motor for cruising the market klongs at 1-2 knots when you can have a big V6 that screams like a banshee? The smile on this pilots face says it all!
Canon 5d Mark II, 70-200mm F2.8 IS @F5.6 1/125th 110mm 250 ISO
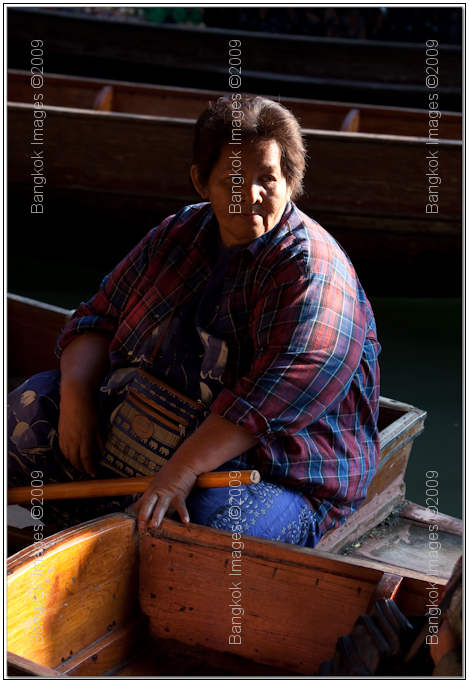
This sampan pilot waits in the early morning light hoping for an early customer. I'm impressed with the dynamic range of my new Canon 5d Mark II, it's at least 2 stops better than my old Canon 1ds Mark II.
Canon 5d Mark II, 70-200mm F2.8 IS @F5.6 1/80th 90mm 800 ISO
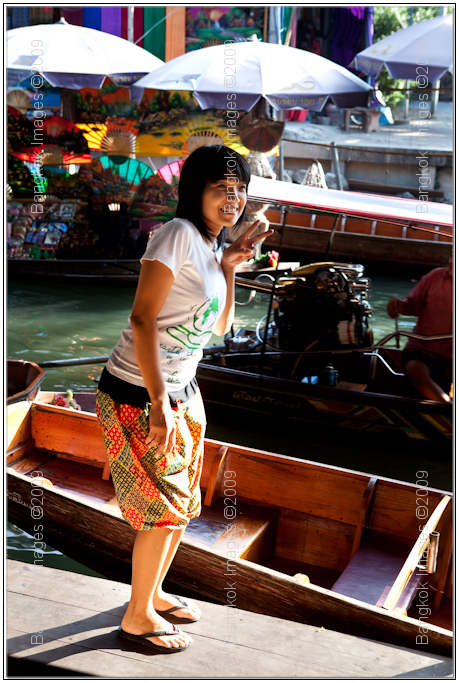
This is a resident of the area running a personal errand. She's not here to ferry tourists around. She seems in remarkable shape. I'd guess she's in her mid-40's, but her body has the tone and look of a much younger woman.
Canon 5d Mark II, 70-200mm F2.8 IS @F5.6 1/60th 70mm 400 ISO
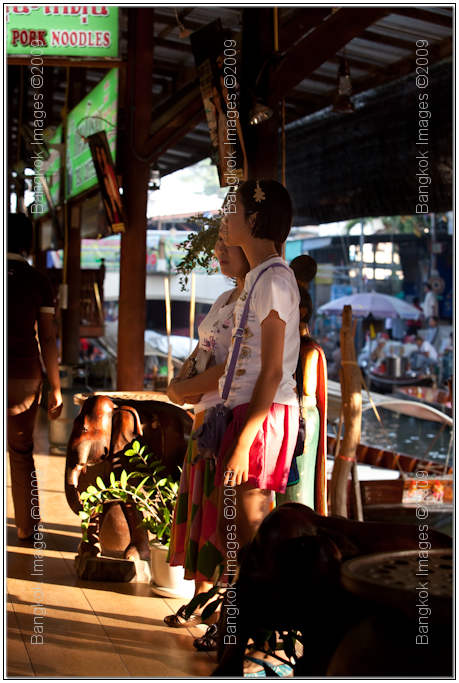
Oh my, the tourists are starting to arrive and these two stare blankly at the closed noodle shop hoping they will soon open for breakfast.
Canon 5d Mark II, 70-200mm F2.8 IS @F5.6 1/160th 200mm 200 ISO
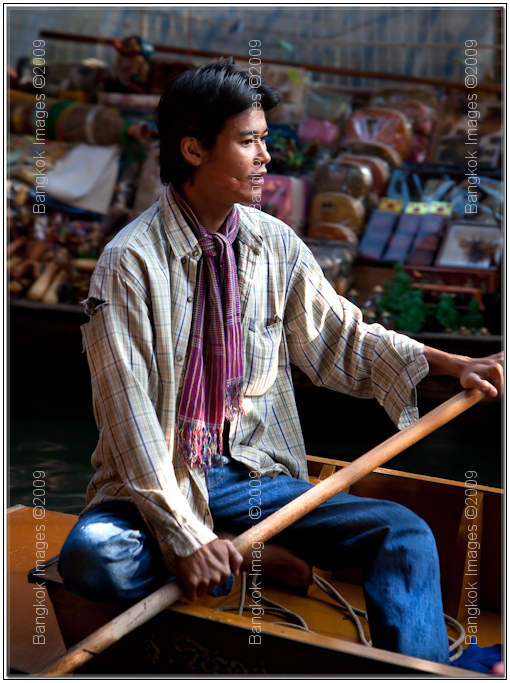
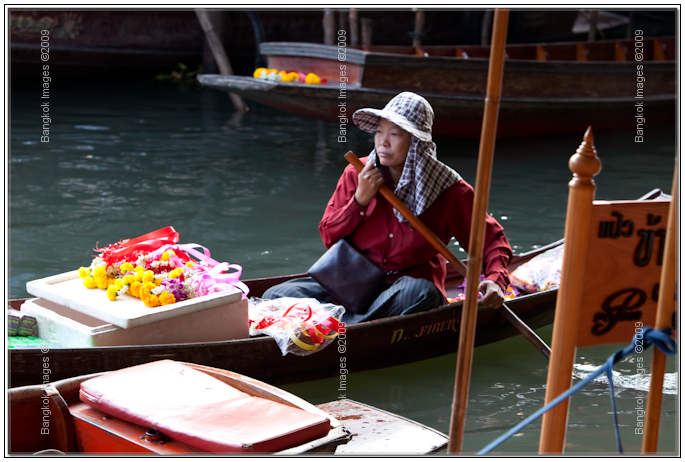
This sampan pilot is dressed in long sleeves with a scarf to help keep the morning chill at bay. The sun has come over the horizon casting its strong light across his face.
Canon 5d Mark II, 70-200mm F2.8 IS @F5.6 1/200th 173mm 250 ISO
Another sampan pilot drifts into view and I'm loving the direction sunlight on their faces. I've already figured out the exposure (-2 Ev) values as I test out the new cameras 'Av' mode. I'm looking at the LCD and hoping the beautiful range of tones and light I'm seeing will be the same when I view them on my workstation. They are.
Canon 5d Mark II, 70-200mm F2.8 IS @F5.6 1/100th 100mm 500 ISO
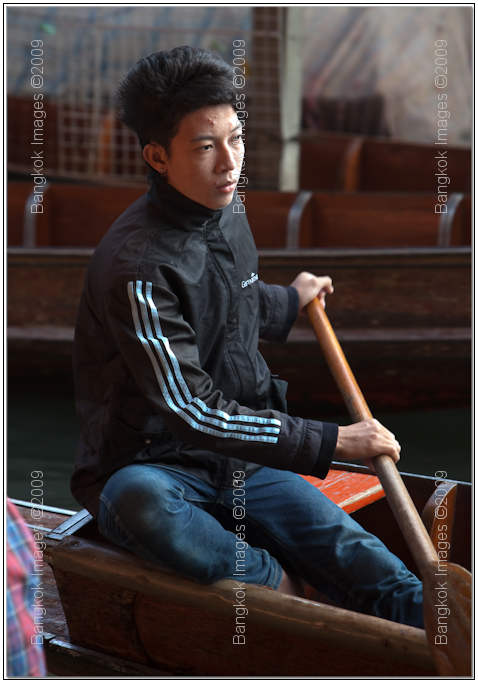
This pilot is comfortable standing as he drifts by, pushing his sampan along with a long pole.

Canon 5d Mark II, 70-200mm F2.8 IS @F5.6 1/200th 190mm 500 ISO
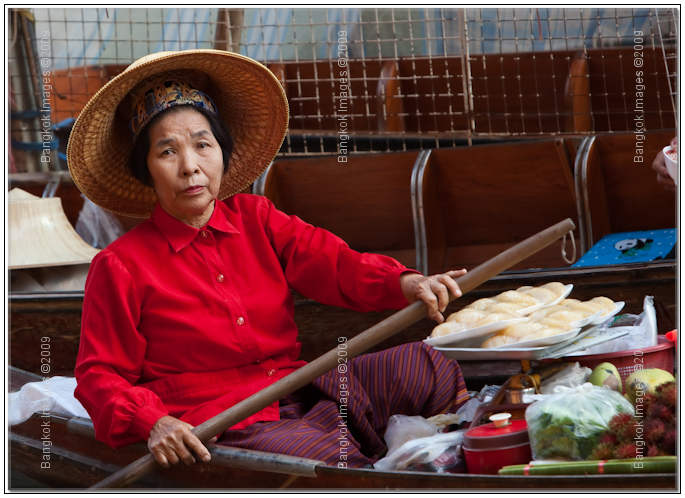
Another permanent fixture. You'll always find her here. She wears the same hat and shirt and has the same expression on his face every time.
Canon 5d Mark II, 70-200mm F2.8 IS @F5.6 1/160th 190mm 2000 ISO
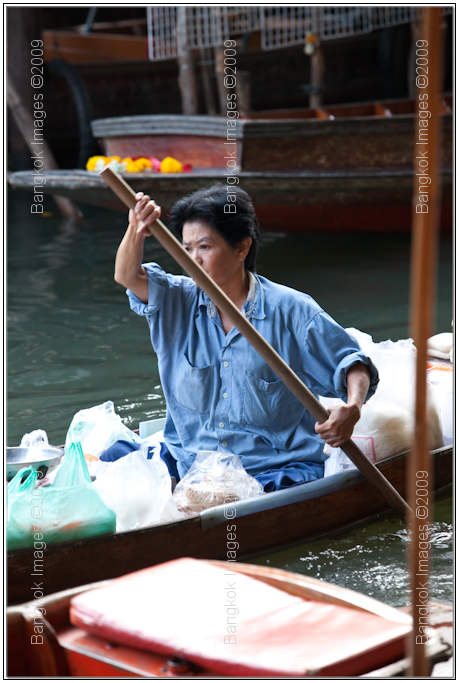
Another resident takes groceries home. With all the tourist market hype going on it's easy to forget there is an entire community living on these klongs who use sampans as their main source of transportation.
Canon 5d Mark II, 70-200mm F2.8 IS @F5.6 1/200th 200mm 2500 ISO
Canon 5d Mark II, 70-200mm F2.8 IS @F5.6 1/160th 100mm 2000 ISO
Canon 5d Mark II, 70-200mm F2.8 IS @F5.6 1/100th 125mm 1600 ISO
Canon 5d Mark II, 70-200mm F2.8 IS @F5.6 1/100th 105mm 1250 ISO
The four shots above are just examples of the different sampan pilots. For me, each one tests my new camera body in a different way so I'm pleased with how things are working out.

Canon 5d Mark II, 70-200mm F2.8 IS @F5.6 1/200th 195mm 1000 ISO
The tourists are now on the water and having a great time. The sun has risen to a more overhead position from the side light position earlier.
Canon 5d Mark II, 70-200mm F2.8 IS @F5.6 1/160th 200mm 1600 ISO
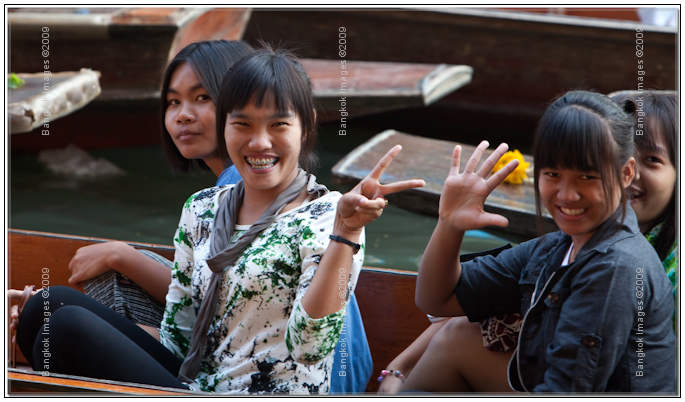
These young ladies think they're being photographed for Channel 5 and do their best to impress the guy with the big white lens.
Canon 5d Mark II, 70-200mm F2.8 IS @F5.6 1/80th 70mm 500 ISO
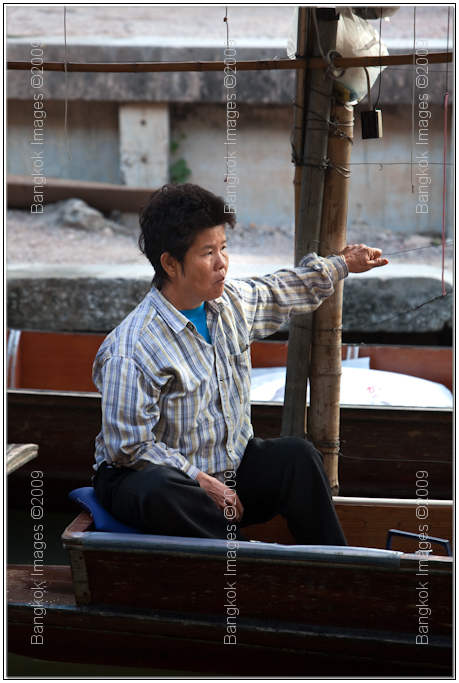
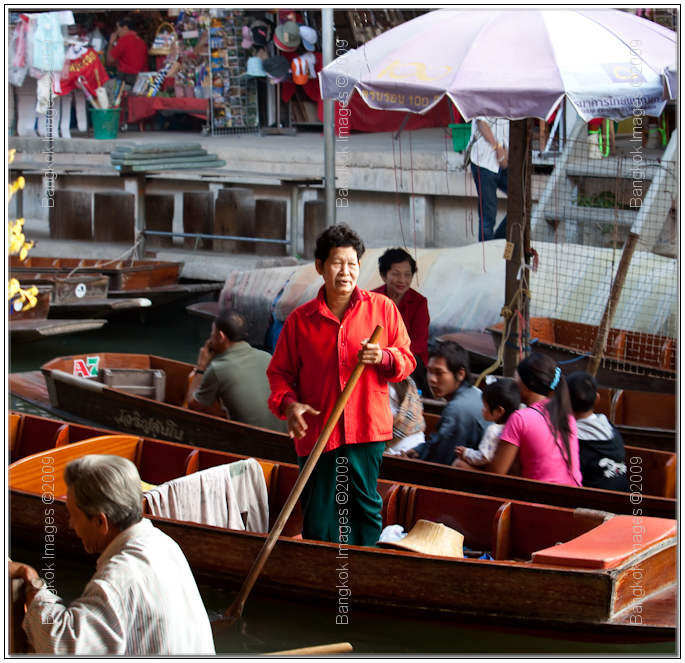
This lady just stands and watches it all happen. She's not passing by, she's stationary in the middle of the klong and it looks like she's preaching to those around her. Trying to convert people? Everyone just ignores her and after a while
she goes away.
Canon 5d Mark II, 70-200mm F2.8 IS @F5.6 1/125th 145mm 400 ISO
This is a shot from when the sun first appeared. It's coming in from the side strongly and there's an easy 4-5 stops between the bright patch on his head and the rest of the scene.
Canon 5d Mark II, 24-70mm F2.8 @F5.6 1/50th 54mm 125 ISO
I can't help myself, sometimes I'm greatly amused at how people pose when their friends photograph them. This young lady is being photographed by her friends and will soon be back on the tour bus and heading towards the next destination planned
for her group. I think most westerners would be surprised how fast paced and how many hours in length the tours for Asians are. They easily put in 12-14 hours a day and see more (well, they go more places) in a day than I'd care to see in a week.
Canon 5d Mark II, 24-70mm F2.8 @F5.6 1/80th 68mm 320 ISO
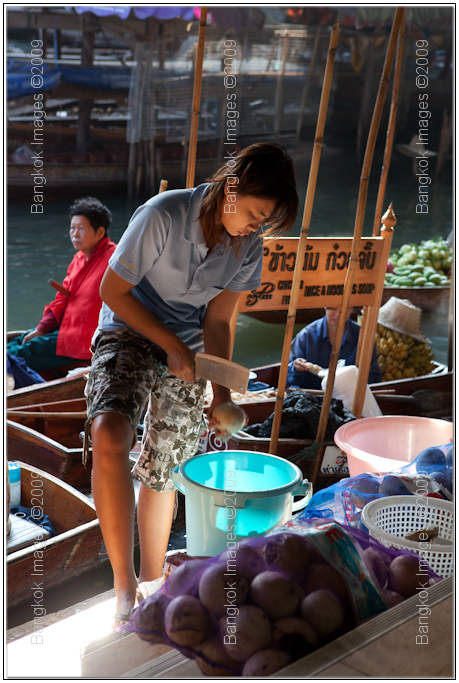
This teenager, she's 14, breaks open the coconuts to drain the milk from them. The coconuts are first burned to remove their outer husks and soften the shell, and then with a solid WHACK from the back blade of her cleaver the nut splits and she drains
the contents. I'm curious if the contents are what goes in the coconut drinks where they make you think you're drinking from a freshly opened coconut.
Canon 5d Mark II, 24-70mm F2.8 @F5.6 1/60th 70mm 400 ISO
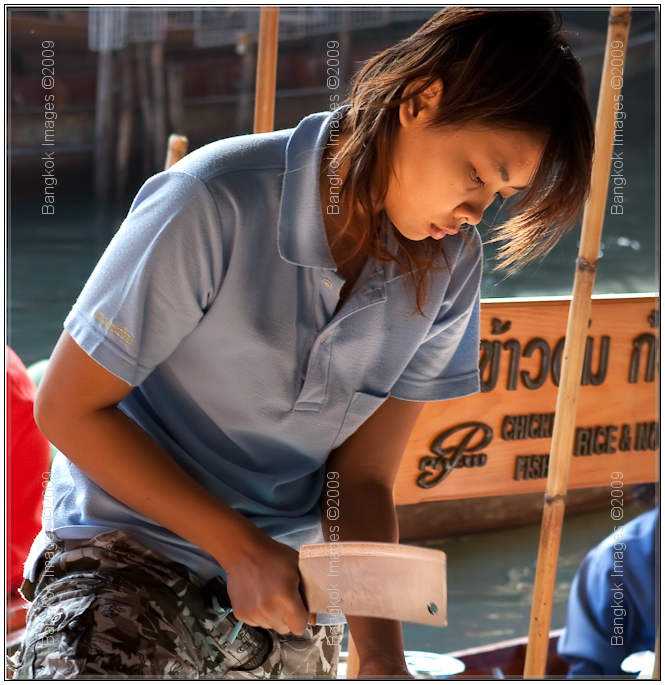
This girl is really interesting. Look at that concentration, the grip on the cleaver, and the way the light catches her face and hair. I can't look away.
Canon 5d Mark II, 24-70mm F2.8 @F5.6 1/80th 70mm 160 ISO
This was one of my favorite shots of the day. My favorite shot is very similar and I'm saving it for a feature photograph. So many colors backlit by the sun.
Overall I really enjoyed coming to this location early. How many of you are willing to get out of bed at 5am, drive 2 hours, and be on location when the light is the most interesting? I was more than pleased with what I achieved for the day. If you have
a unplanned day take the time to go someplace early, be there when the sun comes up, and sit there observing how the locals live.. and watch them as the tourists start coming in.
There is nothing like morning light..
Lens Care In South East Asia *menu
The Challenges
Kevin in Vietnam asked me this week "is there any special care or techniques" to keeping a lens in good condition while in South East Asia. I've covered this in the past in bits and
pieces and it remains a popular question. Instead of answering Kevin's question directly via email I told him I'd like to cover this question 'in-depth' in this week's column.
South East Asia has several unique factors which makes keeping a lens in top shape challenging. These factors are:
1. High humidity and temperatures, and changing humidity as we bring lenses out of air conditioned spaces, into the outdoors.
2. Challenging environments (bumping and jarring due to transportation types, crowds, and handling by baggage handlers), insecure environments (theft) and
dirty and dusty environments.
South East Asia is known for very hot and humid weather. More, we often stay in air conditioned hotels, eat in air conditioned restaurants, and shop in air conditioned malls. Air conditioned spaces have much lower temperatures and levels of humidity. As we transit from air conditioned environments to outdoor environments extreme variations in both humidity and temperature take place and create special challenges with condensation being a particular problem area.
Humidity causes accelerated corrosion, and condensation exacerbates these conditions to the point of fogging up lenses and mirrors, often enough so drips and drops become an issue. In some extreme cases condensation can create enough moisture to short out circuitry.
What Can We Do?
Desiccant products have been around for ages and are still effective today. Some products are even improved. Carry some silica gel packs in you camera bags and seven some moisture absorber packs. They come in all sizes and if you buy them from areputable store they'll offer all types and be able to advise as to the size and properties best suited to your needs. You can even dry out these packs during your travels to make sure they keep on working.
SLOWLY transiting your equipment from air conditioned spaces to the outdoors is also advised. I'll often set my bags by the door and crack the door allowing for a gradual increase in temperature and humidity. I'll also leave my equipment in the bags for 15-30 minutes once outdoors and let the bags act as a sort of 'insulator' while the desiccant products inside my bags work for me at the same time.
The absolute worst thing you can do is grab an unbagged camera from your chilly hotel room and walk directly outdoors to take pictures. Your lens objective, LCD, and possibly even the internal mirror will fog up and your hands will be wet with moisture which can work its way into cracks, crevices, buttons and switches.
Anyone who has traveled or worked with me knows I carry a stack of fresh clean hand towels in my vehicle, with more towels inside individual bags. These are good for more than wiping sweat off my face, they're also good for absorbing moisture and wrapping around equipment to insulate when exiting an air conditioned car, wiping moisture and dirt from my hands, and I'm always throwing used towels in the back of the vehicle and replacing them with new clean ones.
When in a vehicle, reduce the A/C gradually before arriving at your destination so as to equalize temperature and humidity between inside and outside the vehicle. If you'll be popping in/out of the car often leave a window cracked and don't let it get too cold inside.ngi
It should go without saying to always transport your equipment in suitable bags. I have a bevy of such bags from military grade hard cases, dedicated camera trolleys and backpacks, and improvised bags mocked up for specific uses. Some have high-density foam, others padded dividers, and others just have towels to wrap around equipment. I can't cover every condition you might encounter, at least not in the scope of this piece, so you'll need to think things through and do the best you can in protecting your gear.
Consider vibration, heat, impact, exposure to water, and whatever other conditions your equipment might encounter. I carry a selection of extra large Ziplock freezer bags with my gear and if I think I'll be fording a creek or river I'll take the time to put my equipment in the bags. If I'll be going by boat I use the bags. If it's raining heavily I use the bags. Extra Large Ziplock bags can be your best friend. I also carry a lot of clean hand towels and large rubber bands. I'll wrap and band the towels around lenses and bodies and THEN put them in the ziplocks. I'll do whatever is necessary to have my gear in perfect working order upon my arrival.
Dirt, grit, sand, and dust are just as damaging to your equipment. Keep it to a minimum as much as possible. To protect your great use the same measures as you would to protect your gear from water. Bring a small 2-3" soft haired paint brush with you in your bag. If the outside of the ziplocks or towels have a layer of dirt/grit/sand/dust, then use the brush to knock off as much as you can while opening it. Knock it off before unwrapping it. Carry these brushes in outer pockets of your bags and use them to clean off your bags before opening the bags. Pull the brush from the side pocket, clean the outside, open to the inside.
If you're carrying a small point and shoot on your body in SEA, Ziplock it and keep your sweat away from the camera. Plus, you never know when you're going to slip and fall in a giant puddle.. 🙂
Other Protections
Lens Hoods
I recently answered a question for a reader concerning filters and if they protect lenses are not. Sure, they do to an extent, but a lens hood protects your lens much more than a filter could ever hope to. They'll take more abuse, more impact, and more anything else than will a fragile glass filter.
Straps
Strap it up! Straps around your telephoto lenses are absolute musts. NEVER pick up a DSLR by the body when a big lens is attached. You only have to tweak a lens mount 1/10,000th to throw the entire thing off. I personally draw the limit at my 70-200. I pick the DSLR/70-200 combination up by the lens. And I keep the lens foot on the 70-200 which works as a handle. And I keep a strap not on the body, but on the lens. I hate straps on bodies. If you're lucky enough to have a 300/2.8, 400/4, 500/4, that big strap that came with it.. it's for the lens and not an extra body strap. Strap it up and keep all that weight on the strap and not the body. Here's a link for a Canon 300mm F2.8 IS, $4200 USD's. Look in the grey square where it says "what's in the box" and you'll see "WIDE STRAP." I guarantee you that if you show up at a Canon service center with no strap and a tweaked lens mount and over $1000 worth of damage they'll notice the strap wasn't being used and they may even laugh at you.
Grip
I useNikon AH-4 leather hand grips on ALL my DSLR bodies. The Nikon models are far superior to the Canon models or any other than I know if. They allow the weight to be carried on your wrist vs. your hand.. so you can have the camera/lens hanging by your side and your hand totally relaxed because you're carrying the weight around your wrist. They work great on Canon's, Sony's, Pentax's, all of them. You might have to get creative with the threading, but it will work.
Misc
There are Lenscoat products and Lenshood products and rain shield products and even special umbrellas to keep the rain off your lens. Look through your camera catalog and check out what's available and use good common sense as to what will work in your environment. They even make"Camera Armor" DSLR skins .
Keeping it Clean
When you're out and about in the field you're sure to get your equipment dirty. It will get wet, muddy, dirty, dusty, smears on the lenses and filters, and I even know someone who got a piece of snot on their sensor. This stuff happens and you need to be prepared to deal with it. I've already talked about cleaning sensors several times and I plan on making it a full learning topic in the future so I won't cover that today, but we will cover most everything else.
Cleaning Tools and Supplies
I strongly recommend you carry the following in the field with you:
1. 2-3" soft bristle paint brush with wood handle. Get a decent one. A course stiff bristle plastic handled brush will be of much less value and might possibly harm your gear.
2. Soft hand towels. I take no less than a half dozen with me on any day outing and I'll clean these and have them ready to go the next day. You never know when you'll spill your coffee on your equipment or in your bag, or anything where a quick soft and clean towel will come in very handy.
3. Small 3-4 ounce bottle of Windex WITHOUT ammonia, diluted 50/50 with water. This stuff will clean everything from the LCD screen of your laptop, to sticky soda spills, to your eyeglasses, to the outside of your lenses. However, ammonia or a straight mix could possibly harm your gear, remove numbers from keypads (as will excess scrubbing) and possibly cause other problems. I personally use a 50/50 mix of Windex and water and have never had any issues. I find it invaluable. I will NEVER use it on lens optics, and will only use it on filters when I have no other choice. Filters and lenses have fragile coatings and it's best to only use an approved lens/filter clean by your manufacturer, though don't be surprised if after reading the ingredients you find out it's diluted Windex.
4. A small Swiss Army knife. I can't count the number of times this tool has saved the day.
5. Prepackaged Sensor Swabs (thought we won't talk about this today) and other basic sensor tools for field use.
6. No less than a dozen anti-static microfiber Tiger Cloths in small ziplock bags. I have one of these in my pocket, two in my knapsack, a few in each bag, a few more in my glove box, and more spread out everywhere. These are very handy for cleaning delicate surfaces, especially lenses and filters. I never use them twice. I use them once, put it back in it's bag, and stow it away until I can clean a batch of them, at which time I'll neatly fold them back into the bags which lets me know they're ready for use. The reason I never use them twice is because all it takes is a single grain of sand stuck in the fabric to etch a deep line across your expensive lens surface. If I drop it I don't use it, I stow it away to be washed and break out a new one.
7. At least a dozen extra-large Ziplock Freezer bags.
8. Small LED flashlight with extra batteries.
9. Several 6×12" surfaces of fine flannel type cotton perfectly clean.
I carry off of the above and more. And it takes up very little room. Besides for the hand towels and extra large Ziplock Freezer bags this entire kit can be stored in a small pouch of about 8x3x3 inches.
Cleaning Equipment
I clean as little as possible in the field other than using the hand towels to wipe off moisture and obvious dust/dirt/grit. It's always a better option to have your camera equipment and lenses cleaned at your service center and with the reasonable prices charged in the SEA region this is even more true.
I'll use the diluted Windex mixture to clean anything sticky like soda, food oils, or whatever kind of smears off my laptops LCS screen. I'll also use the Windex mix to clean the same sort of debris off lens barrels and camera bodies, but remember less is better when it comes to your camera equipment.
I'll use the 2-3" soft bristle brush to brush dirt and any sort of debris of any surface including a lens surface AFTER making sure it's perfectly clean. This is a safe tool unless you force pressure or use it dirty.
I'll only use the Swiss Army knife when I must as I much prefer not to bugger up any screw heads. However, in an emergency this simple tool can save the day. It can clean corrosion off battery contacts, tighten loose screws, help open stuck battery doors, and more.
The Tiger Cloths are great for fine cleaning camera bodies, and the small flashlight is invaluable for lighting tight places.
Cleaning Lenses
Like sensors lenses should only be cleaned as much as absolutely needed, never more. This means sometimes you'll need to chip dried mud off with a toothbrush, and other times you'll just need to remove a single fingerprint on a filter surface.
I clean my lenses in the field this way: Using the 2-3 inch soft bristle paint brush I remove any dirt/dust/grit/hair from the lens surface. Often this is all that's needed. If there are light smears I'll use my hot breath to fog up the lens surface and then remove the hot breath with the soft cotton fabric strips. If there are heavy smears I'll use the diluted Windex with Tiger clothes, followed by hot breath and cotton fabric strips.
The flashlight can be used to shine from the rear objective up through the lens barrel and inspect the lens interior for dust and fungus. Since most lenses are air sucking (telescoping) devices even new lenses will be full of dust. Don't look if you don't want to know the truth. No lens should have fungus growing, and if you see it plan on getting the lens professionally cleaned.
Good Judgment
Cleaning camera gear without causing issues or damaging the gear is all about good judgment. When you're out in the field and you need something to work 'right now', you'll often take chances you wouldn't otherwise take. However, if you're handy at cleaning electronic gear and you're very careful, you'll do fine with camera gear. When in doubt as to if a solution is safe to use, consult your instruction manual or even the manufacturer's website.
Keep everything dry, do your best to avoid condensation, and use a lot of common sense. However, don't be so timid that you never use your gear. Gear is meant to be used and I use my gear hard. I also spend a lot of time maintaining it.
I hope this helps. I know I didn't cover every possible scenario, but I think I gave it a good start. If you've got your own methods you think others will benefit from send them in and I'll share them here in the column. We can always learn from each other.
Photography News of Interest *menu
The Consumer Electronics Show held its annual event in Las Vegas like it always does, and the industry usually releases minor models during the CES show and this year is no exception. Scads of new point and shoot models from practically every manufacturer were announced and as usually Digital Photography and Review has a complete roundup nicely formatted. You can see ithere.
Roughly every 5 years Canon and Nikon release new versions of the photojournalists 70-200's. This year is no exception with both Canon and Nikon practically synced to each other. I linked you to the Nikon 70-200/2.8 VR II model a few months back,
and this week Canon announces their EF 70-200mm F2.8L IS II USM lens. It has some new coatings, their newest IS system, and more importantly it reduces the MFD to 1.2m which is
significant. This is great if you're just now buying a new lens, but there really isn't any single feature compelling enough to prompt someone who has the older model to upgrade.. at least IMO. You can see the announcement here
.
I really enjoyed this article over on the Digital Outback discussing Panasonics 7-14mm F4 (14-28mm in 35mm equiv) micro 4/3's wide angle zoom. More, I found the discussion on how it
can be used where a bigger format such as a traditional DSLR would not be used. Take some time to read this one.
. Very much worth the read.
You knew it was coming. The market potential of the Micro 4/3's system is just too great for the big consumer giants to resist. This week Samsung announces their Samsung NX10 but it's
not a Micro 4/3's system! Nope, it's smaller and more lightweight than some Micro 4/3's system, but it has an even bigger and more appealing APC-S sensor just like you'll find in most consumer DSLRs. Samsung isn't a major
camera maker, so I personally would want to be convinced of their market commitment before investing in a camera with its own brand new lens mount.. especially considering the cost of quality lenses. Still, it's full of high tech systems,
it's very small and lightweight, and it does have a decent sized sensor. Check it outhere
.
I very much.. and I mean I really really enjoyed.. this article over on the Luminous Landscape by William Neill where he discusses his relationship with Ansel Adams and how it has influenced his photography. There are some keen bits of wisdom in this article. Several of which I'll discuss in future blog entries. I have the same books and have read the same passages.. but I wish I'd had the same
pleasure of meeting the man. Read this
, it will be the best use of five minutes you're likely to find in quite some time.
Readers Submissions *menu
Hi
This was a big bike show in Siam Square back in November.
Lots of Harleys and lots of people.
Bart
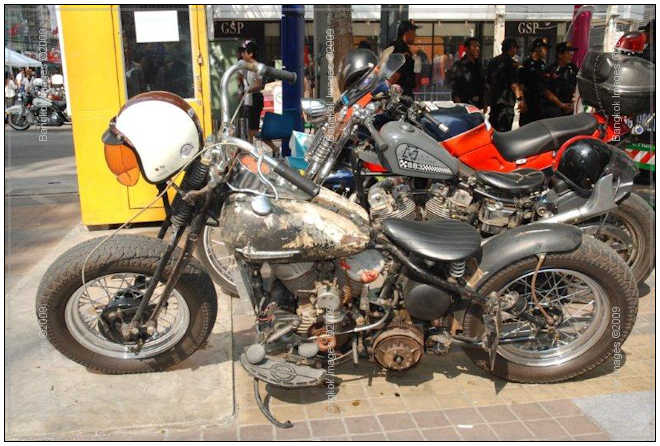
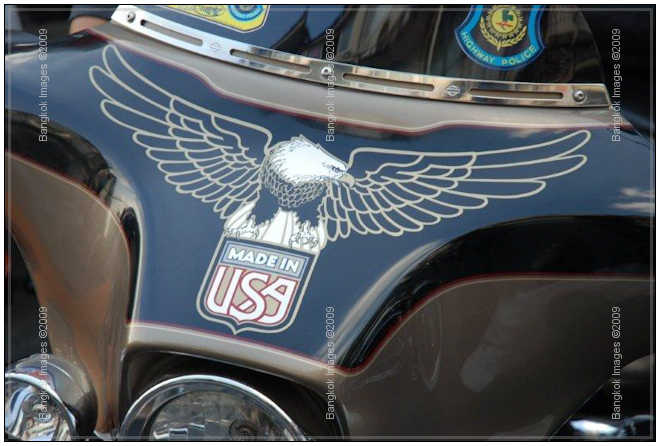
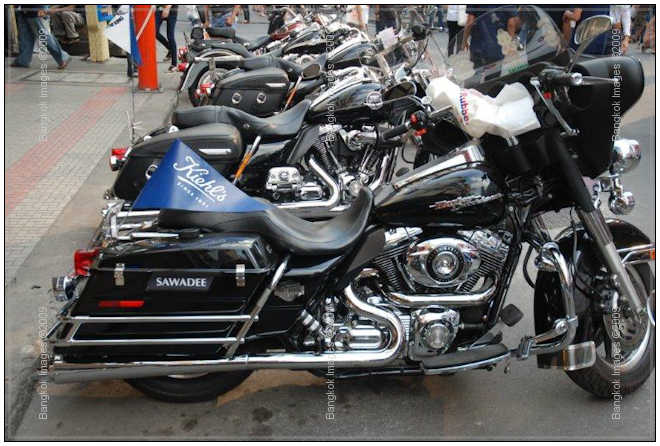
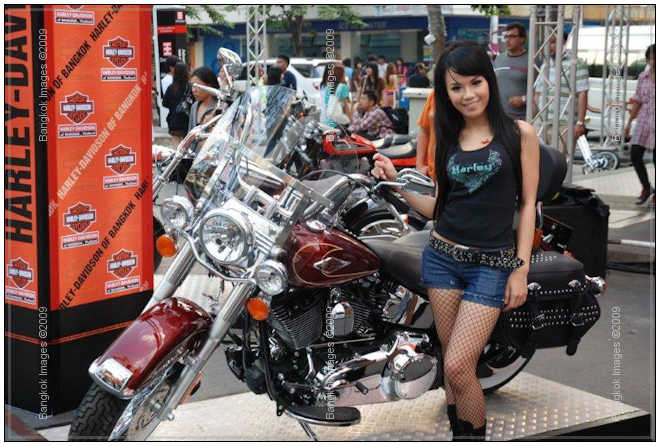
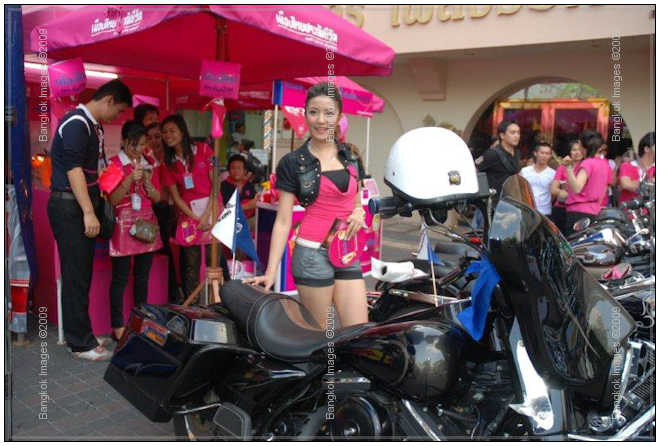
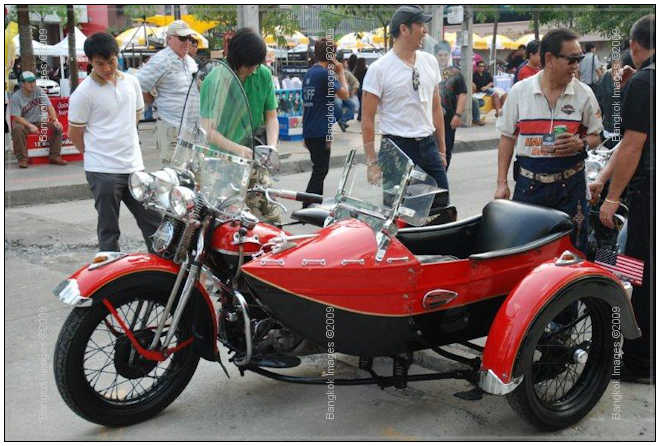
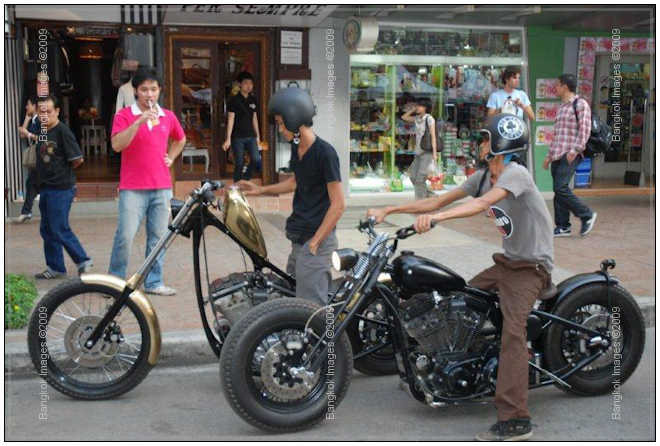
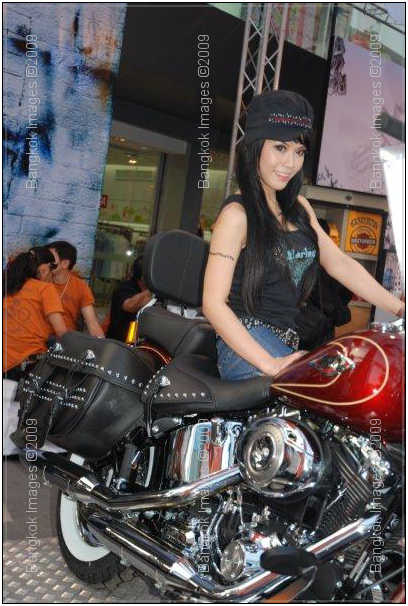
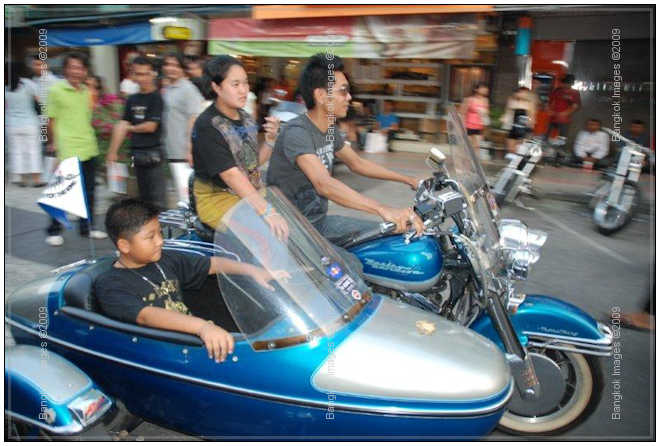
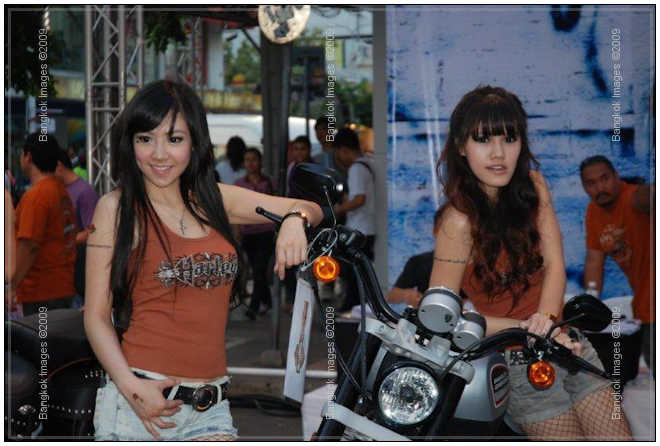
Bart –
Thank you! I personally enjoy these bike shots quite a lot. It reminds me of the years I spent riding my Harley around Japan. These are fun and interesting shots. Keep them coming!
Steve
I suspect the readers submissions will be a highly anticipated section of this column and I encourage anyone with photographs and travel accounts they'd like to share to please send them to me at: QandA@Bkkimages.com
Readers Questions *menu
Hi Steve,
I've recently discovered your photography section on Stickman and am always amazed at the pictures you achieve. I'm having some issues with taking a specific sort of photo. Basically I take pictures of things like gadgets, so they are still
close ups. I'm using a light box with pro lights, plus a digital Nikon D40. The quality I'm getting is inconsistent with problems of background colour not coming out totally white.
I've played with settings but not a clue what I should be doing- i.e. I'm just doing trial and error and getting 99% error. Do you think I need a special type of lens to make it better?
Maybe you've done an article already which you could point me to, I'm working through your past articles and not really found the right thing. Any help would be awesome, I'm new to photography and to be honest not
very technically minded.
Cheers
Dave
Hi David –
I'm pleased you're reading the column. I'm happy to answer your questions and usually if it's a good question like this I'll use it in the column under Readers Questions if that's okay with you? Sometimes the questions take
a bit of effort to answer, so the more people who might benefit from them the better.
Your question:
It would be helpful if you could send me some links to the type of "pro lights" ad "light box" as there are more than a few different types which
can make real differences. I'll leave this part of the question alone until I hear back from you and continue to answer the rest of your questions.
The D40 is more than adequate for small product photography. Recently I've been corresponding with a guy on one of the local forums who has the same needs as yourself. He was surprised to learn that a decent quality point and shoot would actually
work better for his needs because of the deep DOF (depth of field) afforded by the small sensor, the built in Macro function, and with a hot shoe it can sync strobe lights as well. The D40 will ultimately
provide better image quality than a point and shoot, but its quality you might not notice, and to get the DOF you want you'll need a specific lens because compared to a point and shoot, the D40 has a huge sensor and achieving enough DOF can
be difficult.
No, so far no articles on small product photography but we have been talking about one. With eBay and on-line reselling this is a popular topic. The problem is that it actually takes a decent amount of understanding about photography, or you'll need
someone to design the set for you and then you can just operate the set.
Here's some general information which will always be true for small product photography using a DSLR such as the D40. Get back to me on the exact type of lights and light box.. and I'll get to the rest.
1. The camera should be set to manual mode.
2. Shutter speed should be set to or under your maximum flash sync speed. For convenience 1/100th will work fine.
3. Your aperture should be as deep as your lens allows for maximum DOF (depth of field), a minimum of F16 and preferably F32-F64.
4. Your lights output will then need to be adjusted for these settings.
5. You should be looking for a lens with a focal length which allows you a comfortable working distance from your subjects, but at the same time fills your frame with the subject. For a small subject like a watch, this will require a Macro lens. Nikon
calls them Micro lenses (no one knows why Nikon is the only manufacturer to call them "Micro") Usually 100mm focal length will provide enough of a working distance. The least expensive
high quality Macro lenses start at 60mm. 60mm will work fine, but you might find yourself working closer to the subject than you like.
6. If shooting against a white background, and you want the background 100% white, you'll need to expose the background roughly 2 stops greater than you expose the subject. This "whites out" a white background giving it that clean "floating"
look you'll see used often.
7. Placing a piece of visquean over the white background (top of table or shooting platform) will provide a nice reflection which is a simple neat trick to make your products look better than the next
guys.
8. ALWAYS use a camera support (tripod) and external shutter release cable when shooting these types of subjects.
9. Consider background colors like a dark grey, black, or colors that compliment the subject.
10. Using flags (posterboard that blocks light, usually black in color) and reflectors (posterboard that reflects light, white in color) to shape your lighting
is the standard technique for such subjects.
Once you get your settings the way you need them, the set.. set up properly, and the lights adjusted.. you can just leave everything in place and shoot your products as you add them to inventory. Ebayers and on-line retailers maintain a dedicated set/camera
for photographing their products. They also find it helpful to "tether" their camera to their computer so they see the image immediately after its' taken, vs. removing a card and importing the image.
Let me know about your lights and light box, take a picture if you can. I'll follow up with more specific information once I have this information.
I hope this helps. If you like, it's possible to do a individual workshop just on this topic and get you set up properly.
Take care
Steve
Hi Steve,
Thank you so much for such an in depth analysis. I'm more than happy for if we can do something for an article.
It's going to take me a bit of time to process all that information and put it into action. What I'll do is keep you informed of and hurdles and the progress as I put it into practice. The light box I have is a very cheap pop up white one- probably
worth a re investment there straight away! The light are 2 x Interfit by Paterson 500w tungsten which aren't adjustable in power – not sure if that's an issue.
I'll look at getting a reasonable to good lens dependent on price. The issue on kit is we don't want to go and buy all top end stuff when we lack the experience to use it correctly…yet.
Very good point about keeping the 'set' all set up and not messing with it – will definitely be putting that into practice.
I'll let you know more as I get chance to put your great advice into practice.
Kind Regards
Dave B.
Gadgets
David –
There are some changes to what I told you based on your equipment. It's almost always a mistake to get to far into the "how to" without knowing the specifics, but we try.. 🙂
Your tungsten lights are what we call "hot lights", or always on. They won't have adjustable power so instead of adjusting the lights to the desired exposure, you'll need to adjust the camera to the desired exposure.
To do this you will set your lights as desired. Set your ISO to the lowest possible (ISO 200 on Nikons), and your aperture to at least F32.. or as small as you have. You'll get the most depth of field
this way. Then, you'll adjust your shutter speed for the best exposure. It's that simple.
However, you'll need to have the camera mounted and locked down in a tripod, employ an external shutter release, and set your lights properly.
When you say "light box" are you talking about a small product "tent", one of the cheap translucent tents used to photograph small items like watches
and jewelry? If so.. these are okay for a quick start, but later you'll want to replace it with proper equipment. You probably bought the light box and lights together as a small product lighting kit? These can be used effectively.. but with
a bit of work and a trip to the hardware store you can do better. It's just a matter of experience and progression.
Don't hesitate to buy a good used lens. You can save a lot that way. Lenses are generally very reliable and last for many years. If it works on inspection, it will probably work for a long time.
Take care David.. good luck
Steve
Please submit your questions to QandA@Bkkimages.com All questions will be answered and most will show up in the weekly column.
A Snapshot of Bangkok Images Week in Review *menu
Another slow but unusually busy week. Does anyone know where they put our winter? We haven't had a winter here in Bangkok. I hope this isn't setting the tone for an unusually hot spring and summer!
No workshops and no shoots this week. I took the extra time to source a new set of video cards for my main workstation, install them, and thoroughly test them before going live on-line with them. Anything to do with the video of my computer affects color
and my output.. so I'm very cautious and careful in this area. During the course of this testing I ran some other tests which will be of interest to the casual reader thinking about color profiling. I'll put my thoughts and results together
for a feature in the coming weeks.
Infocus Blog *menu
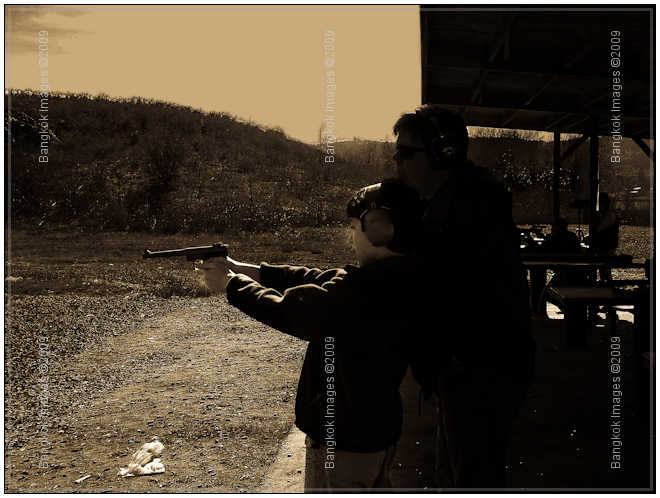
Dry Firing
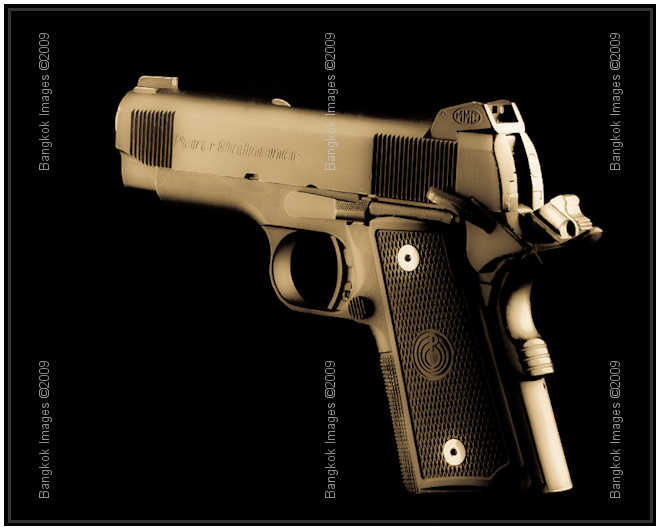
Nikon D2h, Nikkor 85mm F1.4D @F14 14 secs ISO 200
Analogies and Visualization
Anyone who has ever taken one of my workshops knows I'm big into analogies. During the course of small talk I'll learn a bit about your background and other hobbies, and then as much as possible, but only as needed, will use analogies to help
explain the more technical terms and theories of photography. I do this because it works and it helps the client feel comfortable and did I mention it works? Visualization is a powerful tool and analogies help us visualize.
What does that have to do with dry firing and just what the heck is dry firing anyway? Any competitive or combat shooter will tell you dry firing is the process in which you take aim at a target, and while taking aim you slowly squeeze the trigger until
it actually surprises you when the hammer falls. But you do this without live ammo in the comfort of your living room, garage, or wherever is convenient. Why would they do this? Because dry firing isolates the process of releasing the trigger
(pulling the trigger) from the often distracting other elements of shooting such as noise, recoil, and the resulting apprehension both of those can cause. And it also teaches you to release the trigger as
smoothly and with as little extraneous movement as possible. Dry firing returns perhaps the biggest gain of any sort of practice or preparation.
Relating to Photography
Okay, so why is that important to me and how does it relate to photography? This is a good question! I wish it were possible, and many workshop students wish the same thing, that I could just 'tell' you how to properly hold the camera, release the shutter, and get tack sharp images every time. Unfortunately this isn't the case.
Some things just take practice, and others take experience. And no, practice and experience are not one and the same. Practice is actually performing an action. Experience is knowing when and how to perform the action. Photography takes both practice
and experience to obtain sharp images.
The Genesis of the Analogy
From the times my sons were 3-4 years old I'd take them on our shooting range (my home in Oregon had several marked and maintained shooting ranges) and helping them get comfortable in one of the classic
shooting positions would speak softly in their ear "Brace solidly, push your arms into your chest/knees/ground firmly. Place the front site on the targets center and focus on the front site, let the rear site go blurry. Breath all the way in and release half your breath. Slowly and steadily 'squeeze' (but don't pull or jerk) the trigger with the pad of your finger until the hammer falling and the shot firing surprises you." At first this entire process takes a novice shooter perhaps 10 seconds. An experienced shooter who has done this thousands of times mentally slows the process to a crawl and can complete the same action in just milliseconds, each step separate
and liberate. Total and complete control.
Olympus C-5050 F4 1/400th ISO 64
The analogy to photography is very much the same:
The focal length of the lens is analogous to the length of the barrel of the firearm, but reversed. The shorter the barrel of a firearm the more difficult it "appears" to hold on target at longer
distances. With a camera the longer the focal length the more difficult it "appears" to hold on a subject at longer distances (and get clear pictures/hit the target).
The focal distance is analogous to shooting distance. The more distant the target, or with photography the subject, the more difficult it is to hold on a subject at longer distances (and get clear pictures/hit the target).
There is no shutter speed in shooting, but the shorter the shutter speed the more difficult it is to get a clear picture. And the necessary shutter speed for a clear picture changes with the focal length and focal distance.
Transferring the Analogy
During the course of a workshop a client might hear me softly reminding them: Brace solidly, pull your elbows into your chest, use that lamp post as a support, lean against that tree.
Look through the viewfinder and acquire your subject. Look straight through the viewfinder until you don't notice you're looking through a camera and lens.
Breath in fully, and then let out half your breath and hold it.
Place the pad of your finger on the shutter release, and gently and slowly depress the shutter release until the sound of the shutter cycling surprises you.
Nikon D2h, Nikkor 85mm F1.4D @F11 10 secs ISO 200
So What About Dry Firing?
Dry firing is simply practicing these techniques in a comfortable environment, when not distracted, when you have all the time in the world. The more you practice bracing, breathing, and releasing the shutter, the better you'll become. The slower
the shutter speed you'll be able to get away with in a given situation and for a given focal length and focal distance. The better you become at these techniques the more latitude you'll have with your shooting variables.
Not only will you get sharper images at normal shutter speeds, but you'll be able to shoot at much slower shutter speeds than ever before enabling you to get sharp images you otherwise wouldn't have, or perhaps enabling you to use a lower ISO
for better image quality.
Dry fire in your living room while watching TV, on your patio while ogling the next door neighbor, or even while being a passenger in a moving car. With digital cameras you can actually use live ammo and see how you're doing. These aren't images
you'll want to keep, but they become invaluable in review. The dry firing and image review is preparing you for when you make the additional effort of driving a few hours to a destination you want to photograph, spending a ton of money on
an African Photo Safari, or perhaps when shooting your children's wedding. Dry firing helps you prepare to be ready, and to be your best, when it counts.
Conclusion
To be good at anything most of us have to put in long hours of practice and gain valuable experience. In a one to several day workshop I can show you how to practice and impart experience, but I can't make you shoot like a pro in only a few days.
Only tons of practice and proper training along the way will do that.
I occasionally get an email from a reader that asks "geez, how did you ever get that sharp of an image handheld at 300mm and 1/30th? Or 20mm and 1/5th?" All I can say is I didn't learn to
do it overnight and there are no secret techniques. It's having learned the proper techniques and practicing them over and over again. A lot.
Dry Firing. Give it a try.
Until next time..
