Kruger Trip Report Part II/Review, Focus Magic
![]()
|
• Intercontinental Jacir Palace Hotel • Desert Inn Beersheba Hotel • Golden Tulip Negev Hotel • Dan Caesarea Hotel |
Thank you for your generous contributions. We're slowly collecting enough images to make the mosaics. We are still accepting (and pleading for) images of children from SEA. No matter how terrible you think they are, please send them in anyway. These images will be used to complete a set of 3 high quality mosaics which will be sold to benefit the Karen and Burmese Orphans living in the orphanages and refugee camps. The more images the better, I can use all you have. Please take the time to go through your images for anything you think might help. If you missed the "No Place to Call Home" special, you can click on the link and read more about this. Thank you! QandA@Bkkimages.com
Feature Photograph

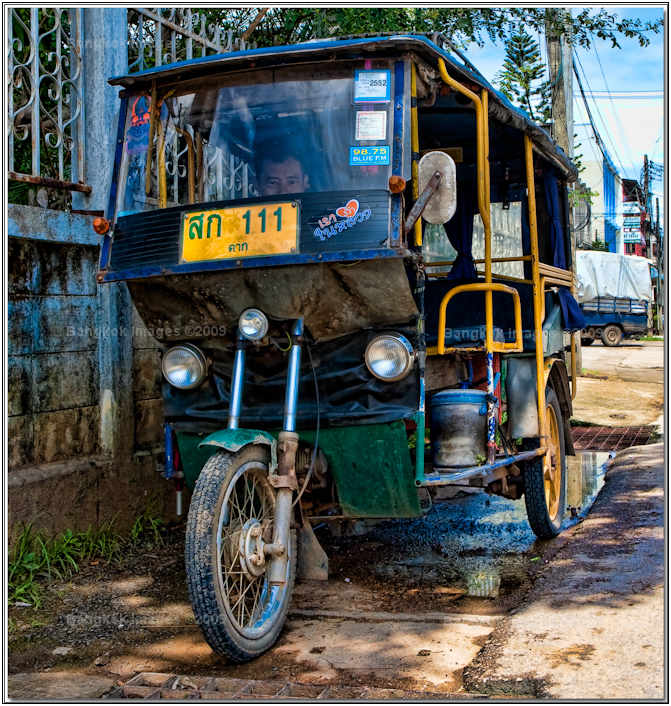
Mae Sot Tuk-tuk
The ubiquitous tuk-tuk is almost as common in Thailand as umbrellas on a sunny day. Their look, vintage, and style change from region to region. I've never found them particularly interesting, but sometimes a change of perspective can make the ordinary
into something new and perhaps even special. Such is the case with this tuk-tuk.
You've probably noticed that we're doing more professional reviews of software and hardware than in previous months? Our column is becoming popular enough so that software developers and hardware manufacturers have become interested in what
we think of their products. Recently a company called Topaz sent me a reviewer's package so I installed their software and sat down for an hour or so to give it a look and see where it might prove useful. Because we are using a review
"team" concept I was also curious if other members of the team might be interested in giving it a spin.

So, I needed an image to play with and out of pure chance my wheel of fortune landed on this image of the tuk-tuk. I started tweaking and playing and generally having a good time seeing what was under the hood of Topaz. Eventually I ended up with this
image and I like it! It has a painterly effect and a type of hard contrast and color combination that brings out bits and pieces of this tuk-tuk which previously blended in. I started taking a closer look.
This image is significant because I looked at it from a different perspective and discovered elements of style and color and even utility that caught my interest. Notice the three lights? The center light turns and the two big ones are fixed. How about
the yellow iron supports on the side? The yellow spoke wheels in the back? The rear curtains? Splash shields? The driver?
I think I like this effect and plan to explore more with Topaz before writing a proper review. This style is far from my normal workflow but this software has motivated me to explore. I'm curious what I'll find!
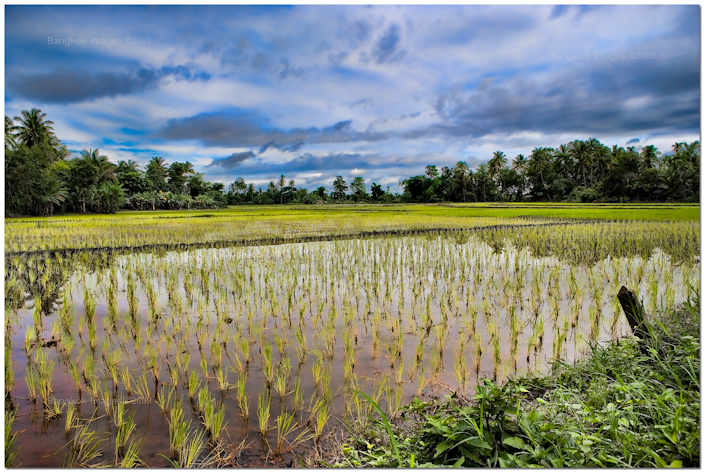
Rice Field in Mae Sot

The above image was a second attempt. Sure, it doesn't look real but what I like about this is that it took a relatively flat image where all the features of this landscape blended, and isolated them allowing me to better appreciate the elements
of the composition. Next week I'll read the instructions and see if I can turn it into a proper image.. ;o)
Kruger Trip Report Part II
Rob is a good friend and a very serious amateur photographer with the resources to travel and  vacation in some really exotic places. He hails from New Zealand and has lived or traveled through much of Asia and wherever his extraordinary IT skills are required. Nary a day off from work is wasted as Rob and his wife Sao pack up camera equipment and hit the road looking for new and rewarding locations to photograph. He publishes www.1ds.com where you can always find lots of great photography and interesting blog entries. If there is a great place to photograph in Thailand you can bet Rob and Sao have already been there and documented it.
Part II covers days 4-16 and reflections on the trip once back home.
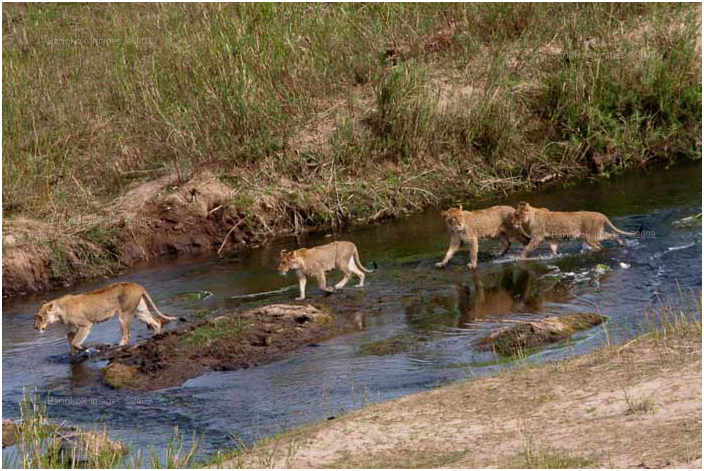
The View Down on a Lion Pride
Day Four – Olifants
This morning we decide to take a shorter route and end up back at Olifants and the Chalet for breakfast. Some of the newbies are showing signs of “Kruger ass”, where sitting all day in the
car…. well, you get the idea. Sao and I are seasoned campaigners in the car driving stakes having trained in Western Australia for three months before hitting Africa. But, of course, a quick drive in the morning turns out to be three hours.
It’s amazing how many distractions one can have in a mornings drive. The drive is quiet, but fruitful and we come away with some keepers. All is not lost!!
After a great cooked breakfast and a rusk, we’re off into the park again to check out some likely places. We’ve a three hour drive picked out and the rest of the crew rests of checks out the amazing Olifants Camp.
As usual, the drive is an entertaining one. We interact with Elephant, watch one chase a Concrete Truck down the tarmac and we see lots of birds and other fauna. Did I say it was quiet??? Yeah… Right! We’re back in about two and a half hours
as we have to see to our laundry (remember those clothes we wore for three days) and to get a snack refill for the Hilux. While back at the cabins we see four lion being hassled by a herd of elephant and they then cross the river to get away.
It’s the first time we’ve seen lion swimming or wading. Quite a treat. The elephant make great silhouette on the river too. Majestic and awe inspiring. Now for the afternoon!!
I’m back now from the afternoons drive. We had headed out on a productive loop up past the Bulule Caravan camp. There are some Hyena there with babies and lots of Kudu and Eagle! A lady on one of the Oliphants Bridges told us about some Leopard,
but that came to nothing as we followed her instructions to the sighting. Oh well, that’s Safari life!
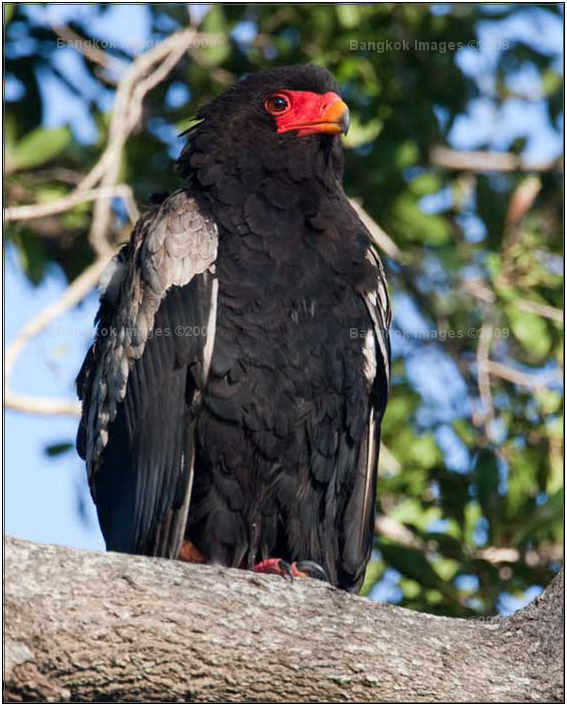
Bateleur Eagle
We’re averaging around 14GB of data a day. The 500GB Colorspace is coming in handy. I have posted two images to the Blog and will do another one after dinner. What a day!!
Back tomorrow!
Day Five – Olifants to Mopani Camp
This morning started as usual at 5:31. It seems to be a bit lighter in the mornings and we’re chomping at the bit to get out. It’s been quite an interesting trip so far. This morning we are heading out to a Breakfast spot called Makhadzi.
It’s just short of the Mozambique border. A very nice little spot it is too. We have a quiet drive up, spotting a few things here and there.
After a light breakfast we head back out on the road to Mopani. About 40 minutes into the trip we spot an animal ducking into the bushes. Sao thinks Lion, as do I and we went to investigate. Low and behold it’s a Leopard!! And we are alone and
it’s walking along next to the road!! At this point I am trying to drive, photograph and radio the others about the find. This drives me into a mental stop and I have to calm down a little, prompted by Sao in the back seat. We track this
beauty for about 40 minutes and the cars start arriving causing the classic “Jam” that ensues when ever a decent sighting is in progress. I’d like to say the shots were great,
but they are just OK. I am happy though!!
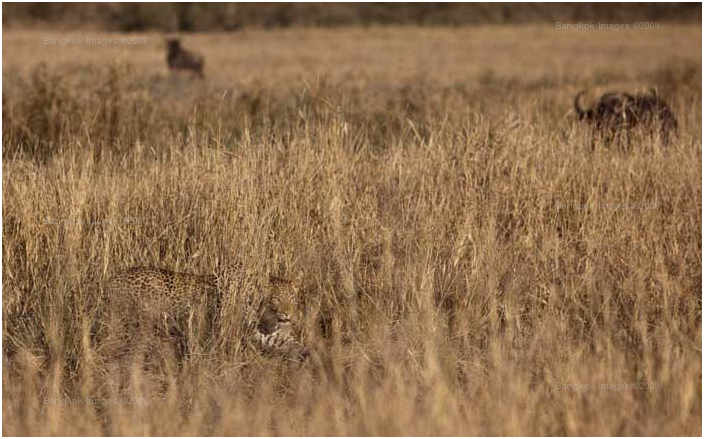
Slinking Leopard spooked by 500 Buffalo
After all that excitement we head out to Mopani Camp and settle in to our accommodations for the next three days. A Nice chalet at the top area of the camp. Lots of birds and a mongoose to greet us. It’s warmer here, quite pleasant
in fact!
After a nice lunch at the local “Pie and Chips” joint, we head out again for our first sojourn down the “Tropic of Capricorn” loop. This
is always a good viewing place in Kruger and it never fails to deliver. We’re greeted by plenty of Game, Elephants, Tseseebee and the likes. Zebra everywhere and lots of Kori Bustards in sight! It’s fun!
As the afternoon progressed we were at the end of the loop (almost) and Ollie is blocked by a herd of 200-400 Cape Buffalo. He radios this in and we head off to meet up. One hundred metres before where Ollie is stopped is a little loop that goes down
in amongst the Buffalo. This looks like fun and we head in. At the bottom we are surrounded by Buffalo! A Great experience. Ollie joins us and we take some snaps! Sao is shooting video and suddenly exclaims . . “Leo…. Leopard!!!” and there we are, two more!! They’ve been flushed by the herd of Buffalo and want out! We hand around and get some shots (OK only!) of the cats and Buffalo.
What a day!!
Day Six – Mopani Camp
This morning we’re invigorated by the experiences of yesterday. We know it’s hard to top it, but we also know there’s stuff to be seen. We head out back up the Tropic of Capricorn loop. It’s a great morning, culminating with
a breakfast back at the Chalets.
Post breakfast, Sao and I decide to head out and go for a little longer trek up another of the loops. We agree to meet Ollie and Co at 2:30 for another go at the Capricorn. It never fails to deliver. On the morning/Afternoon drive we’d seen Elephant
and Buffalo bicker, Zebra fighting and a plethora of birds and other flora and fauna. Even in the bad light we had fun! Just being out in it is sometimes good enough! A 40 minute stint overlooking a waterhole was a highlight of the afternoon,
but we finished strongly with some Bull Elephant throwing dust over themselves with the sun behind them! Magic!
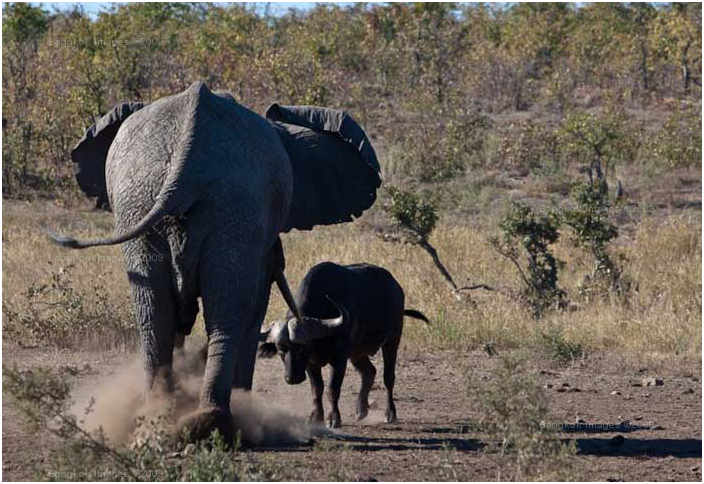
Goliath takes on Golaith-er
Now it’s time to sit back, process a few images and get one up on the blog!
Until tomorrow!
Day Seven – Mopani Camp
5:31, up and at it. We’re off on a shorter loop down the bottom end of the Capricorn Loop. It’s quiet but we get some nice pictures. Being a shorter loop we are at the breakfast camp at 9:30 which means we can get another long drive in after
breakfast. We eat at Mooiplaas day area and enjoy some Sausages, Bacon and Eggs. Fuel for the long drive ahead.
We head out for Shingwedzi camp some 55kms down a back road. In normal times this is a 30 minute drive. In the Kruger, it’s a three and a half hour trek stopping at all stops!! Worse than a Thai Train timetable! It’s a long hot drive, but
productive with a lot of good viewing. We’re on a promise to catch Ollie at the later part of the day, but we still have time for a burger and a trip to red rocks to hunt lion!! Alas no Lion, but we have a nice Burger!
We meet Ollie at 3pm on the Capricorn loop and got a few nice pictures of a Jackal. 10 minutes later Ollie has spotted a Cheetah! Wow, this is not an occurrence that happens often!! We head down there and take a few snaps. It’s not the best sighting
in the world, but it’s a Cheetah. One to cross off the list!!
Back at the Camp Paul, Shari and Andy have come back from their afternoons drive with a Lion spotting. Good hunting for all involved!!
Until tomorrow, we head into Satara camp about 100++ km south of here. We’re expecting more lion and perhaps some Wild Dog down there!
Cross your fingers for us!
Day Eight – Mopani to Satara Camp
Today's drive is going to take us a good 100kms down south of where we are now. We’re up as usual at 5:31 and ready for the day ahead. We’re heading down the tar sealed road to keep the timing not too bad for everyone. We’re
going to decide on a breakfast stop when we are on the road.
The mornings viewing is very sparse and we hardly grab the camera at all. At Letaba camp (About 60kms in) we have a light breakfast and a look around the park. Lots of birds flying around and the weather is great. We have high hopes for the next leg to
Satara.
We were not to be disappointed as we are 10 minutes into the drive and we come across several White Rhino just off the road and about five more a little further down the road. Magnificent!! Coming past Olifants we see a Clan of Hyena on some sort of pursuit
or flee mission. Again, just wonderful.
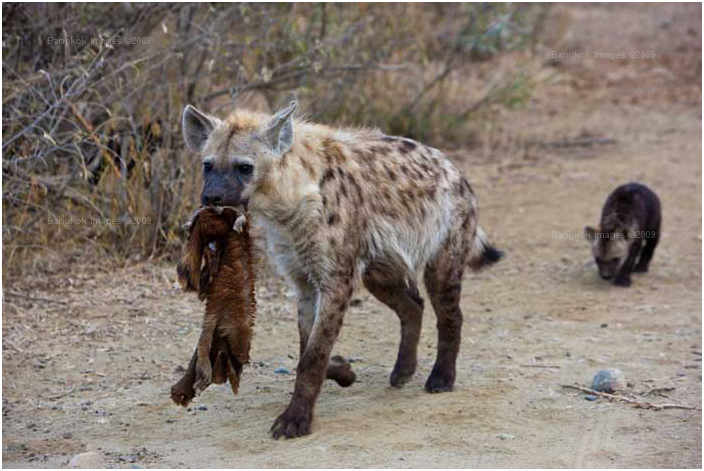
Hungry Hyena
We arrive at Satara and move into our accommodations which are really really good. A Circular building with five bedrooms, a magnificent lounge and dining area and a private yard and viewing area for just the private guests. Quite different from the usual
accommodations we’re used to. As I type, Ollie is at the fence looking at our lit waterhole on the other side. We’ve had Giraffe, Elephant and Cape Buffalo at it already. Ollie is eyeballing a Hyena that’s having a drink.
What an evening!!
For the afternoon drive we are aware of the Rugby match starting at 5pm but we resolve to let good sightings rule the timing, today is the first day that the gates are open until 6pm and that gives us more options later in the afternoon. We head out to
the S100 loop which is typically a great loop. The light will be nice over the other side once we get there.
There is game a plenty and we get directed to a Lion kill. They’ve taken a Zebra and are feeding on it. We count 8 lions at the scene. There’s a Saddle Bill Stork and plenty of Vultures around to keep us busy off the kill as the cars pile
up. What fun!!
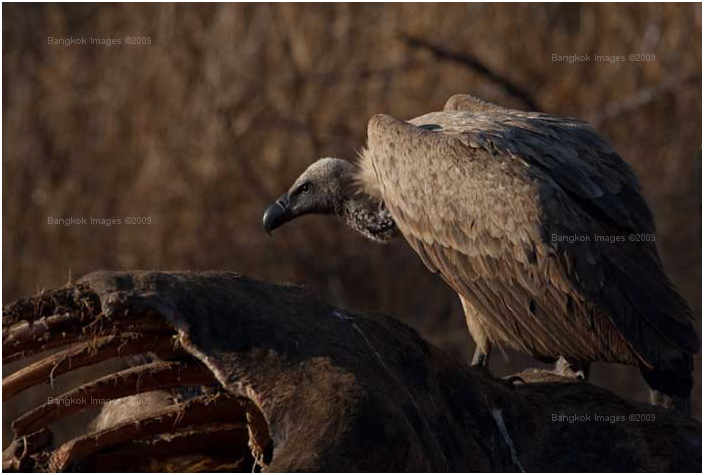
Vulture Munching (Mc Brunch?)
On the way back to the Camp we come across some more lion hiding in the bushes. Two sightings within an hour of each other!! Christmas has come early.
We’ll sit chatting now for a while with a cuppa and talk about the days proceedings.
Until tomorrow!!
Day Nine – Satara Camp
It’s 2:39 am and there are Hyena Wooo-ooo! Wooooo-ooo! -ing and it’s hard to sleep. We’re right on a water hole here and paying for it! We had planned to get up early and sit at the lit waterhole, but we decide to flag it and try
and get some missing kip.
5:31 rolls around and we’re up and at it. It’s heavily overcast and the light is going to be awful today. We’re heading out to Ntswene day visitors area out the back of the S100. We’re not hopeful of much, but are surprised
by a couple of Male Lion about half way there. We get a few nice shots and move on. There’s plenty of Game about as usual. Good sign!
A light breakfast is had and it begins to rain. We’re not expecting that! Other’s in the area duck for cover. There’s lots of birds around and the light is bad. Not worried we head out for the rest of the loop. We go past yesterdays
kill and there’s nothing at all left, not any indication of anything. Amazing. The Lion, Hyena and Vultures have totally cleaned it up. About 7 km on past that there are two male lion and four females. They are not in photogenic poses,
but we snap a few anyways.
Lion every day!! How good is that?
In the afternoon we head out for a long drive. It’s fun and we interact with Elephant and see plenty of game. Later in the afternoon we see a White Rhino really close by. Amazing stuff! The Lion from this morning are still there and they are still
laying around. Further round we see two more male lion in a fleeting sighting.
The sunset is beautiful and we snap a few shots.
Another day in Kruger……..
Day Ten – Satara Camp
We’re back from the morning drive. It’s 1:39pm and we have a few minutes. Ollie is off getting the car cleaned (pointlessly) and Janine is reading in the area outside. The “attendant” is cleaning and is buzzing around. Paul, Shari and Andy have left, today was their last morning in the Kruger. Sad to see them go. They are heading out Orpen gate. We have three nights in Lower Sabie and three nights in Berg en dal coming up to
complete our 2009 sojourn into Africa. This is out longest safari yet. Still enjoying it immensely.
This morning we went down the Sweni loop. It’s a fairly long morning drive, but we’d heard there were lion down there and that there was a Giraffe kill on the road about six kilometres in. Hard to resist really. We said our goodbyes to Paul,
Shari and Andy and headed out. Seems cold this morning and we’re well bundled up. Yesterdays bad weather was now behind us. Blue skies and a few clouds to accent the beautiful scenery.
It didn’t take long into the loop to find two Rhino in a large opening. They were strangely flighty and didn’t hang around running from us as soon as we broached the corner. Strange behaviour, usually they are placid and dull.
The Babt Rhino Chases a Plover
A few corners later and there are Vultures in the trees. There’s also a certain odour that permeates from the undergrowth. Sure sign of an old kill. Giraffe are typically good kills for Lion and the scavengers that feed around them. We turn a corner
and there’s an unmistakable outline of a ribcage and there’s about 40 Vultures all over the trees and about 12 Vultures squabbling over the huge feast that was still there. It seemed that Hyena had not been there yet as there was
a good deal of food left in this one. The smell downwind was too much and we opted to sit upwind and take some pictures of the feasting and the roosting Vultures, waking and sunning themselves in the morning glow. We’re there about 10 minutes
when the radio crackles “Leopard Guys!!” and we see Ollie and Janine off down the road in pursuit. We’re right on their tail but it disappears into the foliage and two steps
later it’s blended in totally. No hope of any pictures.
We continue on to our breakfast spot and sit down for a hearty feast. All that dead Giraffe has made us hungry!!
On the way back to camp we see more Rhino and some nice eagles. Bliss!!
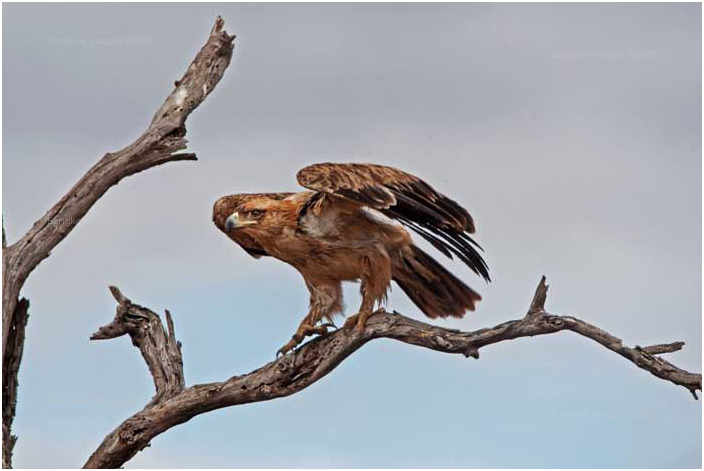
About to Take Off! Yeah Baby!
More when we’re back from the afternoon drive up the S100!! This loop never fails to deliver.
1:52 pm…… time for a 30 minute snooze!
6:01, we’re back in the camp, Brai is burning and the CF cards are being downloaded. Beers and Savana Lights have been handed out. The waterhole light has come on and it’s starting to cool down. We’ve got Steaks, Boerewors and Butternut
Pumpkins for dinner, with some Gem squash to finish the day off. We’re hoping the genet from a few days ago visits us again so we can photograph it.
Everyone’s super relaxed and looking forward to heading to Lower Sabie tomorrow. The afternoon drive was quiet, but we got some nice images.
Back tomorrow, we have a Brai full of hot food, a fridge full of beer and a waterhole to watch!! 8 Buffalo just headed out, so we wonder what will be next.
Byee..
Day Eleven – Satara to Lower Sabie
This morning we headed off to the next part of the adventure. At Lower Sabie we’re staying in “Tent” accommodations. We decide to head down the tar seal to Tshokwane Breakfast area. It’s not too far and we might see some good
stuff.
This morning turns out to be one where the birds save the day. We see Rhino and various other fauna including elephant and buffalo.
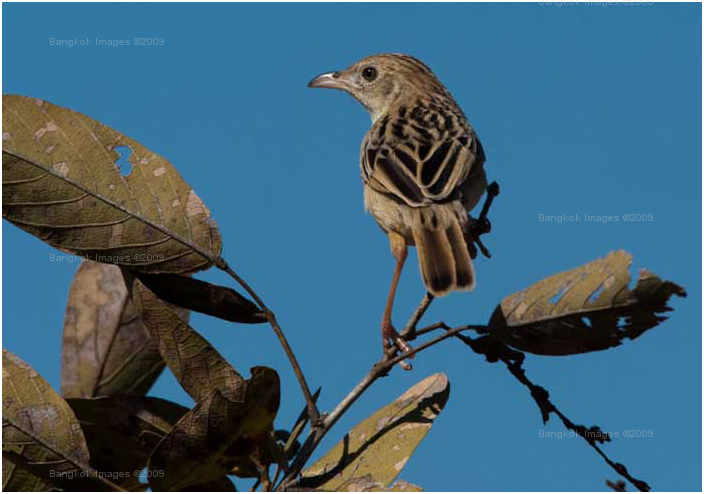
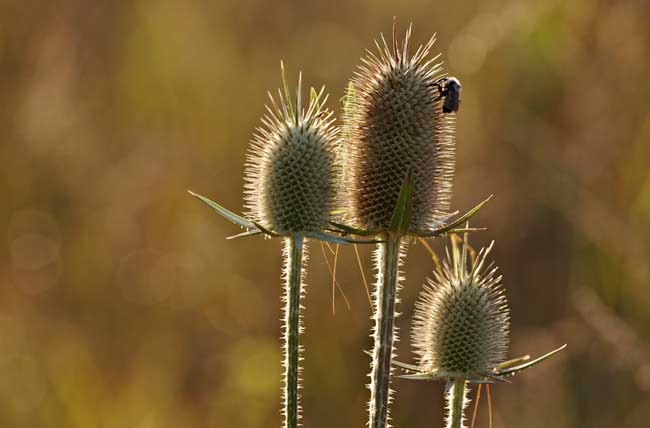
Tweet Tweet
The afternoons drive is down to Crocodile Bridge to meet Janines parents that have rescued us with some fresh vegetables etc.
It’s a quiet drive back for the afternoon with some fleeting glimpses of Rhino and some birds again saving the afternoon.
Let’s see what tomorrow brings!
Day Twelve – Lower Sabie
Today’s a full day in Camp. For our morning drive we’re heading north up towards Olifants. There have been many good sightings up that way. We’re going up the tarmac and heading into the gravel loops and heading south again before
breakfast up on the Hill at Mlondozi. What a fantastic spot!
We saw about 10 Rhino, some of them close to the road. Many birds, as usual. All in all, a good mornings hunt for the cameras.
At Mlondozi we meet up with Janine’s parents and have a nice breakfast. A juvenile Fish Eagle flies over the camp and we get some nice shots. We then have a nice drive (suffering from a food coma) back to the camp.
Sao and I buzz around shooting some of the sunbirds and have a cold drink. We’re running low on cash and decide to try our luck with the ATM down at Skukuza, Krugers Head Office Camp. We have two sightings of Lion on the way down and suffer from
the crowded roads and mad driving. Southern Kruger is quite different!

Kingfisher
The ATM is a wash and after two attempts we are able to exchange some US dollars for Rand. Thank goodness!!
On the way back from Skukuza we take a quieter road and see a lot of nice Eagle and Elephant.
Another beautiful day in Kruger!!
What will tomorrow bring???
Day Thirteen – Lower Sabie
This morning we’re taking a loop over towards Skukuza camp. There’s a Breakfast day camp there famous for its buffalo pies. We head north out of Lower Sabie and up to a loop down a dirt road. It’s 6:12 and it’s
a cold morning!
The drive is uneventful, sightings of game and birds, but nothing that really catches the eye photographically. We’re looking for something different (as usual. . .)
We’re getting close to the breakfast area around 8:30 and we’re feeling flat. No sightings and no real good stuff in the can! With this in mind, I am scanning the road ahead and to the side and a Leopard strolls out next to me. Feet on the
brakes, on the radio “Leopard, Leopard Leopard”
We see two Leopard and they walk back across the road. Amazing!! Great breakfast conversation.
The afternoons drives were uneventful in the whole apart from two great sightings. One was a Crocodile eating another croc!! Cool stuff. The other was a herd of elephant, spooked on the river and rushing madly to get away, only to have a small calf stuck
on the bank. The ensuing chaos and rescue mission was stuff that you can only dream of seeing.
More tomorrow on the road to Berg En Dal camp
Cheers!
Day 14 – Lower Sabie – Berg-en-dal
(I didn’t post this yesterday as I ate something that disagreed with me. Perhaps an ice cream! We’ve driven up to the Renoster pan, north of Berg-En-Dal and have gotten the laptop out to type up the notes. I usually do this
at night, but it’s been a long 15 days and I may be too tired tonight!)
We headed out at 6am to our last camp for this adventure, Berg-en-dal. This camp has been getting a lot of Wild Dog sightings and we are hopeful but not expectant. It’s all in the timing.
We head down the S82 gravel road and then down the H1-4 main tar sealed road to Crocodile Bridge for Breakfast. We see a lot of General game a some Rhino on the way down. This trip is certainly a Rhino-fest as far as sightings are concerned. There must
be more Rhino!!
After breakfast we head down the S25 Gravel for the long haul across to Berg-en-dal. There’s lots of general game a few Rhino, but again we are cat-less in our sighting endeavours. We take all the back roads to Berg-En-Dal and get there around
1pm. It’s a long hot drive and not much in the can photographically. We see an interesting African Wattled Lapwing doing a song and dance on a mound, but apart from that and a few other nice birds, it’s quiet.
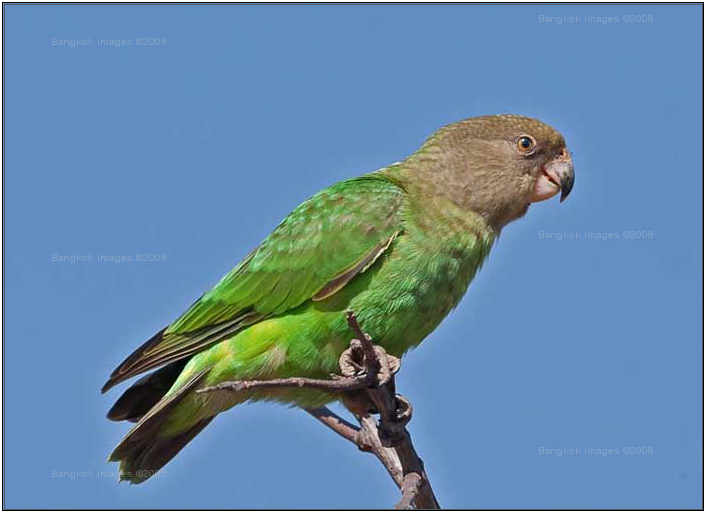
Brown Headed Parrot
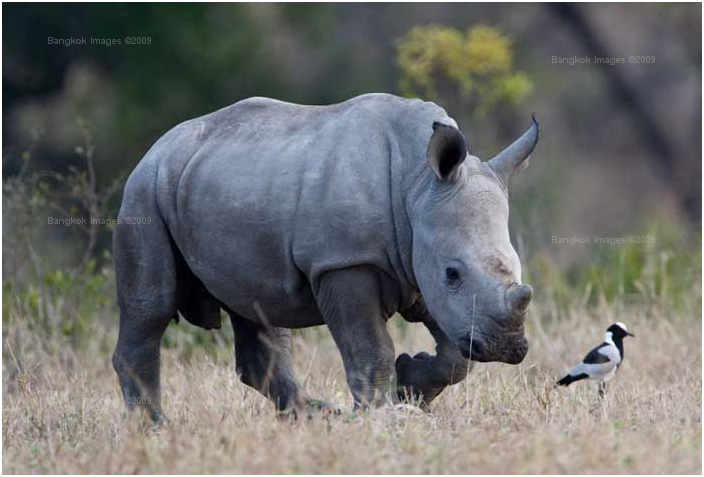
We check into our accommodations and get ready to head out on the afternoons drive. We take the back-roads again to where we are sitting now as I type and we’re lamenting the days lack of sightings when Sao says “Rhino!!” A mother and baby step out of no where and the mother drinks as the baby chases a small plover around. Priceless action.
We head back to the camp and check out the water hole close by. Amazingly there are four Rhino there, two mums with babies.
Again, a lot of Rhino (10 in all today) so not such a bad day after all.
Day 15 – Berg-En-Dal Camp
This morning we hit the gate early to head out to the Water hole about three kilometres from camp. There’s been a plethora of sightings there so we want to check it out early. It’s abandoned, apart from some rubber-neckers (Us). We then
head on back down the S110 loop to the main road.
From the main road we take the S121 Timfenini Loop down towards the Malelene Gate. On this Road we spot a leopard scratching himself. We get a few shots before he takes ten steps and disappears completely. Amazing!
Not much more action on the trip back to the camp for breakfast, but we’ve sure been woken up. In the next drive segment we’re heading to Afsal after stopping at Renosterpan to view the water hole and to type a few notes…. Not much
excitement on the way here, but was pleasant none the less.
OK, will continue this when the afternoon drive completes…..
We’re at the Water-hole behind Berg-En-Dal. A Fleet of Bee Eaters is buzzing about and there’s cars coming and going. A herd of Buffalo are coming in for a drink soon. We’re just here waiting for something to happen. It’s 5:10pm
and the light in this gully has gone off. Still, if a Lion shows up, we may photograph it. Ollie’s arrived with Janine and Struan and they are over the other side of the parking area shooting the feisty Bee Eaters.
I am sitting here and I just heard a clip clop clip clop sound, a Rhino runs behind the car and into the water hole. Wow! He’s drinking and enjoying…..
OMG!! A Leopard has just walked into the picture. He’s being seen off by the Rhino!!
All action here!!!
The Leopard is gone, the light is gone, we’re gone!! 15 minutes to drive the track back to camp!!!
Last day tomorrow!!
Day 16 – Berg-En-Dal Camp
5:31 and the alarm sings it’s gentle tones of encouragement to get us out of bed. It’s the last day in Kruger and we’re all tired from the constant long hours and long drives. We’re out by the gate at 6:07 and
off up to last nights site of triumph, the water hole…..
It’s quiet at the Matjulu waterhole and we decide to head up the back loop and across the S110 to the S114 and on to the S118 back onto the main tar road up to Renosterpan Rhino Pan) and up to a Breakfast spot called Asfal. It’s all very
quiet apart from the usual game. Elephant, Kudu and Impala, with a sprinkling of Buffalo and a Hyena running down the main road.
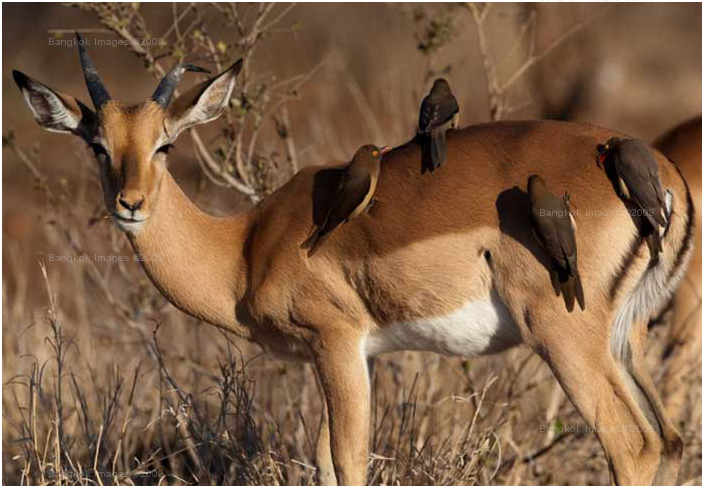
OC Peckers
As we get closer to Asfal we get a radio message “Leopard on the left coming up.” There’s a massive traffic jam, but it’s obvious from the general makeup of the crowd that there’s
not a definitive sighting in progress.
Ollie points out where he last saw it. Sao and I head up the road a little to change the angle and see if there’s a better spot to see it. As we peruse the area, I see the Leopard sit up. I radio Ollie who’s also seen it. It’s a fair
way away and it’s clearly checking out some warthog not far away. This could be good. We get some long distance snapshots and wait for more action.
The cars are piling up around us and most of them cannot see the Leopard, who’s natural camouflage is amazing and unless you know where to look, you’d never pick it out from the surrounds. We wait and he takes two steps and disappears. Two
steps….. We wait longer hoping he’ll track closer to the hogs. No such luck. We head to breakfast with yet another Leopard Story!
After a nice Bacon, Sausage and Egg brekky at Afsal, we head slowly down the tar seal, look for the Leopard (there is still a mini jam there) and spot a Rhino further down the way that’s mooching around in the grass.
We’re back at the cabins while a young chap gives the car a spruce up (15 days of dirt and grime) and we relax a little.
I’ll return late this afternoon with the final piece of the “in Park” portion from Kruger Park, 2009………, and I’ll do a summary tomorrow while sitting in Nairobi.
Well, nothing much happened. This was out quietest day by far!!
The summary will follow tomorrow…..
Until Nairobi!
At home, reflecting
I am sitting down now, rested, a little, from the long trip to Bangkok (We fly to Australia tonight) and I am reflecting on the longest Safari we’ve done so far. As usual, the people we went with made all the difference to a good trip. We sat through
hours of driving, many meals and walks through camp shops (for ice creams mainly) and sat around the burning brai at night with a few light ales together in perfect harmony. The good thing about this sort of trip is the ability to trabvel with
friends, but not be in each others pockets. Trust me, there are times after 11 hours in a hot car, on gravel roads, that you get a bit scratchy. It’s always good to have friends and a bit of humour chucked around to keep it light and fun.
Never Safari with a drama queen!! Hell would be nicer!! he he
In total we saw eight (8) Leopard, all of them would be deemed “good” sightings. We didn’t see one of Ollies, but that was a timing issue. We lost count of the Rhino sightings and in
the northern and central parts of the park Lion were a plenty. As we hit Lower Sabie and Berg-En-Dal sightings dropped off considerably, but we still had plenty of great interactions with the animals as we watched them in their natural states.
We changed up our photography a lot (as is seen in the pictures) by using smaller lenses and doing more “contextual” shots. Not sure if this was a great success, but we feel it’s part
of our ongoing development as photographers. Certainly we’re not Photoshop Gurus and the pictures we post are spot on representations of what we saw and not pop art or digitally altered with more than levels, a little cropping and sharpening.
National Geographic they are not, and we don’t try to be, really. Anyone can come into Kruger and take these pictures if they drive slowly enough (read this the many many people that blasted past us), are patient (one instance a Lion crossed
the road and the people were saying how lucky they were, and drove off. Seeing the terrain and the attitude of the Lion, we decided to go down the road to a turn in and wait. I suspected they’d come that way, and I suspected more than one
Lion. Bingo!! Two lions, a great sighting and the people that drove off were high fiving a Lions backside as a sighting.) and who get out in time for the good light. Many of our pictures are forced to be in bad light (overcast, or see a Leopard
at 5:35pm), but we’re always out at 6am and back at 6pm and make sure that we’re there when the light is….. So many people are up and out at 10am, see nothing, get bored, and come in at 3pm saying they saw nothing. There’s
lessons there!
Ollie and Janine were the organisiational gurus of the meals and logistics. We have a full spreadsheet of the logistics as prepared by Ollie in advance (he does it every time) and this is available for anyone that wants to see how we plan things (we??).
Many thanks to them again. They are a big cog in the success chain of this and our previous trips with them.
As for gear, we used it all, apart from the tripod. Never got around to it. I won’t take it again! (Unless it’s on a Biggs type Safari where we get out of the vehicles for sundowners etc).
Great success!
The photos are here on1ds.com for the daily shoot and on pbase.com/lecter for the galleries.
Enjoy
Signing off Kruger 2009..
Rob
Review, Focus Magic
 I would like to introduce Craig Lamson. Craig has been a professional product photographer for over 3 decades. Craig has done it all and I encourage you to check out his website for the best product photography you’ll ever have the privilege of viewing. Often times I can spend a great amount of time viewing just one of his images and learning while observing how he uses light. Craig is a master of light, and I’m afraid that is an understatement. If you've ever wondered who I go to when I have a question you now have your answer.
Focus Magic
A review by Craig Lamson
"Going up? Or coming down?" copyright Craig Lamson 2009
How sharp is sharp?
Today’s high resolution DSLR cameras such as the Canon 1DsMkIII among others produce stunning images right out of the camera. That is until you pixel peep at 100% or more in Photoshop. Then it becomes abundantly clear that something is robbing
your very expensive camera of sharpness.
The culprit is the so called “anti aliasing” filter mounted in front of your sensor. Normally this filter is a good thing and the camera makers put it there for a good reason. Without going
into a detailed scientific explanation of why this filer is important, let’s just accept that it removes artifacts in our images that we would find offensive and might require hours of post production work to remove.
These filters work by slightly blurring the image before it reaches the sensor to help keep artifacts like moiré and edge stair stepping to a minimum. Anti- aliasing filters can be quite helpful but how do we overcome the loss of sharpness they induce?
Since the beginning of the post processing of digital imaging, photographers have searched for a method to reduce the blur caused by the anti aliasing filter. By far the most common practice is the use of the USM filter in Photoshop. While quite effective,
this filter really does not overcome the effects of the blurring, and if overdone can cause other artifacts like halos in the resulting image. Another and in my opinion better method of doing capture sharpening is the use of a disconvolution filter.
Wikipedia describes disconvolution as:
“In optics and imaging, the term "deconvolution" is specifically used to refer to the process of reversing the optical distortion that takes place in an optical microscope, electron microscope,
telescope, or other imaging instrument, thus creating clearer images. It is usually done in the digital domain by a software algorithm, as part of a suite of microscope image processing techniques. Deconvolution is also practical to sharpen images
that suffer from fast motion or jiggles during capturing. Early Hubble Space Telescope images were distorted by a flawed mirror and could be sharpened by deconvolution.”
That’s a mouthful but in layman's terms the software resamples the image to remove the blur.
Focus Magic fills the need
There are a number of programs available to provide deconvolution. By far my favorite is Focus Magic by Acclaim Software Ltd.
Focus Magic is available for both PC and Mac platforms and runs as a standalone or as a plug-in for many of the standard photo editing programs such as Photoshop. It is priced at a very reasonable $45.00 US.
Focus Magic bills itself as an image restoration program, and can refocus, defocus, remove motion blur, resize, and de-speckle images. While I’ve briefly played with all of the features I generally only use refocus as a Photoshop plug-in as part
of my raw conversion process. I will be limiting this review to this aspect of Focus Magic.
"1…2…3" copyright Craig Lamson 2009
One man’s workflow….
As I mentioned I find Focus Magic to be essential to my raw processing workflow. My preferred camera is a Canon 1DsmkIII and I find it has a fairly heavy AA filter. Focus Magic does a superb job of reducing the effects in my processed files.
My personal workflow is as follows, but it should not be considered as a gold standard, it is simply my personal choice. Regardless of your camera or processing habits Focus Magic will work for you.
I always shoot raw and my first step it to create a tiff file for post processing by running my Canon files through Phase One Capture One Pro version 4. I prefer to turn off all file sharpening in Capture One and do my capture sharpening in Photoshop.
Once my file has been exported to Photoshop I complete all my retouching and layers work before applying any filters. Since I layer most of my important images it is important not to apply any re-sampling to the images that might effect critical pixel
level alignment between layers. When I am satisfied with my image I’ll flatten the file and then sharpen first with Focus Magic plug-in via the filters menu dropdown.
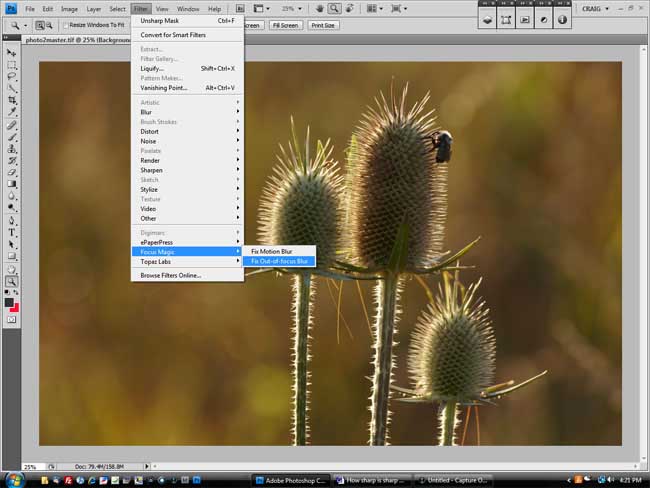
The Focus Magic plug-in is activated from the filters menu.
Upon opening, Focus Magic will check the image and recommend a “blur width” for your image as well as selecting digital camera as the source. Some will find this helpful but I would prefer
that the UI would remember the last settings used. At this point you can either accept the recommended amount, check for yourself by positioning the red box on a specific area of the frame and hitting the detect button, or by simply entering the
blur amount manually.
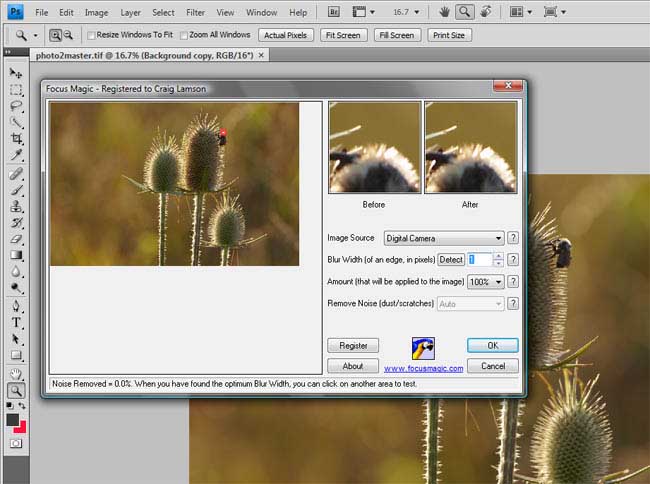
The interface of the Focus Magic plug-in is simple and easy to use
In addition you can adjust the amount of refocusing to apply in percentages from 0% to 300%, and to specify noise removal parameters.
My standard settings for refocusing are a 1 pixel width, 100%, no noise removal. After applying the Focus Magic filter I usually adjust the final look of the image by fading the filter effects using the Edit>Fade command in Photoshop to taste.
The final step in my capture sharpening routine is to apply a local contract adjustment using either a custom made Photoshop action or commercial software such as Topaz Detail.
Let’s review the results.
With Focus Magic it is easy to overdo the process and create artifacts in your images. Below are examples of a 1 pixel width blur at 0%, 100% and 300%. Notice how the image begins to get crunchy as the percentages increase. Remember, the goal here is
to just eliminate the effects of the AA filter, not to over sharpen the image. We can always add more sharpening later when we do output sharpening, which is reproduction size dependant.
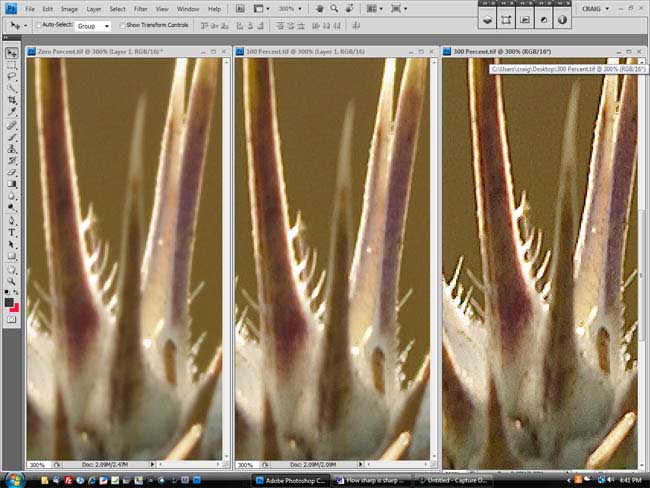
From left to right: 1 Pixel width at 0%, 100% and 300%
Selecting too large of a pixel width can be both helpful and harmful. Given the resolution demands of today’s DSLR cameras, I always try and use a tripod when possible to assure tack sharp images. However, there are times when you must handhold
the camera and that will often take the edge off the sharpness of your images. On those rare occasions you might want to use a larger blur width such as two or three pixels to attempt to recover some of the lost sharpness. You will need to experiment
to find the right settings for each image. Just be careful. Too many pixels of width and you start to create artifacts as the images below illustrate.
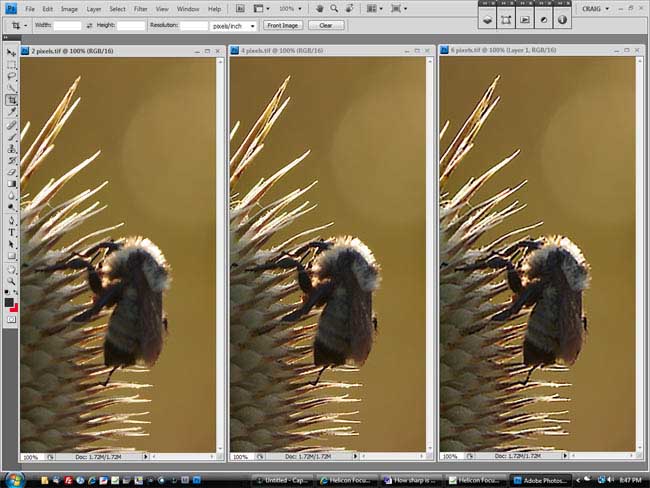
Pixel width at 100% from left to right: 2 pixels, 4 pixels, 6 pixels
The good, the bad and the ugly.
While not perfect Focus Magic has earned a valued place in my digital image processing workshop and is used on most every image I produce. It does a masterful job of reducing the effects of image blur cased by slight camera movement and the ever present
AA filter.
The weak points in my opinion are the lack of sticky settings in the user interface and the slowness of the program even on a fairly speedy computer. I understand that the calculations required are enormous. Both of these issues are minor when compared
the quality this program produces.
That leaves us with the ugly. While Focus Magic itself is not to blame, the possibility exists for a user to overdo the refocusing and create some truly ugly results. My hard learned advice is that less is more.
All in all, Focus Magic is, in my opinion, a must have addition to the workflow of any serious photographer. Those who are less serious will also find this software invaluable for restoring old photos and perhaps salvaging the inevitable botched image.
About the author: Craig Lamson has been a professional advertising photographer for nearly three decades. His work can be found at: www.craiglamson.com
All copy and images are copyrighted Craig Lamson 2009. All right reserved. No rights shall be granted without written approval from Craig Lamson
 Tom Tweedel is a good friend with significant experience in China and has self-published several interesting volumes of his travels in China complete with many great images and informative narrative. Last year he visited Thailand for the first time and I had a great time showing him around the area. Somehow he found time to put together a like 364 page book of his travels around Thailand!
When Tom agreed to become part of our small select product review team I was both excited and grateful. I hope you enjoy this and future reviews by Tom. For those whose plans include extended travel in Thailand and China I’d recommend contacting
Tom and inquiring into obtaining copies of his books. Tom Tweedel is an Austin, TX based photographer and can be reached at: tomsds@austin.rr.com
Motion Blur
One of the key features of Focus Magic is its ability to reduce the effect of motion blur. Motion blur is caused by appreciable movement of the camera or the subject while the picture is being taken. It most commonly shows up in lower light when your
shutter speeds are longer.
Focus magic does not have the ability to completely eliminate motion blur. A corrected picture will not look identical to one taken where there was no movement. But it does have the ability to reduce the effect of the motion blur and significantly improve
the quality of the image.
Usage
The user interface of Focus Magic is fairly simple.

Screen shot of bar
You open the image up and it displays the image at 100% (no other options for the stand alone version). From the dropdown you select what type of filter you wish to use (in this case motion blur). Then you have two controls. Direction and distance. Direction
is changed with dropdowns in 10 degree increments between 10 and 170 degrees. There is even tilt indicator that lets you know what direction you have selected. One apparent oversight is that you cannot select 0 degrees (horizontal). It defaults
to this when you pull the image up the first time but you can’t get back to it without closing and re-opening the application.
When you select the angle of the blur the direction of the blur (left or right) cannot be specified. I assume the software automatically detects and compensates for that. The only other variable you have to put in is the distance of the blur in pixels.
You can objectively measure the distance of the blur by opening the image at 100% and counting how many pixels of displacement. I tried this on a few images and found the results were not necessarily optimal.
By clicking on a section of the picture you get a preview square that shows you the effect of the changes that you have proposed. The best way to use the software is to select a good spot where you can really see the effect of the motion blur and designate
it as your preview. Then set the direction of your blur. You should be able to get a rough idea by looking at the way that the object displaces or smears. After direction start clicking up the blur distance one at a time and observing the changes.
f you go too far your image will begin to look warped and twisted. Again, don’t expect perfection, only improvement.
After you have settled on a good distance for one area do the same thing for several more areas in your picture. I have found that the settings to make one area look really good are often too strong and make another area look really bad. You’ll
need to make some choices and compromises about what is the most important part of your picture and bias the settings towards what fixes that the best.
After you have figured out what settings to go for you hit the process button (which looks like a green light). The program then works its magic. It seems to process the image section by section and updates the image you are looking at in real time. It
will do a 3000 x 2000 pixel image on a Dell 2.2Ghz Laptop in under 30 seconds.
Lets look at this in action

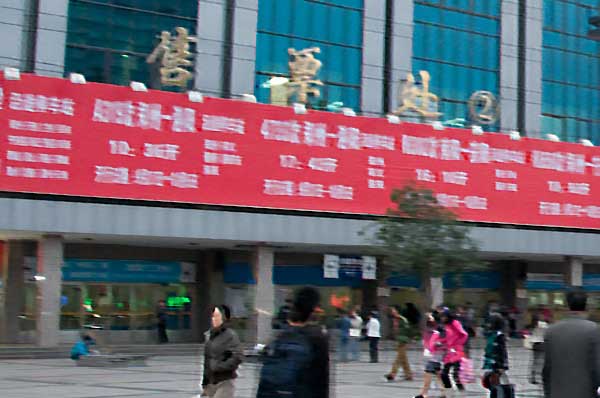
Train Station Unmodified
This was a shot of a train station in China I took early in the morning. The light was low and we were in a hurry, I didn’t have a fast lens on the camera at the time so I just took the best shot I could by pulling the camera up and snapping away.
The resulting image was blurry.
You can really see the flaws when we zoom to a 100% crop on train station sign

100% crop of train station sign
So let’s try it out in Focus Magic. I chose the sign as my preview point and put in 170 degrees as the direction and poked around till I got 9 pixels as the distance. The exact amount varies on the image size. 5 pixels seems a good start. Keep
increasing it till the effect looks over done, then back it down a bit and check other parts of the image.
Screen shot of preview with some degree of correction
After I decided that was as good as I was going to get I hit process and got this as the final result
100% crop of sign after focus magic.
As you can see it’s not perfect but it is a vast improvement over the original.
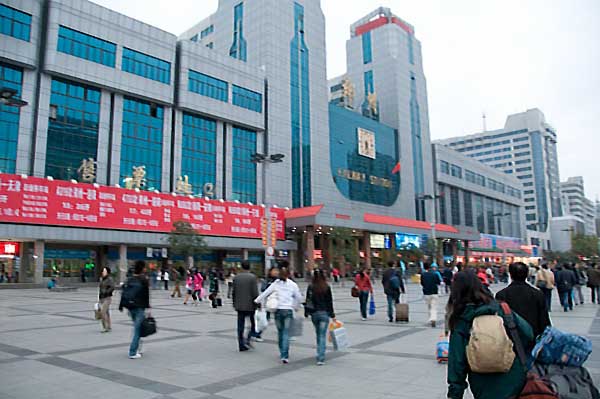
Complete imaged resized to 600 pixels
It took the image from “regrettable” to useable which was good because this was the only shot I had of the train station.
Example 2
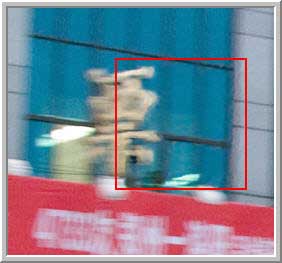
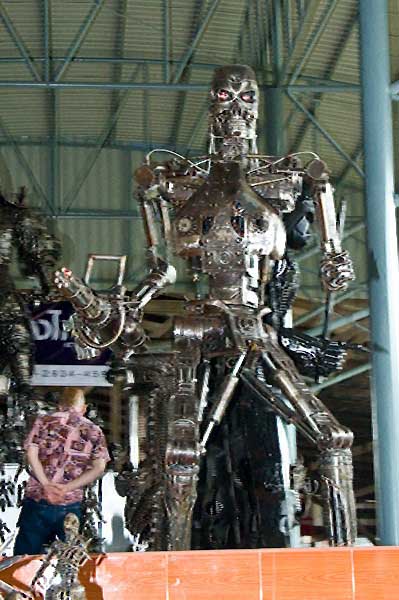
This was a shot of “The Terminator” sculpture in the floating market in Thailand. You’ll see variants of this at many tourist places and they universally seem to have a “No photo” sign on them for some reason. (Because they're breaking all kinds of copyright laws and they don't want it documented. Steve) I figured it didn’t apply from a boat so I
snapped a shot. Unfortunately due to the fact the shutter speed was not too fast and the boat was moving the shot is a bit smeared. So I decided to see what focus magic could do.
This was the entire image.
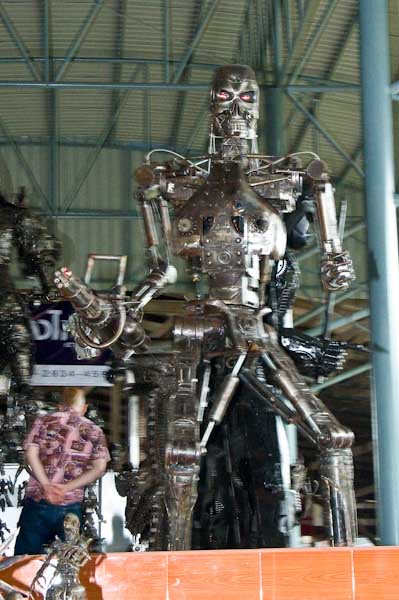
Picture resized to 600 pixels
I started off using the “formula method” when I looked at the phone number on one of the signs it was very easy to count the number of pixels of displacement.
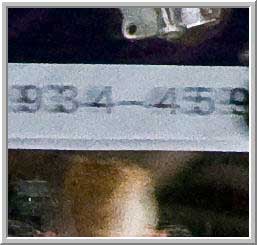
100% crop of sign
I measured 13 pixels of displacement and typed that in. The result wasn’t the best
Preview with 13 displacement
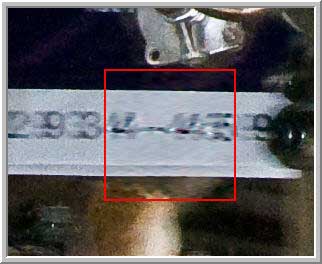
So I had to back it down. I checked a few critical areas of the photo and decided on 8 pixels for the amount of correction. I then processed the photos. The body and the sign look much better at the lower level of correction
100% Crop of Body and sign
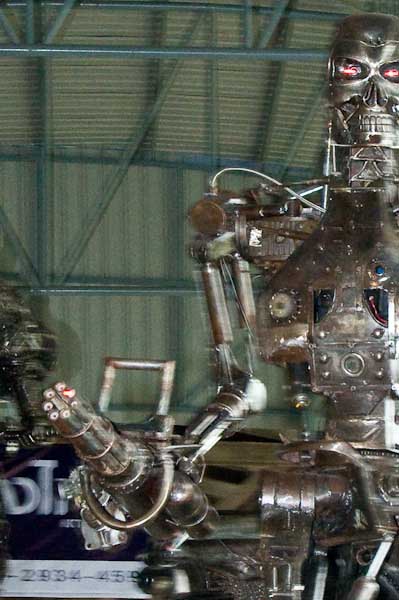
As does the overall image
Processed Image
Limitations
It’s important to understand that while this product can work some magic it does have its limitations. The biggest limitation is that you can only correct for blur in one direction. If your picture is blurred in multiple directions this isn’t
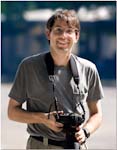
going to help nearly as much. For example I took this shot of an elephant on the streets of Bangkok as we zipped by in a car.
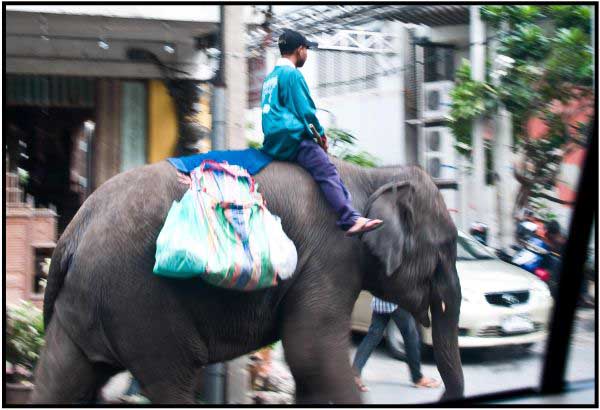
Elephant Picture
It was a reasonably long exposure. We’ve got motion blur of me zipping past the elephant (since the camera was moving faster relative to the elephant). We’ve got motion blur of the elephants legs moving as they walk as well as the mahout
and the trunk. Each of these objects is moving in one direction or another. Not the best candidate for focus magic but I tried it anyway. This was the result:
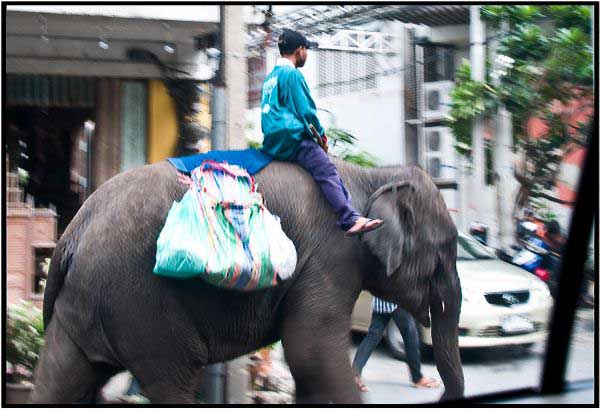
IMAGE12 Elephant after Focus Magic
Not the best but it is an improvement in some parts. This type of image is better off using a more traditional sharpening routine which Focus Magic also provides.
Conclusion
The motion blur tool in focus magic is a welcome addition to the photographers tool box. It useful for improving shots where there is a little bit of movement or more frequently you may not have been holding the camera as still as you should have.
Steve's Comments
Let's do something different and start with the bottom line. Focus Magic has earned its way into our collective workflows in a huge way. Not a single image comes off my workstation, either files or prints, which hasn't had some degree of Focus
Magic's voodoo magic!
We review with a team concept whenever possible and immediately upon first trying Focus Magic I emailed both Craig and Tom and asked them to be involved. Each of us has different end uses and different workflows so I was assured Focus Magic would get
a good wringing out and a fair review.
We're not talking huge night and day differences between Focus Magic and standard Unsharp Mask (USM) utilities like you'll find in Photoshop and other image editors. We are talking small subtle but very significant differences.
Sharpening is very much part of the artistic process. How much we sharpen, which part of the image we sharpen, and which details we wish to emphasize all lend a certain 'look' to an image. Often
this look is part of a photographers signature look. We mask certain objects, we isolate lines, build contrast, and use every trick we can think of to get as much from an image as possible. Focus Magic is one neat trick!
The tendency for those new to processing images is to over sharpen. This almost always results in ugly and undesirable artifacts and halos. Focus Magic is no different, use it too heavily and watch the artifacts dance throughout your image. However, Focus
Magic does seem to allow you to achieve more sharpening effect before artifacts present themselves. Use any sharpening tool with a light hand and if in question error on the side of less sharpening. Remember the adage "The Enemy of Good is Better.."
Craig and Tom, thanks for your excellent reviews! And thank you Acclaim Software for a great product and your excellent support throughout this review period. We look forward to reviewing your future products and new editions of Focus Magic. And Acclaim
one more thing. Are you listening? Can you please incorporate a Lightroom Plug-in? That would be most excellent..
Photography News of Interest
Imagine this: You see a nice yacht with pretty women in bikini's milling around and you pull out your DSLR to snap a few pictures. You take the pictures, check your LCD, but nothing is there. It's like taking pictures of ghosts! This might be
the future. A Russian billionaire has installed a device on his uber-expensive yacht that detects CCD's and then uses a laser to render the images useless. This is designed to deter paparazzi and the "scourge" (not my words) of professional photography. I've got a few questions though. 1. It specifies CCD's. Does this mean CMOS sensors will still work? 2. A DSLR is a "through the lens" design.
Will the laser harm the eyes of the photographer? And if the claim is no, who's tested this and approved it for use in a pubic setting? It's common knowledge that certain wavelength lasers can be very harmful to your eyes and even cause
cornea burns or blindness. Lots of questions. Read about it here.
Another scenario. Your two small daughters are being playful and cute in the bathtub so you snap a few pics and include them on your memory stick which you take to Wal-Mart for prints. Soon, the child welfare department knocks on your door with a warrant
and removes your children from your custody. You've been accused of child pornography using your own kids as models! An employee at Wal-Mart turned you in. It takes you a month of lawyers and the legal system to get them back. A couple this
happened to is suing Wal-Mart for damages. Good! Read about it here.
A 14mm F2.8 lens for a full frame DSLR will usually set you back a few thousand and they've usually been made by the camera manufacturers. Samyang announces their 14mm F2.8 IF ED MC Aspherical rectangular lens for Canon, Nikon, Sony and Pentax mounts. With a 114 degree field of view and a MFD of .28m the specs are very near what you're expect from an OEM lens. If you're interested in an ultra-wide prime but don't want
to pay the price for an OEM lens you now have a choice. You can read about ithere.
A few weeks back I mentioned in this section that Canon was announcing their S90 Powershot. I think this particular model will become one of the few point and shoots preferred
by professional photographers. For sure I'm interested in one. DPR just posted their sample image gallery which will give you a good indication of what to expect from this camera. You can see ithere.
Readers Submissions
Hello Steve:
I hope that things are going well with you and yours. Again I appreciate all that you worked with me and I have been trying to incorporate some of the stuff in the pictures I am shooting now. I was at a ball game last night and got some action shots of
the A's and did some candid shots with people in the stands. I particularly like some of a woman twiddling with her hair. Some interesting shots.
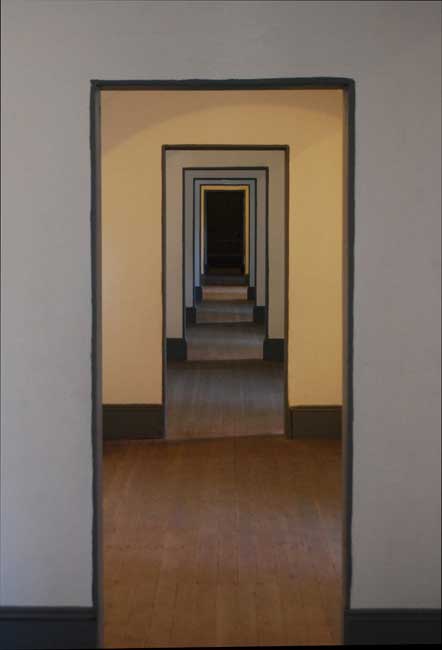
Just letting you know that I am still alive and kicking. I still am holding on to working on the pictures at Ankor until I get a little better at the programs. I did enter the county fair photography contest and won a first and an honorable mention. I
was jazzed about that. The winner is a picture taken at Lee and Gordon's mill in Chickamaga Ga. The second was a series of door openings at Ft Point in San Francisco. I had some others that I entered but these were the ones that the judges
liked.
Hope to hear from you soon.
Mike Green
Mike –
How are you? Do you mind if I run these images in the reader's submission? I really like the first one. I can see why you won first prize. Really good exposure control and use of lighting.
It's great that you're still increasing your skill level and out there with your camera.
Things here in Thailand remain about the same. The usual protests and posturing from the Government and it's distracters and we're in the middle of monsoon season so we're getting some rain..
Take care guy. Oy says hi.
Steve
Hi Steve:
I would be proud if you would run the pictures. I did like what I got on that shot and I did play with at a bit in Photo Shop. It is hot here in California and it is in September. Go figure. [Usually hot but not this hot]
I do appreciate the help that you gave to me. I keep working on trying to get a better eye.
Please give Oy a hug for me and say hello back to her.
I will try to keep in touch.
Mike
Steve
Here are a few more pics only these are form our road trip today.
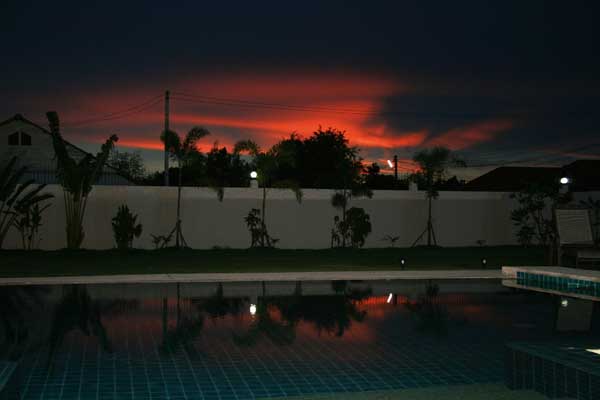
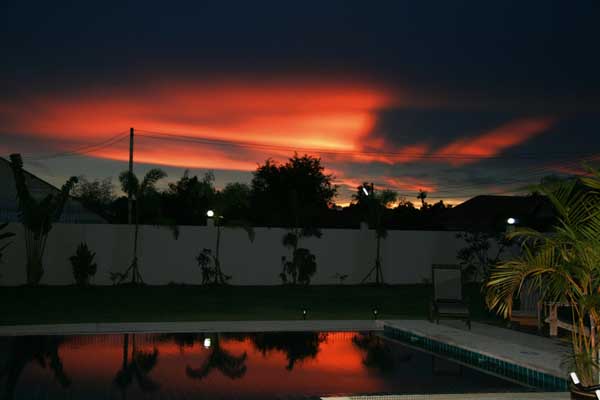
Another beautiful sunset at Villa Sariano in Ban Chang, Thailand.
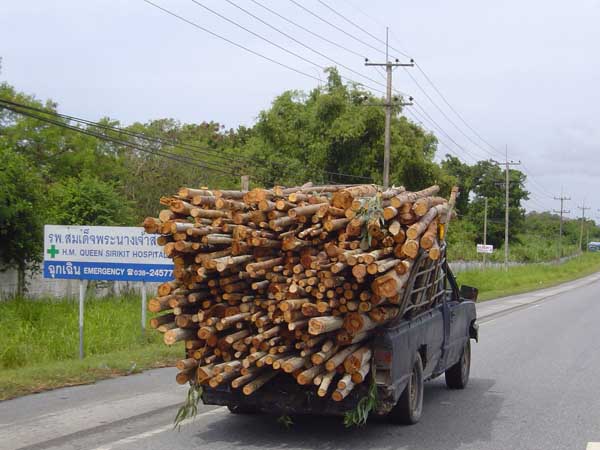
They carry all kinds of things in pickup trucks over here.
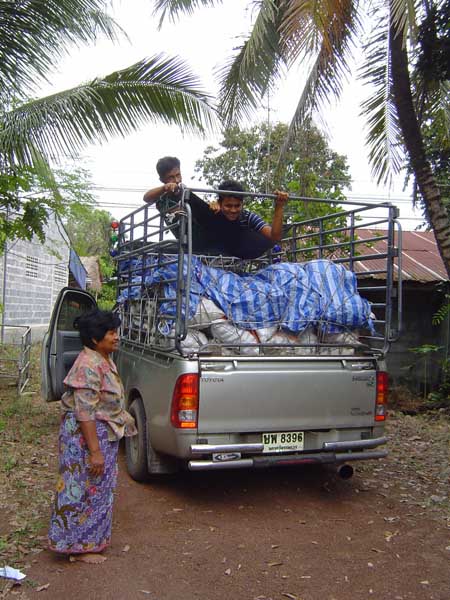
And sometimes what they carry are even in hammocks.
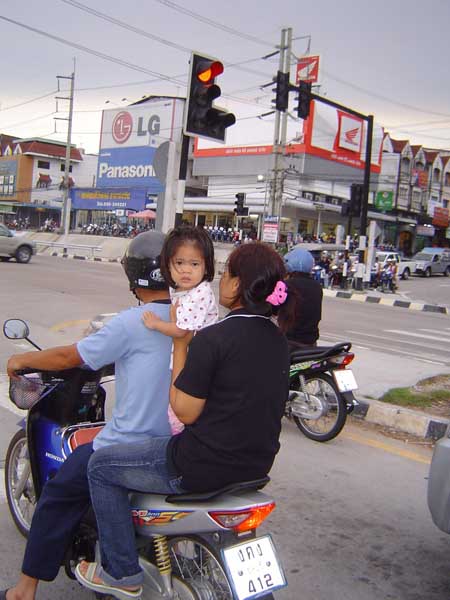
Or sometimes there are more than 2…. and no helmets either. it is also not rare to see 4 or even 5 pax on a motor scooter…..
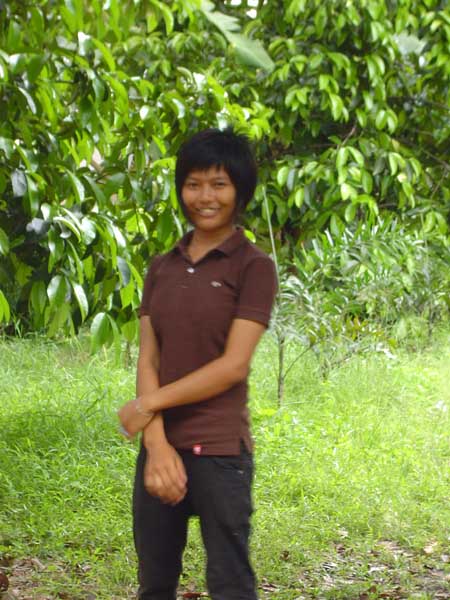
And some unknown in-law that wanted her pic taken
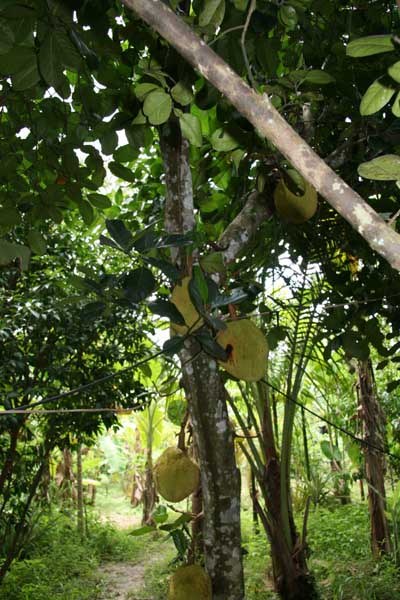
Jackfruit
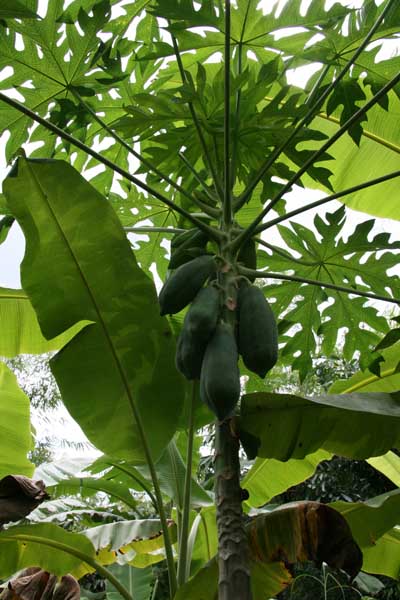
Papaya.
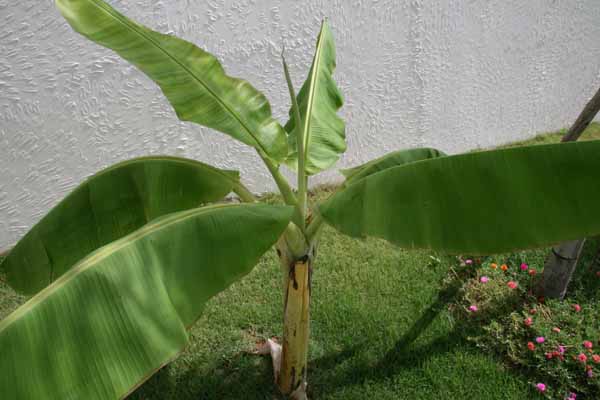
Banana.
MTS International
MTS International –
Thank you for your submissions! I can tell you're having a blast with the new camera. Photography is supposed to be fun and you're having a lot of fun!
Take care
Steve
I suspect the readers submissions will be a highly anticipated section of this column and I encourage anyone with photographs and travel accounts they'd like to share to please send them to me at: QandA@Bkkimages.com
Readers' Questions
Steve
Had another crack at the HDR image of the sanctuary of truth. Tried to sort of replicate the image that you made with the raw files I gave you. It’s not exactly there, but not too bad I’d say. It’s better than the oversaturated image
I conjured up the first time anyway :p.
KVW

KVW –
I think this is a lot nicer.. perhaps a bit understated.
Remember.. with any image really worth anything.. the devil is in the details.
Often the 'look' of an image is more the result of many small details, than an overall processing step.
For instance on this particular image. Chances are we both HDR processed it very close to the same. Still, the 'look' is different. Why?
Because:
Lens and distortion compensation differences
Many small details hand 'painted' in the scene. Look closely and you'll start to be able to pick these out. Perhaps as many as 50-60 details. Each detail is individually painted to it's own level of luminance and color which sets it
apart, but not too far apart, from the neighboring details. This is why I'll often work in a 1:1 zoom with the localized editing tool in Lightroom, or different layers in Photoshop, and then go back through the details varying the opacity/luminance
of each for the maximum effect.
And then there's the very obvious limitations of your monitor.. you can't see them on your end.. but I certainly can on this end.
Really.. you've got enough photo gear and even skill for now.. you're next area of major improvement will be that which you enable through being able to see with your eyes.. which means a monitor.. and when it comes to the small details you're
probably being hampered by the slow mind numbing creativity sucking that happens when forced to use an underpowered machine for processing.
You see.. processing is an artistic process. Your computer/monitor shouldn't get in the way any more than someone holding their hands over the eyes of a painter.. or banging trash can lids while a mathematician tries to form a new algorithm.. anything
that impedes or distracts from the creative process.. or hampers in such a way to discourage.. takes a huge toll.
And this is even more huge with someone like me who is artistically challenged to the point I have trouble drawing a stick figure..
What I'm trying to say.. Dude, you're getting a Dell ;o) …
Steve
Steve,
Just got back from a few days on Koh Chang. Experienced some inconveniences with my photo taking and although not a new phenomena for camera buffs here in LOS, it was an annoyance and I'd like to hear what your recommended solution (other
than the obvious ones) might be.
Situation: Camera sits in air conditioned room or car and when taken out of the AC environment for photo taking the lens accumulates condensation and makes photo taking inop for a period of time until the condensation evaporates.
MTS International
Hi MTS International-
I've covered this one a few times in the column.. a situation that many have asked about.
The easiest way is to just give your camera time to adjust.. or keep it sealed tight in it's case while in the room.. let the air leak in slowly as you drive to your destination..
Steve
Please submit your questions to QandA@Bkkimages.com All questions will be answered and most will show up in the weekly column.
A Snapshot of Bangkok Images Week in Review
A slow but interesting week. Two workshops which were rewarding, and with some free time on my hands I decided to tackle the mind numbing task of rebuilding my mobile workstation. I always keep my main workstation up to date with the latest versions,
but often I'll neglect my mobile workstation until I get some free time my hands.
I also found time to process the images for five new galleries from the Tak province and my visits to the Mae Sot area and I'd like to invite you to visit them here:
Mae La
Mae Moei City
Mae Sot
Safe Haven Orphanage
Watana Guest House (Mae Sot)
Infocus Blog
Artistic License
All too often I hear someone comment on another's work with a "he processed it wrong" "she messed up the composition" "the colors are all wrong" and the list of criticisms
stretches on in an infinite stream of opinions. Everyone has at least one, some have more than nature intended.
Okay, so how do we know if an image really is processed properly or if the composition is correct? This will be hard for some to accept but the fact is, an image is correct if the artists vision is represented in a way that pleases the artist. It's
really that simple. Whether or not we (as third party observers) like it, from an artistic standpoint, is immaterial. We should all make such images, images that we intend only for self-satisfaction. A type of photographic self-pleasure if you
will.
This extends further into comparisons of a hobbyist and a professional. A hobbyist can be into photography purely from a selfish standpoint much more often than a professional. Sure, sometimes a hobbyist has to please his/her spouse, or perhaps they get
roped into photographing a family function and they try to produce images which please as many as possible.
A professionals job is different. We must please the client. Our job is made more difficult because often clients don't know what they want, or worse they think they know what they want when they don't. This is where communication and portfolios
and sample galleries become invaluable. Still, sometimes the client just doesn't have the experience, knowledge, or taste necessary to know what they need. Example? Sure, why not..
How about an album cover or book jacket? As an artist themselves a musician or writer often has a more keen insight into what they want on the cover/jacket. This is great. However, a cover/jacket has a more urgent purpose than being artistically pleasing
to the musician/writer. A cover/jacket is a primary tool to sell as many albums/books as possible. Therefore the photography for the cover/jacket should match the target audience of buyers. And most often the musician/writer hasn't the necessary
marketing background to realize what type of art would promote and sell their art more than another.
This holds true for many genres of commercial photography from advertising to head shots for actors. A good photographer knows their markets and has developed a sort of sixth sense for what sells and what doesn't. This is a lot like judging the beauty
of a woman. How often have you had a friend or acquaintance tell you they've met the most beautiful woman, a real stunner, a beauty beyond compare, and then when you meet her you look at your friend kind of cross-eyed wondering what he found
attractive about this canine in a dress.
A professional photographer knows the markets. He might not know the type of woman YOU find attractive, but he/she most often knows the type of woman MOST will find attractive. Or, the type of woman a certain demographic will find attractive over another.
Try to be open minded. When your photographer, or barber, or clothes salesperson, or even your waitress makes a suggestion.. do consider allowing them to take a bit or artistic license..
Until next time..
