Mae La Refugee Camp/Resize Magic Review
![]()
|
• Agung Raka Bungalows • Biyukukung Suites & Spa • Kakiang Bungalows • Kori Ubud Resort Spa and Restaurant |
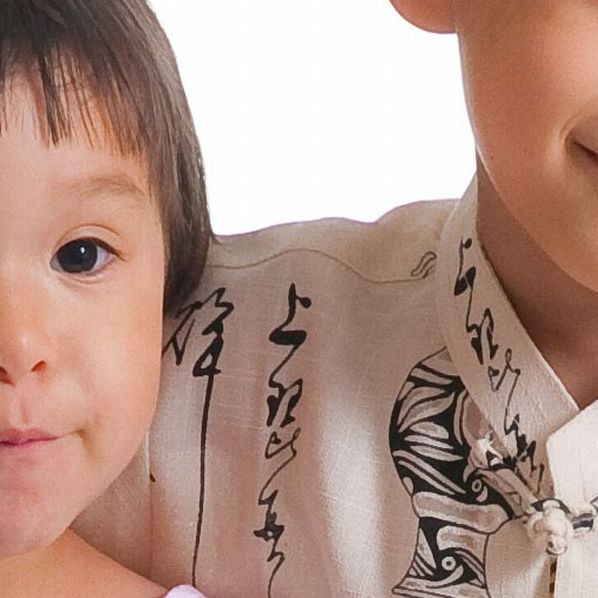
We are still accepting (and pleading for) images of children from SEA. No matter how terrible you think they are, please send them in anyway. These images will be used to complete a set of 3 high quality mosaics which will be sold to benefit the Karen
and Burmese Orphans living in the orphanages and refugee camps. The more images the better, I can use all you have. Please take the time to go through your images for anything you think might help. If you missed the "No Place to Call Home" special, you can click on the link and read more about this. Thank you! QandA@Bkkimages.com
Feature Photograph

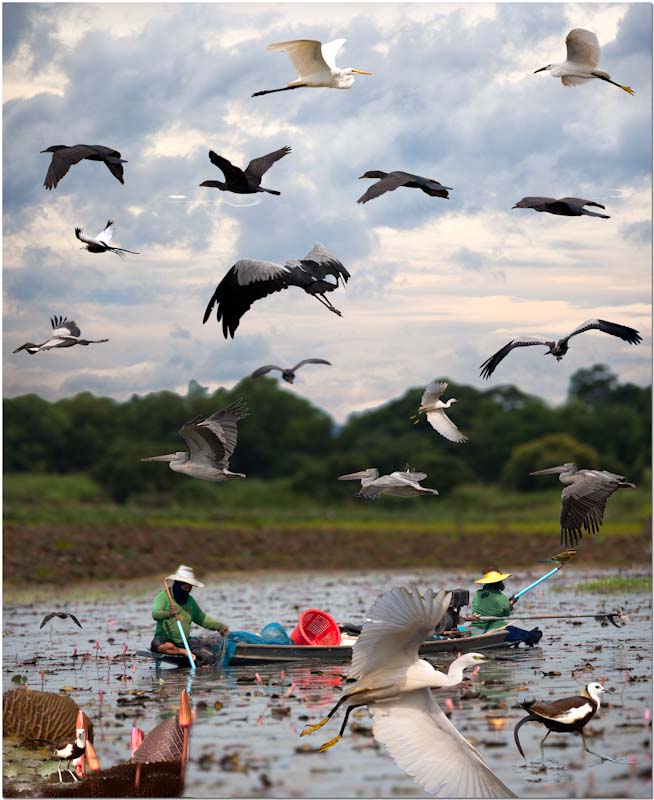
A 24 image/layer Photoshop Creation
A few months back my son, some friends, and myself drove the long drive to Nakon Sawan. Our goal was to photograph birds and other wildlife at Beung Boraphet and in fact I've already written a bit about this experience in the August 15th column in
the blog area titled "It's About Being There."
You can check out the gallery from this outing here.

We did make some decent captures, but when we arrived we discovered the birds had migrated elsewhere and the vegetation had turned brown and there just wasn't the target rich environment I'd experienced on other trips. I was disappointed not
so much for myself, but because I'd promised my son and my friends a good time and it felt like I'd let them down.
What could I do to make it up to them? After all, it was an all day drive and when you work all week you cherish your days off and you don't want to waste them. I figured the best I could do was perhaps make them laugh by 'creating' an
over the top example of what I was hoping the experience would be like. Wherever you point your camera the entire frame is filled with interesting birds and great vistas. So.. I sat down and spent a few hours in Photoshop creating my personal
vision of an over the top experience. How do you think it turned out? Was it over the top enough to elicit a chuckle or two?
This image is significant because it's a good example of using Photoshop to create what you can only see in your mind. The background is made up of four images: The clouds/sky, the trees, the lake, and the boat with people. The birds number 20 and
are from 20 additional images. A total of 24 images were used to create this single scene. Can you find all 20 birds? The four background scenes I put together?
What makes it over the top isn't a poor Photoshop job, in fact taken individually the work is acceptable even though I wasn't trying to make it perfect. Each bird had thought put into its individual placement, size, direction of travel, and
even the lighting. What makes it over the top is the extreme number of birds. The visual overemphasizing.

Where does the genesis of such an image really begin? I'll leave you with a clue.
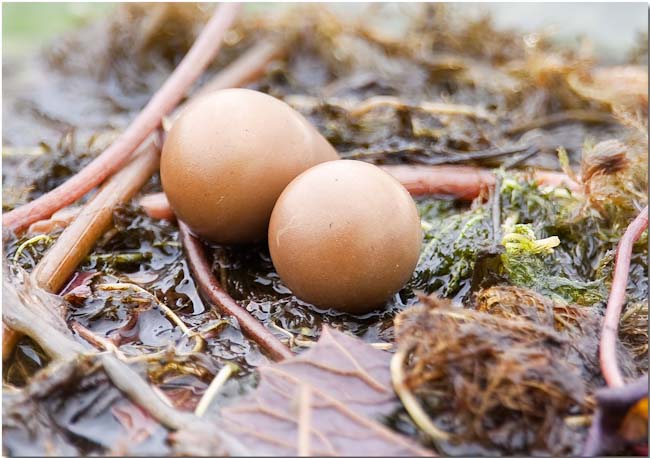
The dying vegetation enabled us to spot many nests on top of the lake
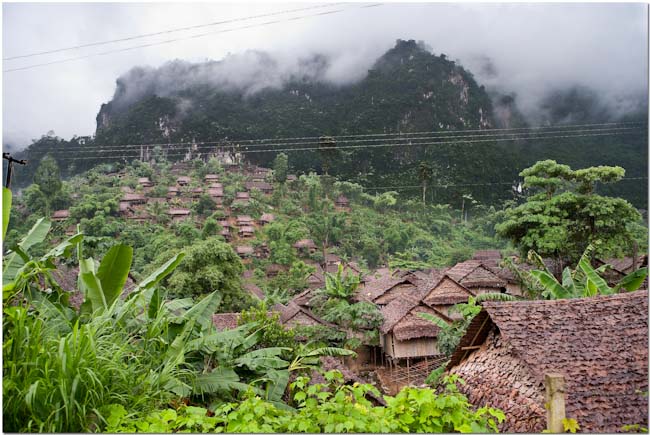
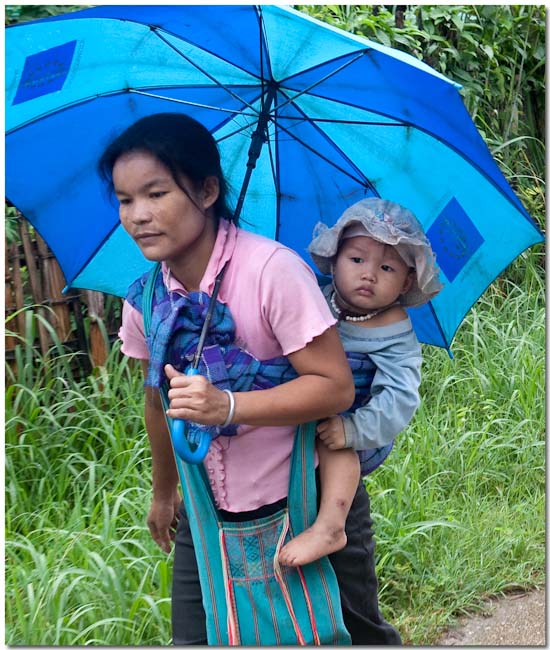
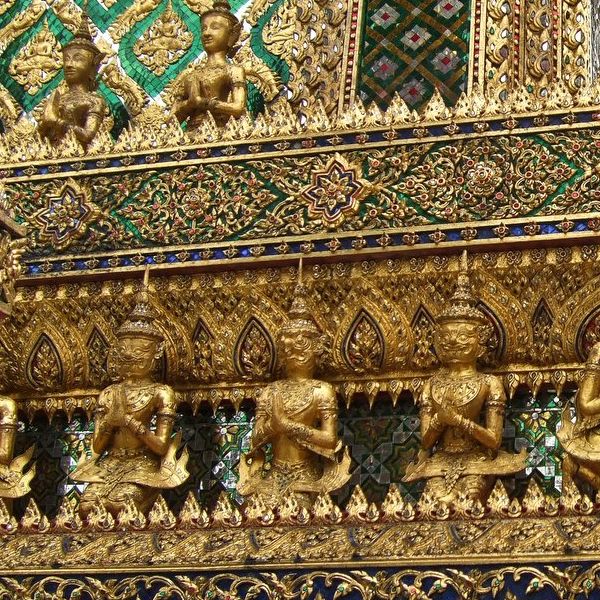
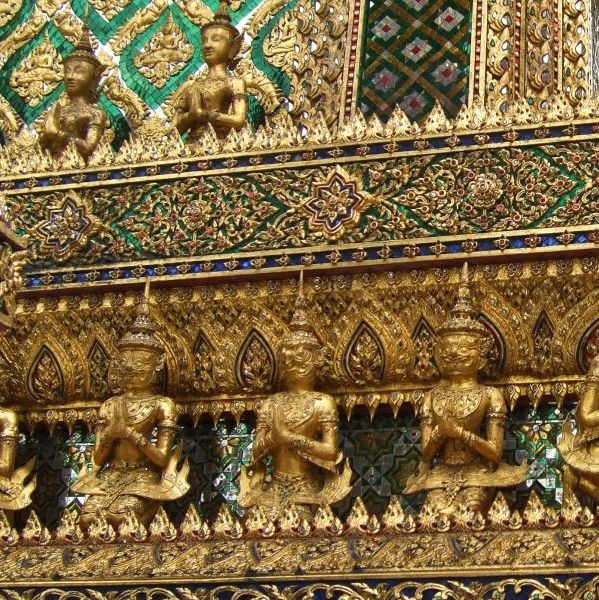
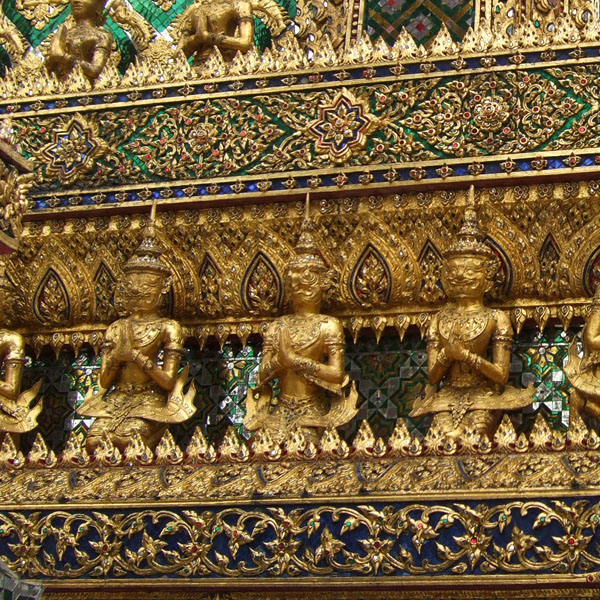
Mae La Refugee Camp Thailand
Introduction
There are 7-9 refugee camps along the Thailand/Myanmar border which at times hold up to 500,000 people. Mae La is the largest of these camps and can hold anywhere from 40,000 to 80,000 individuals. How many people are in these camps at any one time is
very hard to ascertain because the numbers vary with the weather, military actions, and other factors.
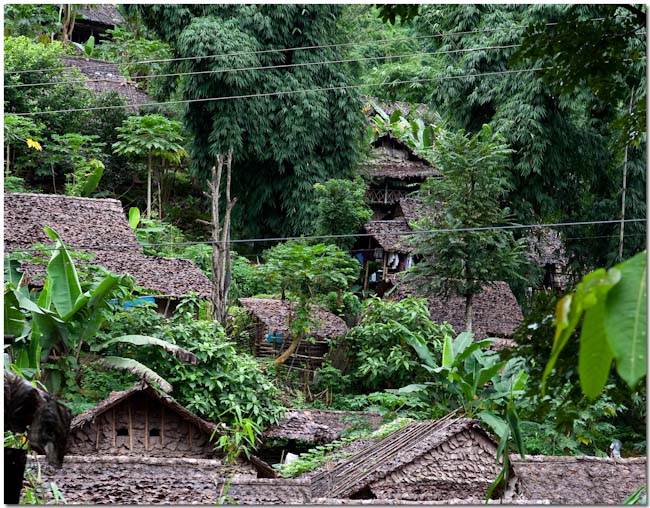
Typical huts in Mae La
The refugees live in homes made of locally grown trees and use leaves for roof shingles. These are put on pilings in the mud and packed as close together as possible. The size of the Mae La camp is startling. As far as the eye can see these meager 'homes'
are packed in side by side, front to back.
As far as the eye can see..
A closer look reveals the homes, often actually touching each other, are crammed in tightly. There is no running water or sewage facilities in these homes and trash is often piled in large mounds awaiting disposal.
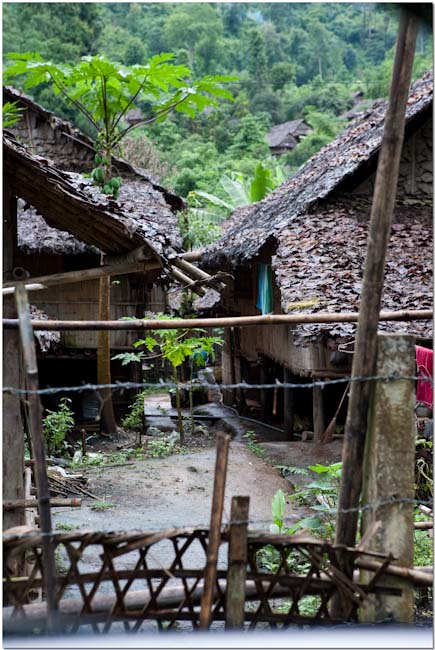
A peek between the homes
You'd think these conditions would be temporary, but they're not. There is no where to go for these people. Most of the time they can't return to Burma (The Myanmar Junta prefers "Myanmar", the Burmese/Karen people prefer "Burma", and both are quite sensitive about which you use) because their homes and villages have been destroyed and nothing is waiting for them other than prosecution and probably death.
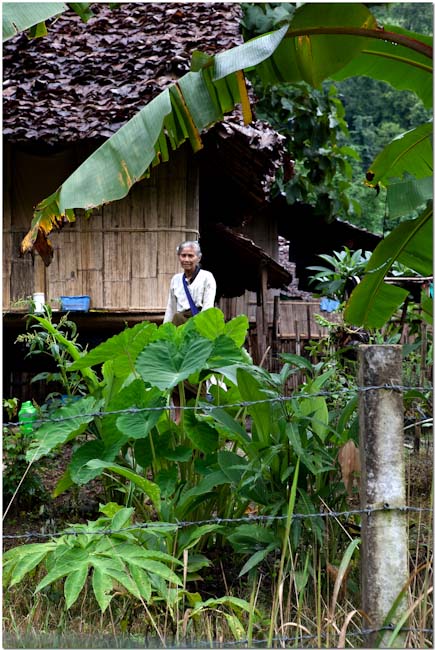
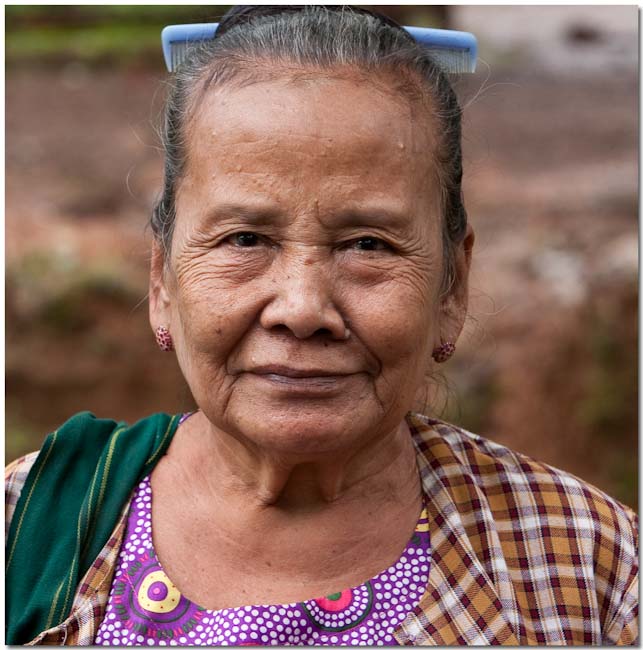
A elderly Karen lady watches from her home
It's not at all unusual to meet a refugee who came to these camps as a child, and 20-30 years later they've known no other home than the different refugee camps in which they've lived. Entire families, broken families, orphans, all types
are here.
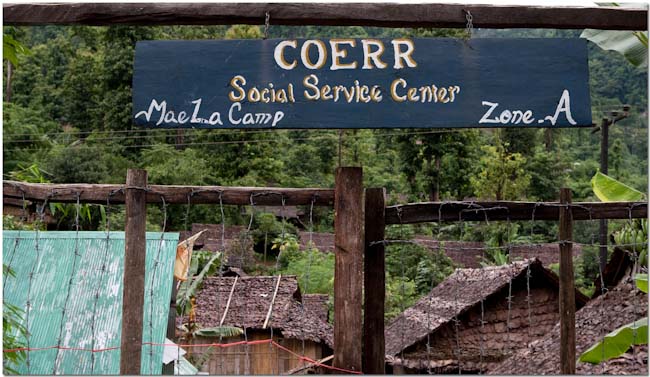
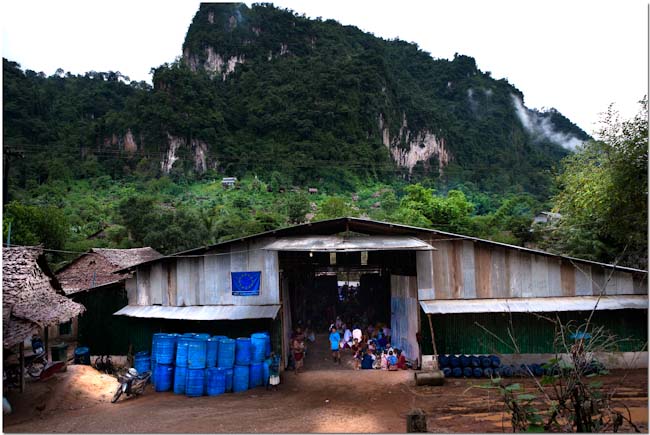
The Coerr Social Service Center, Mae La
There are over 200 NGOs working non-stop in this area doing as much as their limited funding allows. Mae Sot is home to these western workers when they're not living in the actual camps.
Getting There
As you leave Mae Sot and head up Highway 105 which runs along the Thailand/Myanmar border, which follows the river, you'll first encounter cleared land and farms. As the elevation climbs you'll gradually enter a thick forest of rare beauty.
Low clouds appear as a sort of fog among the tops of the trees and small mountains. You'll notice the military checkpoints increase in frequency and fewer cars on the road. 50-60 kilometers from Mae Sot you'll see the camp on the left.
You can drive 80kph for 10 minutes and still not be through the entire camp. It's that large.
What's it Like?
There must be 100s of ways to cover this subject and indeed there are thousands of articles, websites, and images that pop up with a quick Google search. I encourage you to read as many of these as you have time. This is a very sensitive subject for Thailand
because they're often criticized for not doing enough. I wanted to cover this camp from a direction you won't often see, from the perspective of the roadside and what I saw concerning the allegations against Thailand of neglect. I've
spent limited time there, a few weeks all told, so it's possible I've missed some areas of importance. I've also talked to more than a few people who've spent years in this area and are very knowledgeable.
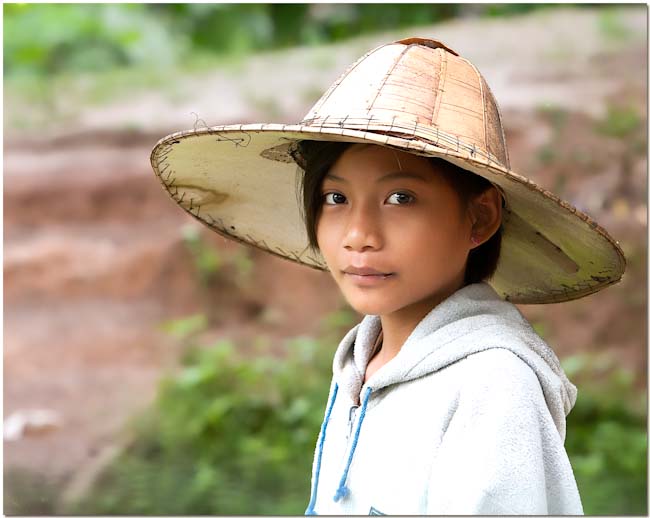
Almost all the residents of this camp are Karen's. Most Karens are Christians. Still, there are many Buddhist Burmese who live in these camps. You'll see the normal spirit houses and shrines along the roadsides.
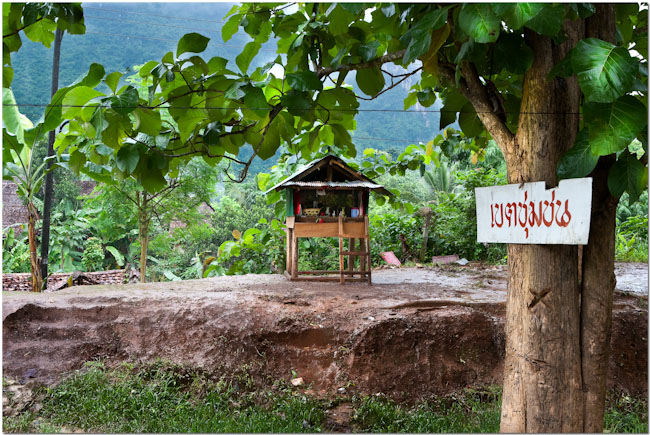
A roadside Buddhist Shrine
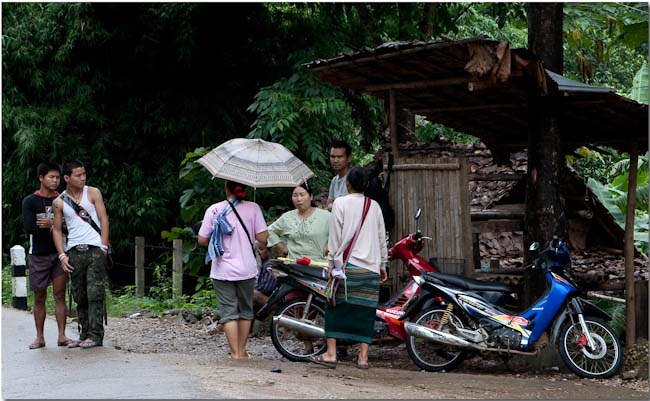
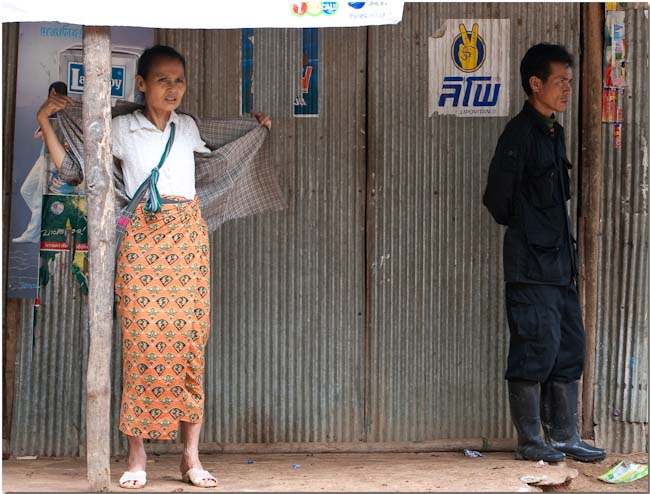
You'll also see small stores and trading centers organized and run by the local Thais in support of the camps.
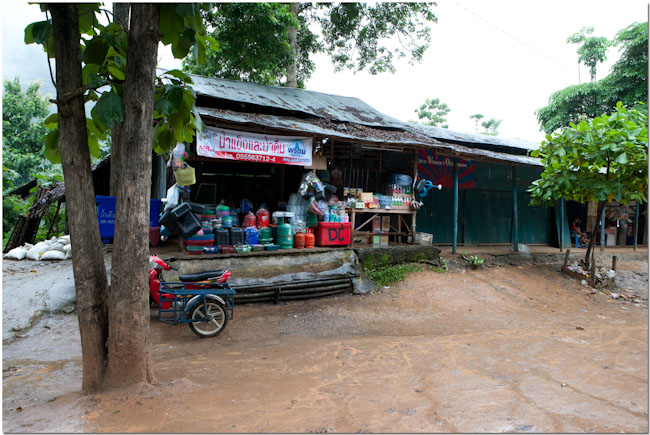
One of the many stores/trading posts
One thing you'll never forget are the distribution centers where food stuffs are passed out by the various NGOs. The exact amounts seem to vary, but the items distributed are mostly the same. A small amount of rice, fish paste, and cooking oil. These
are the absolute minimum essentials to ward off starvation and the menu never changes. Residents of the camp can show up on their day of the week to collect their food, and are always seen waiting in line hours before the distribution centers
open.
A food distribution center ran by ECHO Humanitarian Aid Office
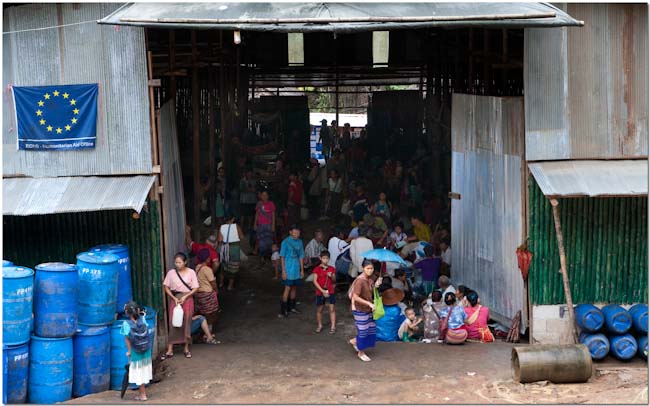
Notice their buckets to carry their rations?
There are numerous distribution centers serving the camps. The problem with these portions is that only the camp residents who are registered are eligible. Because the Thai government only signs up and registers new arrivals once per year, its often the
case where tens of thousands of unregistered mouths need to be fed. This means the small amounts designed to feed the basic bare minimum to whom they're distributed, must share. Less food, less nourishment, more diseases and poorer health.
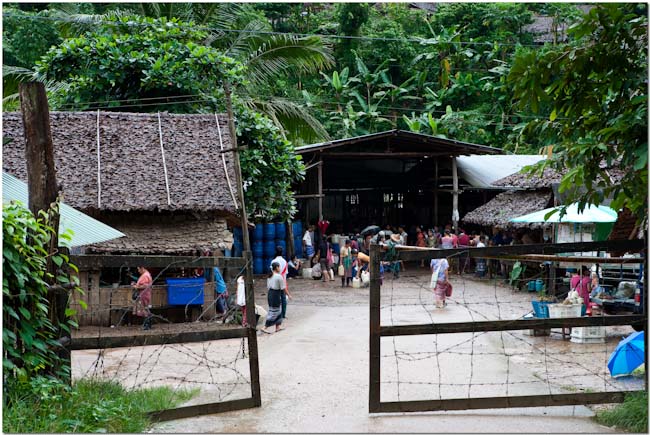
An unmarked distribution center
You're probably wondering how they survive? These people are remarkably self-sufficient in many areas, from the clothes and appliances they fabricate from the local flora, to the food they grow and harvest inside the camps. There isn't a lot
of extra ground because the huts are crammed in so close together, but what areas there are, are used to grow small pockets of vegetables and crops. It's common to raise pigs or goats in pens directly under their huts using the pilings as
fence posts.
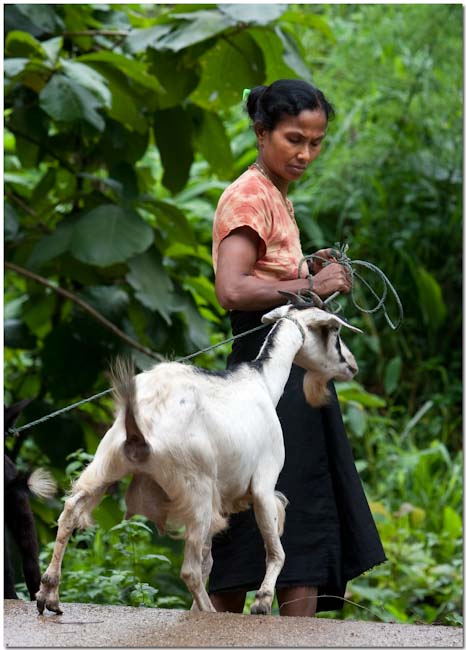
Goats are very popular for their milk and meat
There even appears to be some cooperatives with the local Thais so cows can be raised. All along the roadsides, outside of the wire of the camp, trading of all types take place between the camps residents and the local Thai people. Many of these Thais
also used to be refugees and they've elected to stay in this area and become part of the larger community.
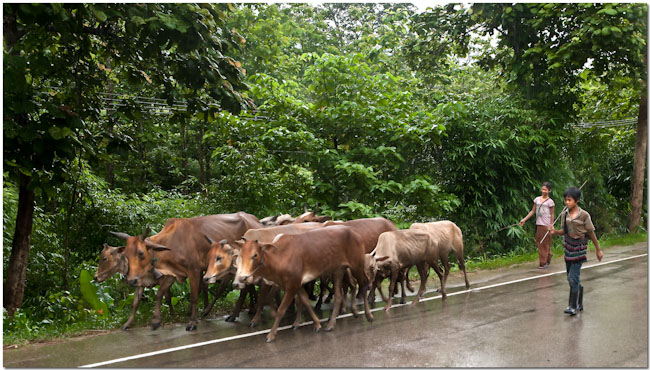
A Karen teenage boy and girl manage cattle
Yes, the "wire" is the marker they're supposed to stay inside, yet the Thai guards and officials stretch these boundaries as far as logistically possible. The Thai people who work in this area, the guards, officials, they all see the many
difficulties and hardships the refugees encounter. No one wants to deny them food, or a chance to grow or trade for food, so the rules are stretched a bit and I'm sure this puts many a soldier at personal risk for discipline.
A sight so common its sad. Sanitary facilities are in very short supply
Overall, the Thais tasked with the administration and care of these camps appear to be very compassionate and sympathetic towards their unfortunate visitors. I've personally seen them using military vehicles to not only take the refugees to the health
clinics and schools, but also to take groups of school children into town where they can set up roadside stands and the like to earn money.
Locals from Mae Sot outside the Mae La camp
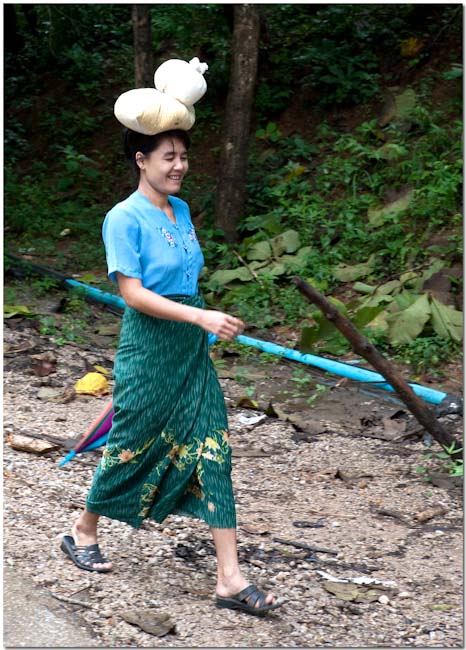
A Karen woman carries in the traditional way
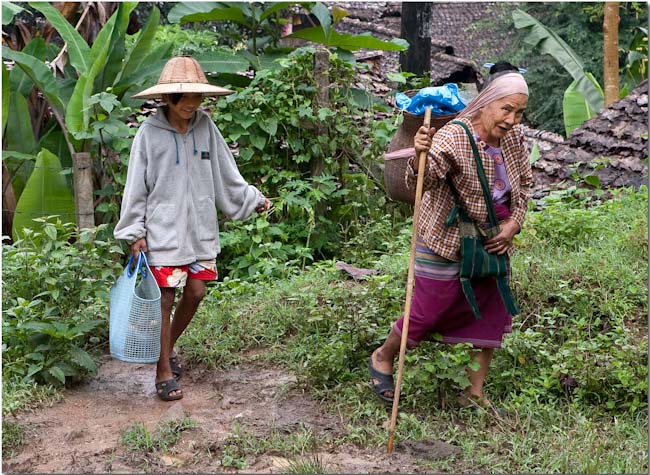
This grandmother with her grand daughter climb a steer hillside
The refugees will also forage in the forest for all kinds of things. Bamboo and material for weaving baskets and making clothes, insects to add to the menu, and if they're lucky small game. There is a great amount of trust between these people and
their Thai guards. I'd imagine both parties live and work next to one another as closely as any neighbors do, and they develop the normal relationships you'd expect. It's not at all unusual to see off-duty Thai military men wheel
their motorsai's into a camp gate to pick up their date for the evening.
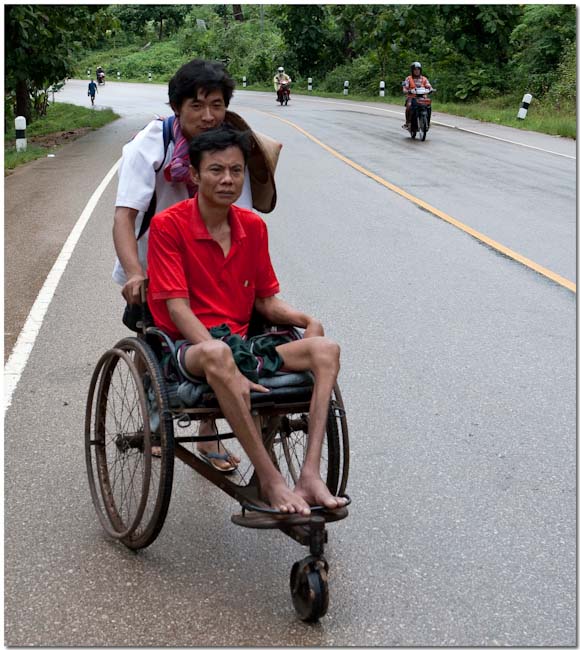
The disabled make up a percentage of any population, Mae La is no different
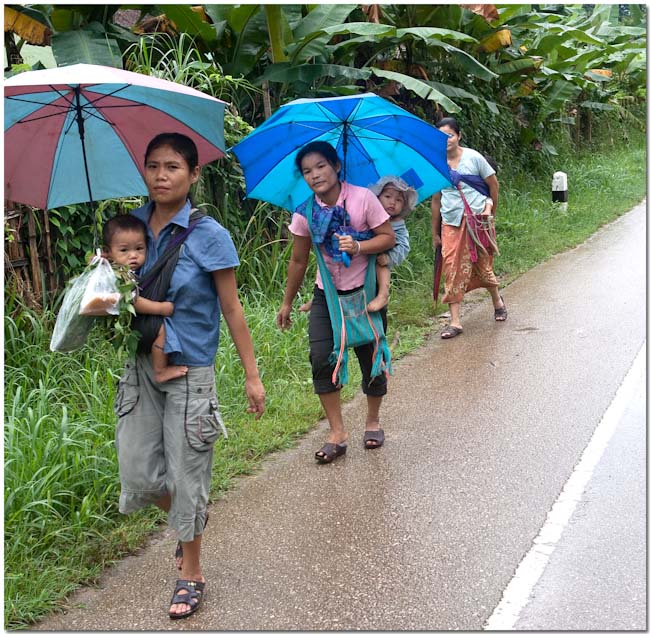
There seems to be a fair number of mothers carrying babies going somewhere? No one tells me anything..
This mother turned the tables on me and stopped to watch me, watch others!
There are many control points, some as far away from the camps as 80-100 km, but still this sort of freedom they're allowed takes an enormous amount of trust. After spending time in this area and observing this trust and the resulting relationships
I think it's very unfair to say the Thais treat these people any less in any way than they would their fellow Thais. I'd guess that in some ways they treat them better because they understand their plight.
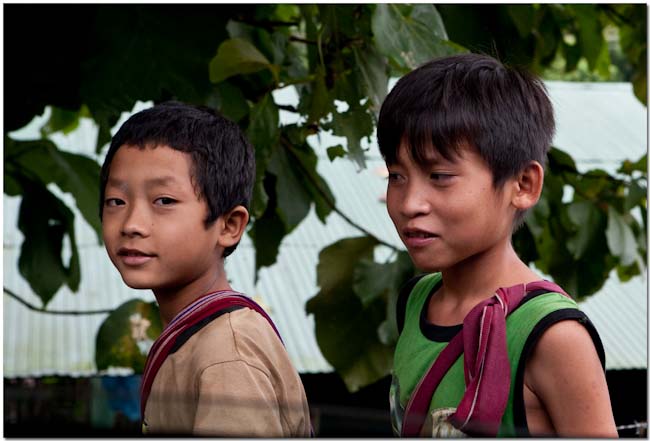
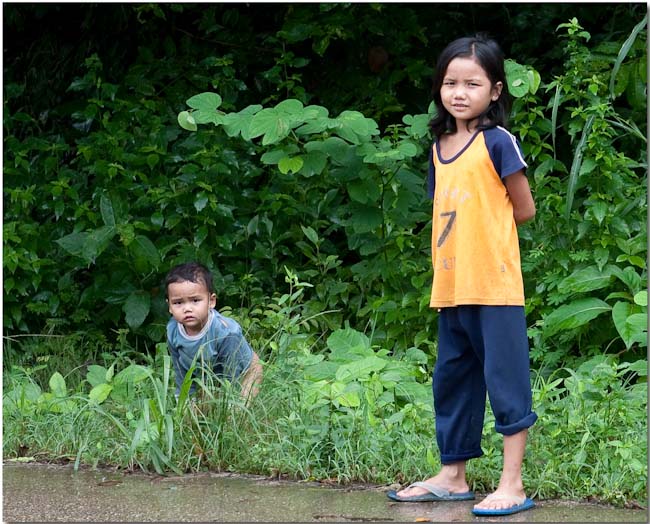
Many young boys and girls
I've caught his attention
Everywhere you look you'll see babies and children. New life is everywhere. These people work hard and live on next to nothing, yet they appear to be happy and enjoy meaningful lives.
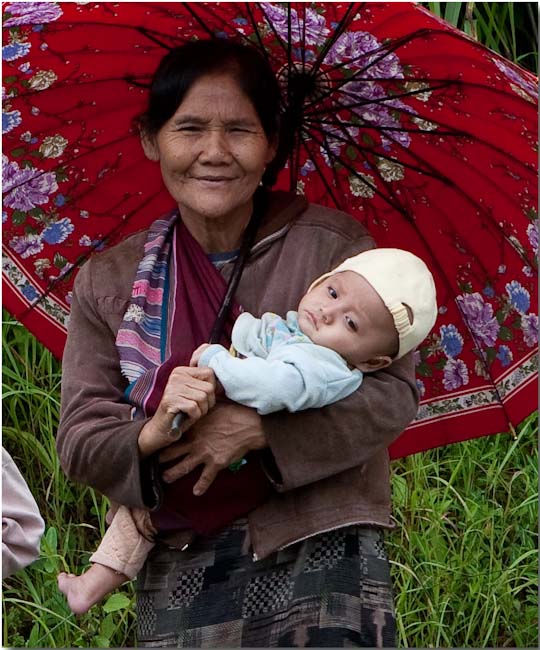
A grandmother and her grandson. She wouldn't tell me where her daughter is.
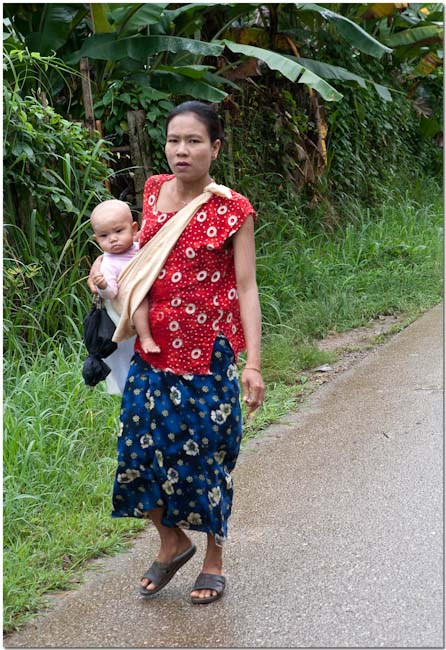
One of the many mothers carrying her baby in the traditional style
Traveling this roadside I witnessed some of the worst in humans, and some of the best. The part of the experience which I enjoyed the most was watching the local Thais, and in "local" I include
the military and other officials working in this area, give and do so much for the refugees.
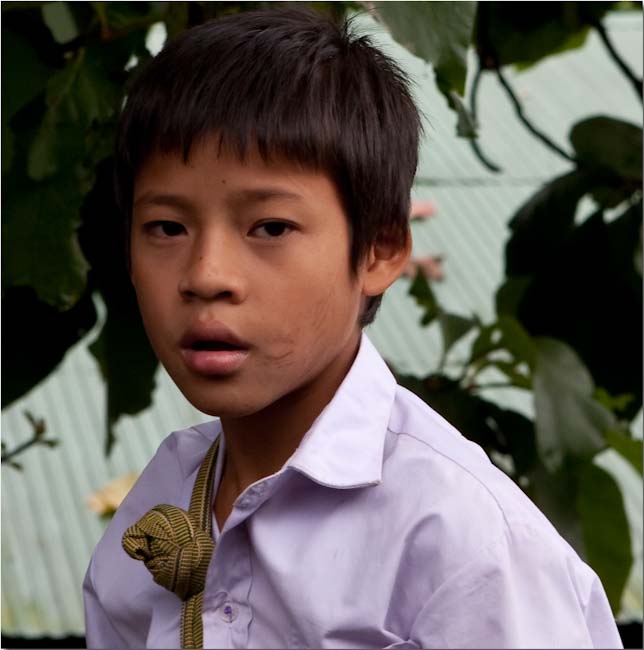
Such inquisitive eyes!
Piercing
One of the very few Karen couples I witnessed together
It's said that America is a land of immigrants. That our citizens are made up of many different nationalities and ethnic groups who came together out of need and together built a great country. I've also heard it said that Thailand is the complete
opposite. I don't believe this. The more Thais I talk to, the more I hear "my grandmother came from Laos" "my father came from Cambodia" "our family came from Malaysia" "my parents are Chinese" "
I was an orphan from Burma..."
Perhaps America and Thailand have more in common than we first thought? The more time I spend outside of Bangkok and the tourist areas, the more I know this is true…
Review, Resize Magic
Tom Twee del is a good friend with significant experience in China and has self-published several interesting volumes of his travels in China complete with many great images and informative narrative. Last year he visited Thailand for the first time and I had a great time showing him around the area. Somehow he found time to put together a like 364 page book of his travels around Thailand!
When Tom agreed to become part of our small select product review team I was both excited and grateful. I hope you enjoy this and future reviews by Tom. For those whose plans include extended travel in Thailand and China I’d recommend contacting
Tom and inquiring into obtaining copies of his books. Tom Tweedel is an Austin, TX based photographer and can be reached at: tomsds@austin.rr.com
Introduction
Resize Magic is a solution for all your resizing needs. It comes in two flavors. A stand alone version and a Photoshop plug-in.
I spent some time checking out the stand alone product and made a few observations:
The user interface (UI) of the stand alone product is a little mixed. It seems to have some features aimed at less sophisticated users and others aimed at power users. Unfortunately it lacks functionality in both.
Overview
The UI (user interface) seems to be set up to do batch processing of a large number of images. First select your source folder and a list of supported images in that folder is displayed. Drag and drop functionality
is strangely absent requiring step by step browsing through folder structures. Finally, you then select your output folder (with quick shortcuts to make the output folder the same).
Select the target images by checking them off on the list. There is room for improvement. A “Select All” would appeal to the power user while getting a thumbnail view of the image you selected last would be useful for people doing smaller
batches. Often you don’t want to do all the images in the folder, only a few. Or maybe you’re doing different images at different resolutions. A visual representation in addition to the file name would be extremely useful.
Select the type of resizing you want. The options are adequate. Longest side, shortest side, and percent. This provides the flexibility to handle a variety of images and orientations in the same batch which is a plus. Also absent is the ability to size
by inches (for prints) and resolution. You can always calculate that (10 Inches @ 300 DPI = 3000 pixels) but for beginners this would be a nice feature.
You can fine tune the output by selecting smoother, normal or sharper. The differences are subtle.
After selecting your settings you click on process and the program will resize all the images in a batch mode. Processing time varies with size and hardware but going from a 2200 pixel image to a 4200 pixel image took mere seconds on a 2.2Ghz Dell Latitude
laptop.
One nag is that you cannot rename the output file. The resized file name is the same as the original. Without a “Do You Want To Overwrite File” warning you can easily make a mistake and overwrite
files of the same name. This leaves you open to overwriting all your original full sized files with the smaller resized files.
Upsizing Quality Comparisons
For this review I worked on a couple of images. The first image had a lot of complexity and detail from the Grand Palace in Bangkok. The other was a typical portrait. I did a comparison of the output quality of Resize Magic vs. two other methods of resizing
images.
One was a standard one step resize using a free image editing program (IrFanview32), the other a stair stepped interpolation in Photoshop using multiple steps.
The image was the complex Grand Palace:

100% crop from the original image – Unresized. Resolution
100% crop from Resize Magic resized from 2700 pixels to 4200 pixels
100% crop from Irfanview32 on step resizing from 2700 pixels to 4200 pixels

100% crop from Stair Step interpolation in Photoshop from 2700 pixels to 4200 pixels
I then repeated the same test with the portrait image:

100% crop from the original image – Unresized
100% crop from Resize Magic resized from 3000 pixels to 4200 pixels
100% crop from Irfanview32 on step resizing from 3000 pixels to 4200 pixels

100% crop from Stair Step interpolation in Photoshop from 3000 pixels to 4200 pixels
Findings:
For most pictures I don’t think your going to see a significant difference in end quality between the different methods. If you are super critical of images you might say that one offers a little more sharpness or contrast or fewer artifacts than
the other. But to the casual observer or anyone who just enjoys the pictures there isn’t going to be a noticeable difference. This is especially true if you are dealing with a print which tends to blend things together a bit. The initial
quality of your capture/conversion is going to have a bigger impact on quality than the specific upsizing method.
Downsizing Quality Comparisons
For downsizing I tested things a bit differently. I downsized using Resize Magic, Irfanview32 and Photoshop with 1 step sharper interpolation.
I used the same images to test the downsizing to both Email and Web resolution settings.
Email Resolution
100% crop of image resized to 1024 with Resize Magic
100% crop of image resized to 1024 with Irfanview
100% crop of image resized to 1024 with Photoshop, sharper interpolation.
Web Resolution

Image resized to 800 with Resize Magic
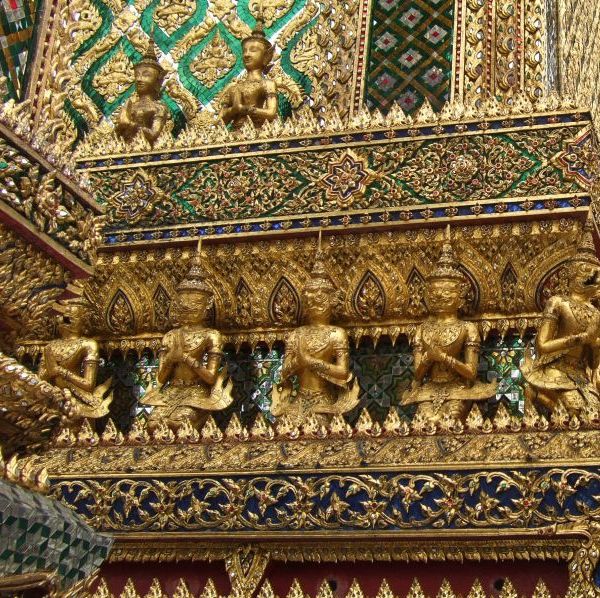
Image resized to 800 with Irfanview
Image resized to 800 with Photoshop, sharper interpolation.
Findings:
Resize magic appeared to have a slight quality edge on the downsizing compared to the other two. But unless your comparing it side by side you probably wouldn’t notice.
Different Settings
What about the different settings? Resize Magic allows you to fine tune your output into smoother, normal or sharper. The differences are subtle. In the picture from the Grand Palace the differences are not noticeable given the complexity of the image.
Using the portraits there was a small bit of difference.
These crops were taken from the 4200 DPI output:

100% crop from 4200 pixel – Normal

100% crop from 4200 pixel – Smoother
100% crop from 4200 pixel – Sharper
Findings:
There were very small differences. I suspect some types of pictures may get optimal benefits from the different methods, but again the difference is not likely to be noticed by anyone but the most critical observers.
Different types of Images
The results from these tests were not as dramatic as one might have expected. I tried to select images that would be “typical.” A detailed photo of an exotic place and a standard portrait. On the Resize Magic website they showcase of couple
of images that can prove problematic; those with finely detailed repeating pattern. I tried one of my images which suffered from the same problem, a subject with a patterned shirt. I resized it to web resolution using Resize Magic and Photoshop.
800 pixel image – Normal from Resize Magic
800 pixel image – From Photoshop
Conclusion
This is one area where Resize Magic did a better job without question or reservation. The moiré pattern on the shirt is common problem faced with digital images and Resize Magic makes it a thing of the past.
So in summary Resize Magic seems to be a nice tool to have in your arsenal. Considering the stand alone version is free and handles batch processing, it’s a handy thing to have around. For upsizing photos most mortals take you can use it and be
confident that your getting as good or better results than Photoshop. For downsizing it can handle things others can’t.
Steve's Comments:
Introduction:
When I learned we had a chance to review a resizing tool I immediately knew this product was ideal for a great deal of our readership. And when I learned the stand-alone version was free I knew it was perfect!
Most every photo editor I know of includes the ability to resize images. So why would a software developer go to all the work and trouble to develop a stand-alone resizing tool? There are a few reasons, one being image quality and the other convenience.
If you can improve image quality and make the tool easier to use at the same time you'll have a winner. Resize Magic is very close to being both.
Discussion:
There is more to resizing images than you'd initially consider. Image professionals have long developed their own Photoshop Actions and techniques using their own 'secret recipe' and blend of functions so they could achieve a small edge
in image quality or processing speed for a specific type of resizing.
Many stand-alone products have emerged over the years and there are two I consider a necessity for my personal workflow. Fred Miranda's excellent Photoshop Action for resizing Canon 1ds Mark
II images (he makes them for specific camera models), and Genuine Fractals from OneonOne Software and has long been the standard to compare against.
Genuine Fractals professional edition is now $299, and Fred Miranda's actions $19.90. ReSize Magic's stand-alone version is free! Their Photoshop Plug-in is $25. These are all in USD's.
Technical:
When you resize in a standard image editor you do so in one step. For instance, you take the image from 5000 pixels to 800 pixels suitable for an email image, in one heavy handed swipe. Image professionals learned a long time ago to "stair step"
in 5-10% increments and to use different methods of interpolation for the best results. Fred Miranda's actions, Resize Magic, and Genuine Fractals all use their "secret recipe" towards the same result.
Installation and Use:
The installation of the stand-alone version couldn't be more straightforward and easy. This is why I was surprised that the Photoshop Plug-in, the version you pay for, didn't have it's own installer and instead had to be manually placed
in the appropriate Adobe Photoshop folders. I hope future plug-in products will include an installer.
Over the course of 5-7 weeks I'd back to back test images from Fred Miranda's action, Photoshop, and Resize Magic. Frankly I found the image quality and even the convenience of Fred Miranda's action and Resize Magic pretty much equal. This
is significant because FM's action has long been my most used resizing tool. Both held a very slight but real edge in image quality over Photoshop IF used in a one step process. I have some of my own custom actions which use Photoshop that
actually do better.
Genuine Fractals is the standard and I'm going to hold off on comment except to say I hope to review this product in the near future and it should come as no surprise that not only does it have image quality advantages, but the functional advantages
that comes with a mature and respected product.
Note: I forwarded the link to the stand-alone version of Resize Magic to several readers I knew to be having a hard time understanding how to resize images. All of them soon emailed me back very happy with the ease and quality of this product.
Summary:
Tom already mentioned the areas I'd like to see improved and the areas we enjoyed. Really, this is a fine product. More, I'd like to see those of you without such a tool using this one! My mailbox is often full from images readers have sent
in for Readers Submissions and the like which are 20-30x larger than they need to be. With Resize Magic you can easily and quickly generate perfectly sized images for email, prints, web publishing, or most any use you'll encounter.
For those of you who already use Adobe's Photoshop CS3 and CS4, you'll find their plug-in very useful. Unfortunately Resize Magic only supports the x32 versions and doesn't yet support x64 versions. I asked them about this and at the moment
they're geared up to support Mac's and Mac's aren't yet supported by a x64 version of Photoshop. Perhaps in the near future. Linux is also supported!
Go to this link and download the stand-alone version of Resize Magic and you'll be generating resized images in under five minutes. It's that easy! I think you'll really
enjoy this great tool.
Photography News of Interest
At the very high end of the DSLR market you'll find Leica's new S2 and the bevy of lenses created just for this awesome DSLR. 37.5mp's, a CCD vs. a CMOS sensor, a very large
(by DSLR standards) 45x30mm sensor size, and a litany of features never before offered on a DSLR of this caliber. Do you have an extra $30,000 USD's to get started? If you do, you can learn more about the S2 here.
Most everyone is familiar with the famous celebrity portrait photographer Annie Leibovitz? She's captured such greats as John Lennon and Yoko Ono (nude),
Demi Moore (pregnant and nude), and a long list of other celebrities. Her portfolio is valued at over 50 million USD's. And she's about to lose it all along with two nice homes. Learn more about her troubles here.
I've written a review and recommend the Fuji Finepix F200EXR as an excellent modern follow up to the iconic Fuji Finepix F30/F31 compact point and shoot. Many readers have purchased
one as they did the F30/F31. I love mine and carry it everywhere. I've also linked you to many reviews. Well, time marches on and in the point and shoot world no camera stays on top for very long and the next few pieces of news will illustrate
this well. A reader sent in this article about camera companies FINALLY doing things to improve image quality and they use the Fuji Finepix F200EXR and the new Sony DSC-WX1 in a comparison
to stress this point. Both are fine cameras, but this reviewer thinks the new Sony with six month newer technology comes out ahead. Perhaps, but he was too vague IMO. Read the article here.
Canon announces the new Powershot G11 to replace the G10 released just last year. Canon like the other manufacturers were in a megapixel race to win over consumers and I've warned
this column's readers about this many times. It's not about megapixels, but more about image quality. With the very limited size of a point and shoot sensor you just cannot cram more pixels on to the sensor without sacrificing image
quality. Canon is listening! The G10 had 14.7mp's, yet the new G11 will only have 10mp's and these 10mp's will be on an even larger sensor which promises much better image quality! HOORAH!!! The other features and specs look first
rate as well. The G11 is not a pocket camera, yet it's not as big as the smallest DSLR either. It's a "tweener" camera and its better than ever before. You can read more about it here.
Canon also announces they're bringing back the successor to the very popular almost cult-like S80, the new S90! The S90 will
have the exact same sensor as the G11 above, and a very fast F2.0 lens which lets in TWICE AS MUCH LIGHT as the G11's F2.8 lens.. and it does all this with truly pocketable size very
high quality metal body. And it has two special "function" rings which you can assign any function for very easy access. Folks, this is the pocket camera to beat. There are some very nice pocket size point and shoot cameras out there,
but this one hands down as the best technical features and promise. I can't wait to get my hands on one and review it. The image quality promises to be extremely good for a P&S and its lowlight and high dynamic capability top in its class
as well. While you wait for my review you can read Digital Photography's hands on review here.
Canon also announces the SD 980 IS, the SD 940 IS, the SX20 IS Superzoom,
Selphy pint size printer ES40, new Pixma Printer Series and more. You can read about all these new products here in Canon's Press Room.
I usually don't announce every point and shoot that comes out.. only the significant one. This week there are many significant models being announced and the Ricoh CX2 is no exception!
A 28-300mm (35mm equiv), large 3" high rez 920k LCD, 5fps, and a super tough body. This CX2 promises very good image quality. Read about it here.
Readers Submissions
Hi Steve, how are you going.
When I was in Brisbane in June I bought a Nikon coolpix VR S210 point & shoot camera for when I want to take some snaps of every day life as I go to work or just going out with friends. It's an ok camera but a little slow in taking photos in portrait mode at nighttime, though the shots are nice and clear. Here are some photos; nighttime portrait shot, macro and also one of daytime.
Thank you.
Charles

Charles –
Thanks for the images! I’m sure there are readers out there looking at this camera and will be very interested to see some sample images. I enjoyed them!
Steve
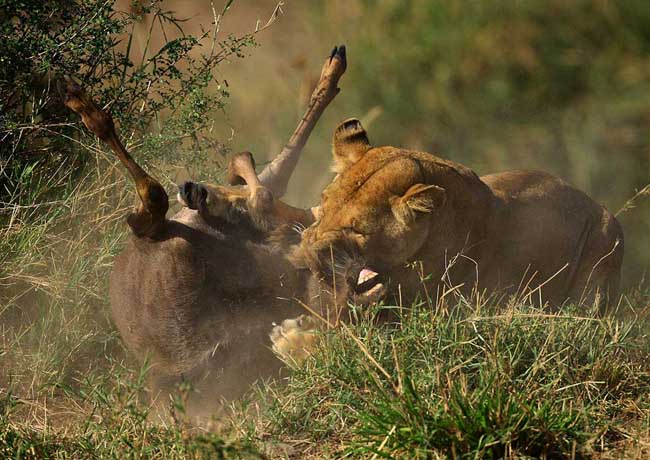
Dr. Carl Palazzolo has contributed a great feature set on his Antarctica Expedition and has just sent in two great
images from his most recent African Photo Safari! I encourage you to re-read his Antarctica feature, it was really great. Can you believe that he's offered to write a special edition feature on his recent trip to Tanzania? This will make
for a very interesting comparison to KVW's first expedition to Tanzania using limited equipment. Dr. Palazzolo has been there several times before and uses great (and
expensive) equipment. You'll be able to see the differences that both experience and equipment make. And get this, Rob from www.1ds.com and his wife have just returned from his own African Photo Safari and
is putting together a special from another angle, what to bring, all the logistics, and some great images. Rob and his wife Sao have both experience and great equipment and I've seen a few samples and they really rock! Can't wait!!!
Hi,
A leopard eating a Grant's gazzelle. It was taken in the Serengeti.
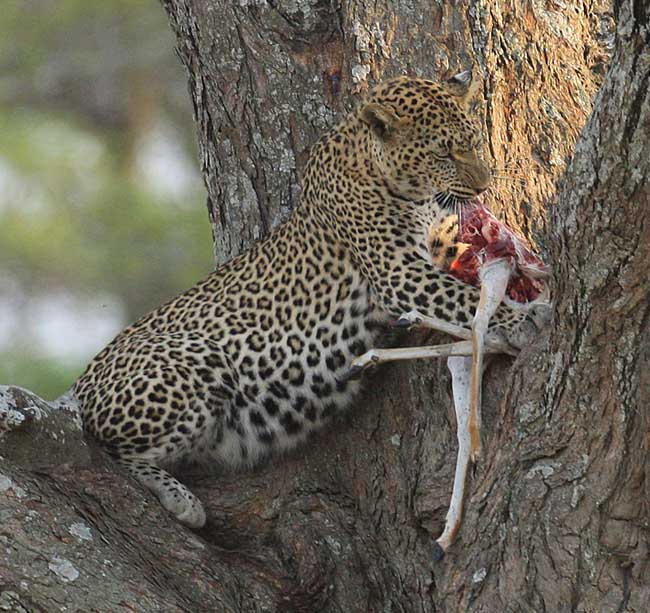
I took me 5 trips to Africa to see this. I have the whole sequence from initial stalk to final kill. Any news on the elephant trip?
I think it was taken with the 1Ds using the 500 mm, but I would have to confirm that.
CP
Carl –
Thank you for the sneak peek. These are really awesome captures! I can't wait to see your complete Tanzania special. Tanzania has been a popular African Safari destination lately and we've ran several specials, and the great thing about this
is that they're all unique from their own perspectives and the captures truly excellent. All these specials will give the readers a great amount of information to help plan their own photo safari.
Thank you!
Steve
I suspect the readers submissions will be a highly anticipated section of this column and I encourage anyone with photographs and travel accounts they'd like to share to please send them to me at: QandA@Bkkimages.com
Readers Questions
Hi Steve, how are you going.
I was just reading your latest column and saw a picture of I think is your computer setup. I saw that you have a small protective cover on the side of the monitor.
Is this to stop ambient light from the side and top of the monitor? Is this something I should look at doing also do help give me more accurate light and color?
Thank you.
Charles
Hello Charles –
The computer setup you saw belonged to the writer of the review, Craig. And yes, this is a ambient light shield so no stray light hits the display face and affects the display. Most professional monitors have these.
I wouldn’t worry about adding a shade UNTIL you have a decent quality monitor and it’s properly calibrated.. and I’m not sure I’d worry about adding one if the monitor didn’t come with one. Just be sure to locate your
monitor in a location out of direct light and you’ll be fine.
Steve
Please submit your questions to QandA@Bkkimages.com All questions will be answered and most will show up in the weekly column.
A Snapshot of Bangkok Images Week in Review
I continue to be tied down to my home during a major renovation and haven't been able to get out and about much. However, I'm trying to keep busy writing great reviews. I've also built a new Intel i7 photo workstation which I'll do
a feature on after I've ran it for long enough to thoroughly test it.. and this week I hope to start work custom building my own file server with SIXTEEN TERABYTES of storage, FTP server, web host server, and top level security. I haven't
yet decided if I'll be using the inexpensive but limited Windows Home Server software, or the more capable and very expensive Windows Server 2008. More on this later.
Infocus Blog
Every Little Bit Helps!
As most of you know by now my condominium is undergoing a major renovation. We're not three weeks into the renovation and there is at least two more weeks before we're finished. We're doing everything from electrical, to plumbing, to baths,
kitchens, ceilings, floors, walls, lighting, and more. When we started this renovation I challenged myself to include every little improvement I could think of to help improve my imaging. There are four things I'd like to share with you which
I think will make a difference
Electrical. Equipment malfunctions are a reality, and inconsistent power delivery is your worst culprit. To combat this I have several high-end large capacity Uninterruptable Power
Supplies feeding all of my workstations, networks, etc. The problem I've been having with the UPS's is that they require a solid grounding to work properly.
As part of the renovations my contractor has completely rewired my home to include all new wiring, new 3 prong receptacles, new switches, new breakers, and that a proper ground system was installed so the UPS's could properly do their job.
Paint. Ideally my walls and ceilings would be a 18% grey color so my eyes could properly see the colors on my imaging monitors. My wife of course would never allow this. The next best
thing is a uniform coverage of a slightly off-white color. This is what we've done.
Lighting. Lighting is a very big thing for imaging. Your light temperatures should never be mixed and this includes light from outside. No artificial light should be directed at your
monitors. A good separation is key.
We've ordered extra thick vertical blinds, reflective on the outside, the same color as the walls and ceiling on the inside. With these I can cut off the outside light when I'm working on my workstation. Our contractor has also installed recessed
light fixtures in our ceilings, all of the same incandescent temperature and type, and all with dimmers so a constant level of illumination is always possible.
Workstation Table Top. The table top? You think I'm kidding I'm sure. I'm not. My workstation table was a good quality, but after nearly ten years and a zillion glasses
of ice water with condensation dripping down into the wood, the natural wood surface was in terrible condition. More, it originally came with a shiny lacquer.
Our cabinetmaker was asked to replace the table top. At the time I wasn't sure it would make for much of a difference, but I requested he try to find a 18% grey Formica to inset into the top of the table. I figured the 18% grey would be neutral to
my eyes as both imaging monitors sit directly on the table top, and the Formica would be water resistant and last a great deal longer than natural wood. The cabinetmaker probably thought I was crazy but he did as requested and had to search
around for almost a week to find the right color. He said he finally found a piece at a local studio leftover from their own renovation which they had special ordered and waited months to arrive. I feel a bit fortunate for not having to wait.
When the table was finished I was very surprised that it turned out looking so nice! I expected a compromise with the looks, but both my wife and I very much like the new look, especially since at the same time he refinished the rest of the table.
But what really made the difference was the color. Once my monitors were back on the table, the new lighting turned on, and I started to work I couldn't believe the difference. Of course I can only work at night after the workers go home for the
evening, and not everything is one, so in the daytime I cover everything.
I'll get back to you on the total effect of these relatively inexpensive but worthwhile improvements once the renovations are complete and I've had the time to thoroughly test drive everything.
Until next time..
